Description
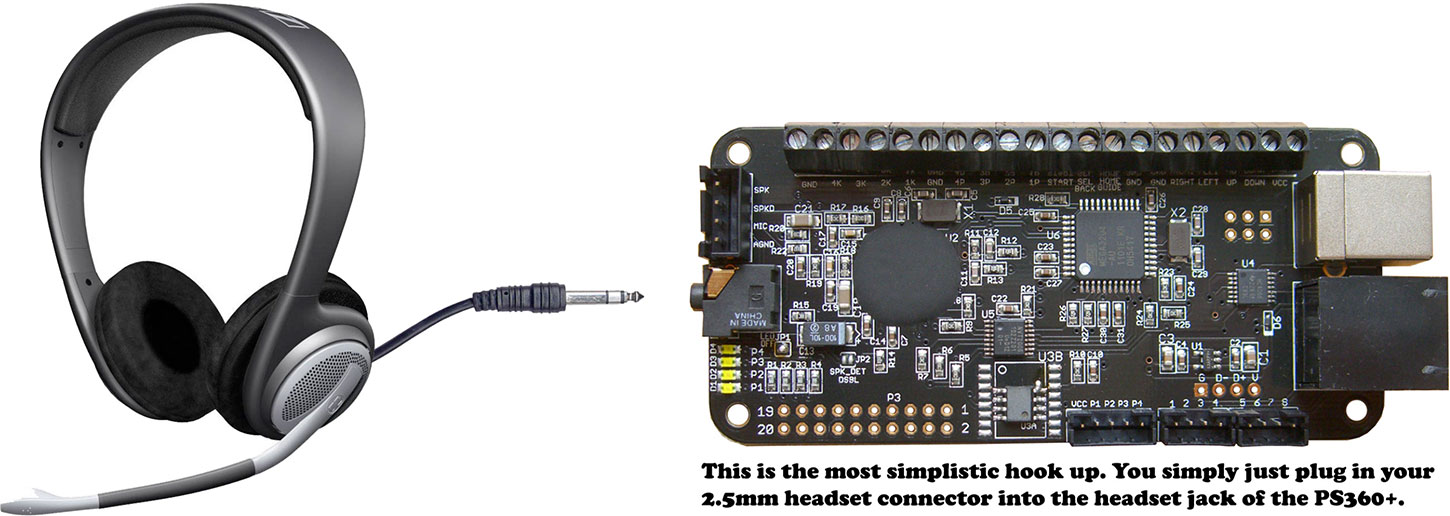
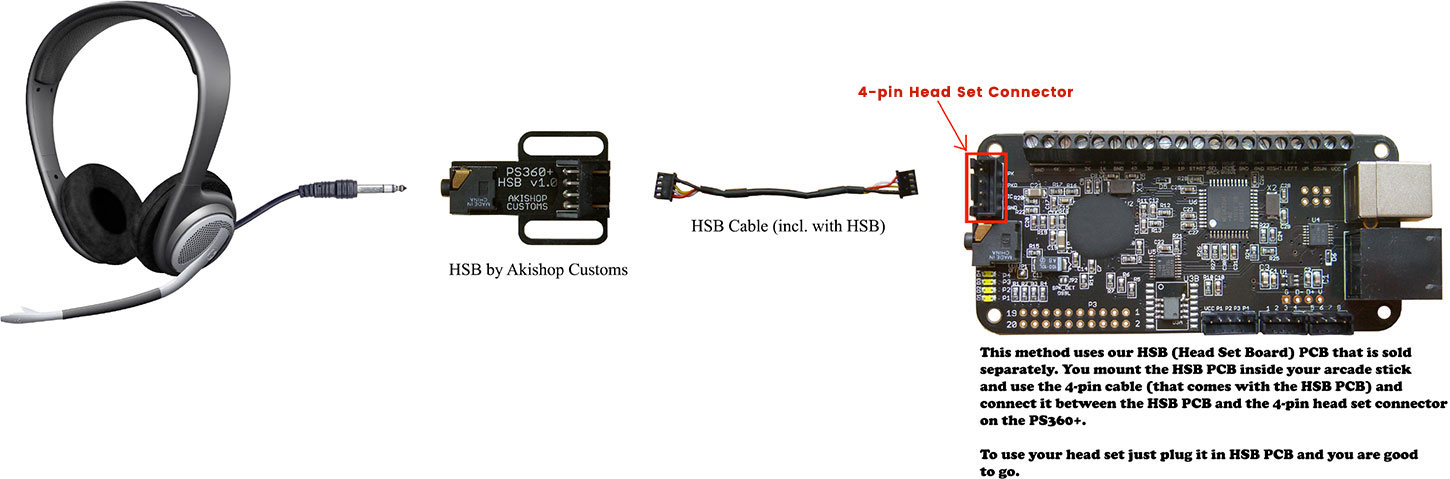
The PS360+ is a multi-console controller board that supports Xbox 360 / PS4 (8min) / PS3 / PSx / Xbox / Dreamcast / Saturn / Wii U/Switch (Pokken) / NES / SNES and PC/Mac with player LEDs for Playstation 3, Xbox 360, Dreamcast and backward compatibility for PSx games on the older version of PS3. It comes equipped with a bootloader to allow firmware updates over USB for bug fixes and future systems that may be implemented. It also supports headset usage on the Xbox 360 through a standard 2.5mm plug. The audio positions are also broken out through a 2.5mm JST shrouded header for usage with a mountable daughterboard. There is also a 20 position 2x10 row that allows for easy solder access to the input signals.
Player LEDs
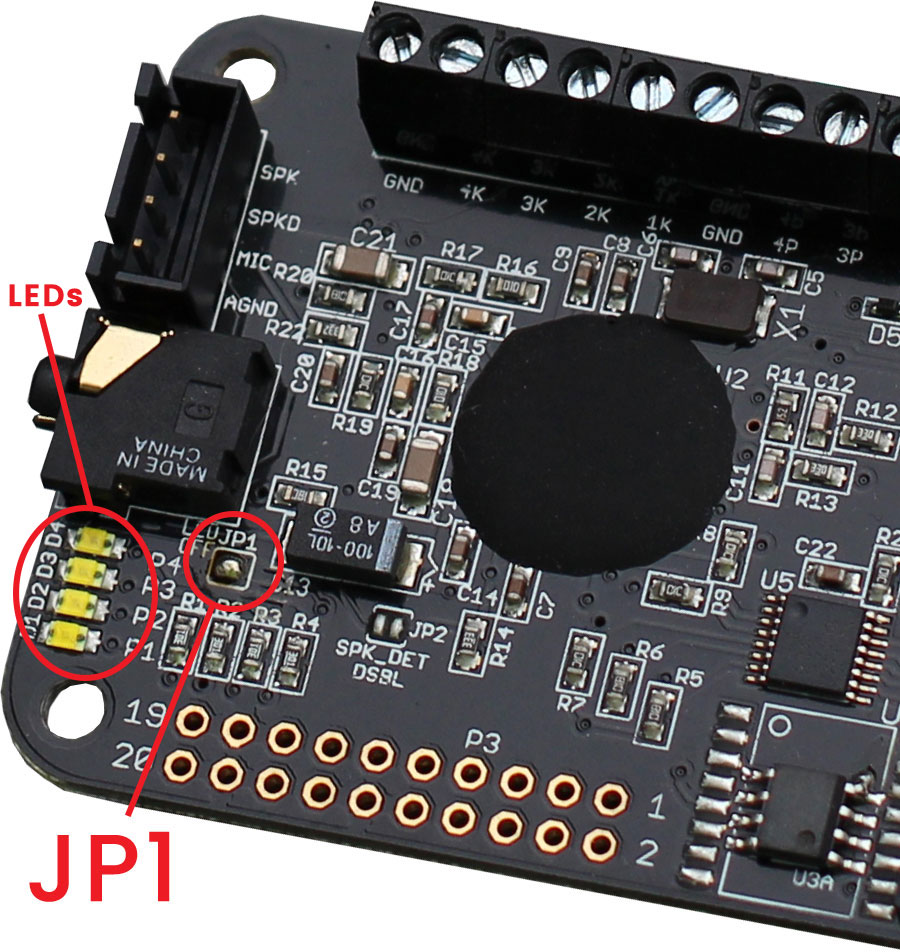
There are on board player LEDs for feedback/indication when external LEDs are not applicable. The LEDs will indicate player number 1-4 (1-7 for Playstation 3), and also cycle in a distinct fashion when in the bootloader mode.
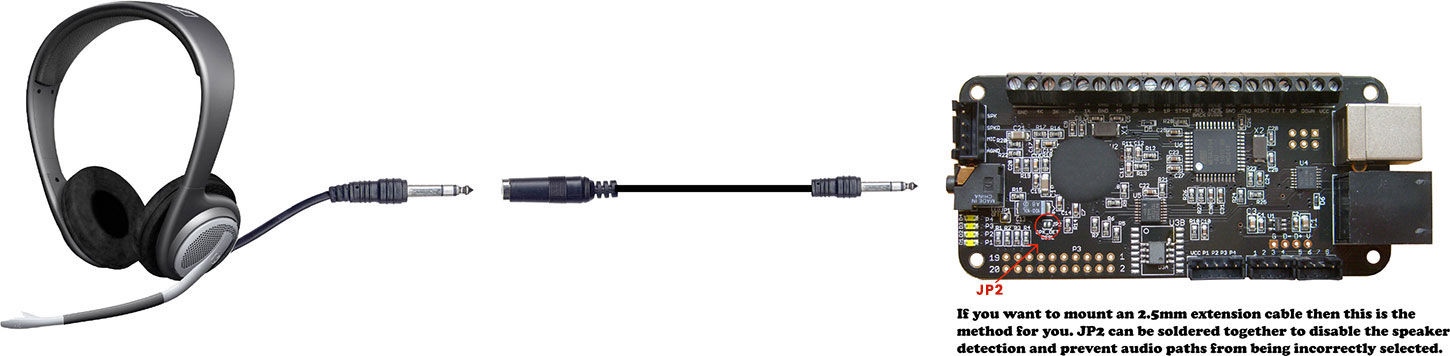
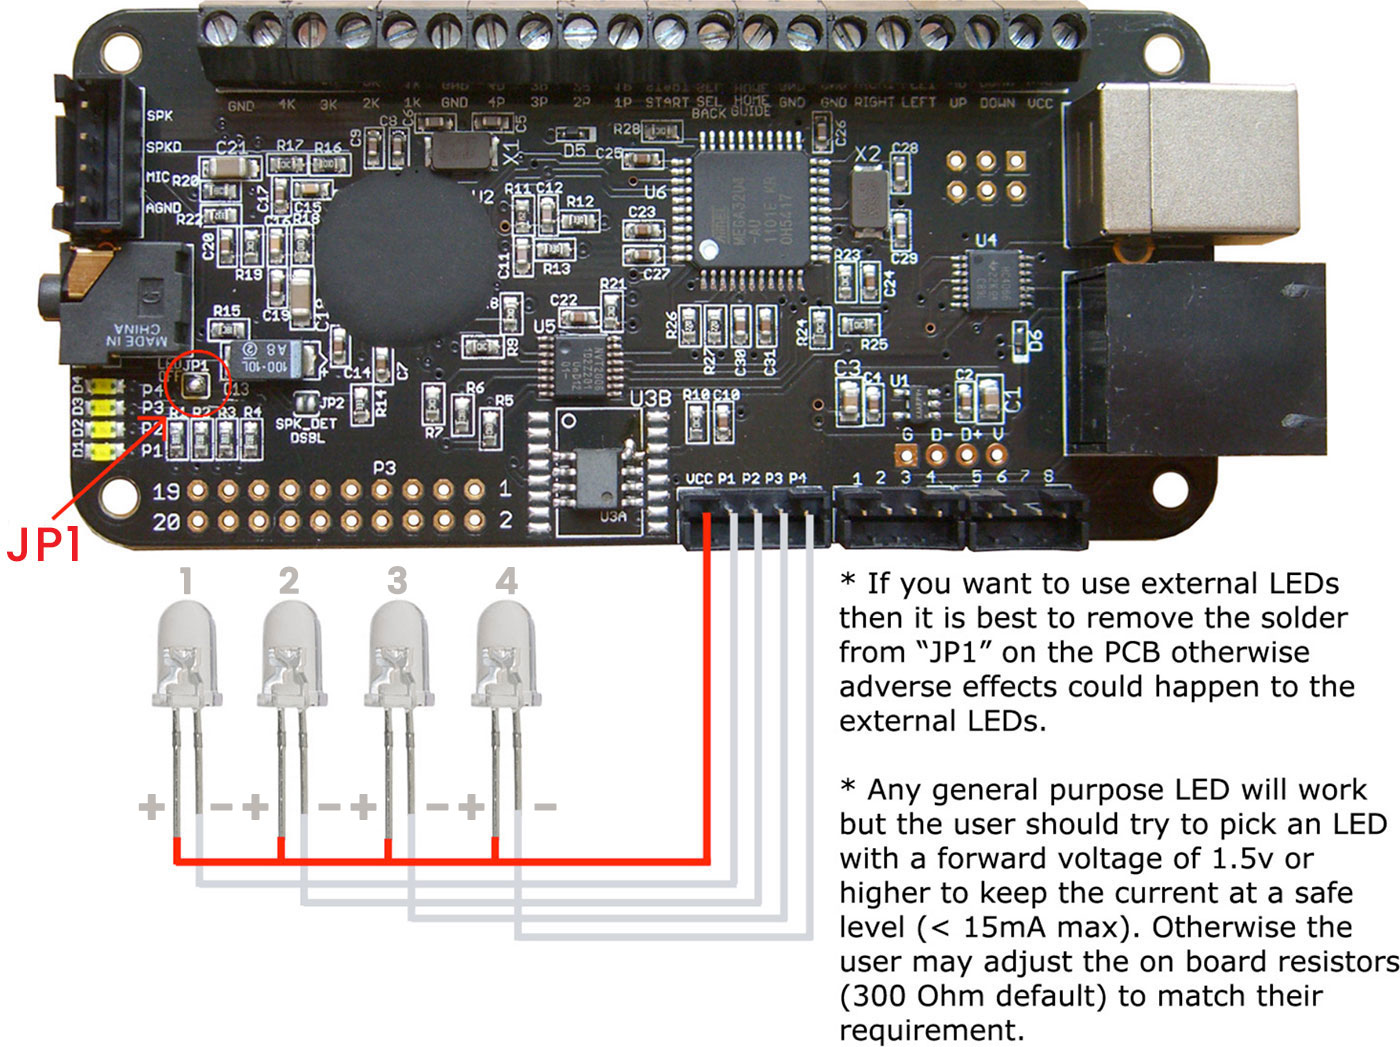
The solder jumper JP1, labeled "LED OFF" is normally closed to allow the on- board LEDs to function. Remove the solder to disable the on-board LEDs if they are not needed. You must disable the on-board LEDs through this method if external LEDs are to be used. Not removing the solder bridge may have adverse effects on the external LED functionality.
The external LED signals can be accessed via the 5 pin 2.0mm JST shrouded header. The player LEDs are designed for common anode operation, with on-board inline resistors eliminating the need to provide them. R1, R2, R3, and R4 are 300Ohm inline resistors that are connected to the cathode of the selected LEDs (on board or external).
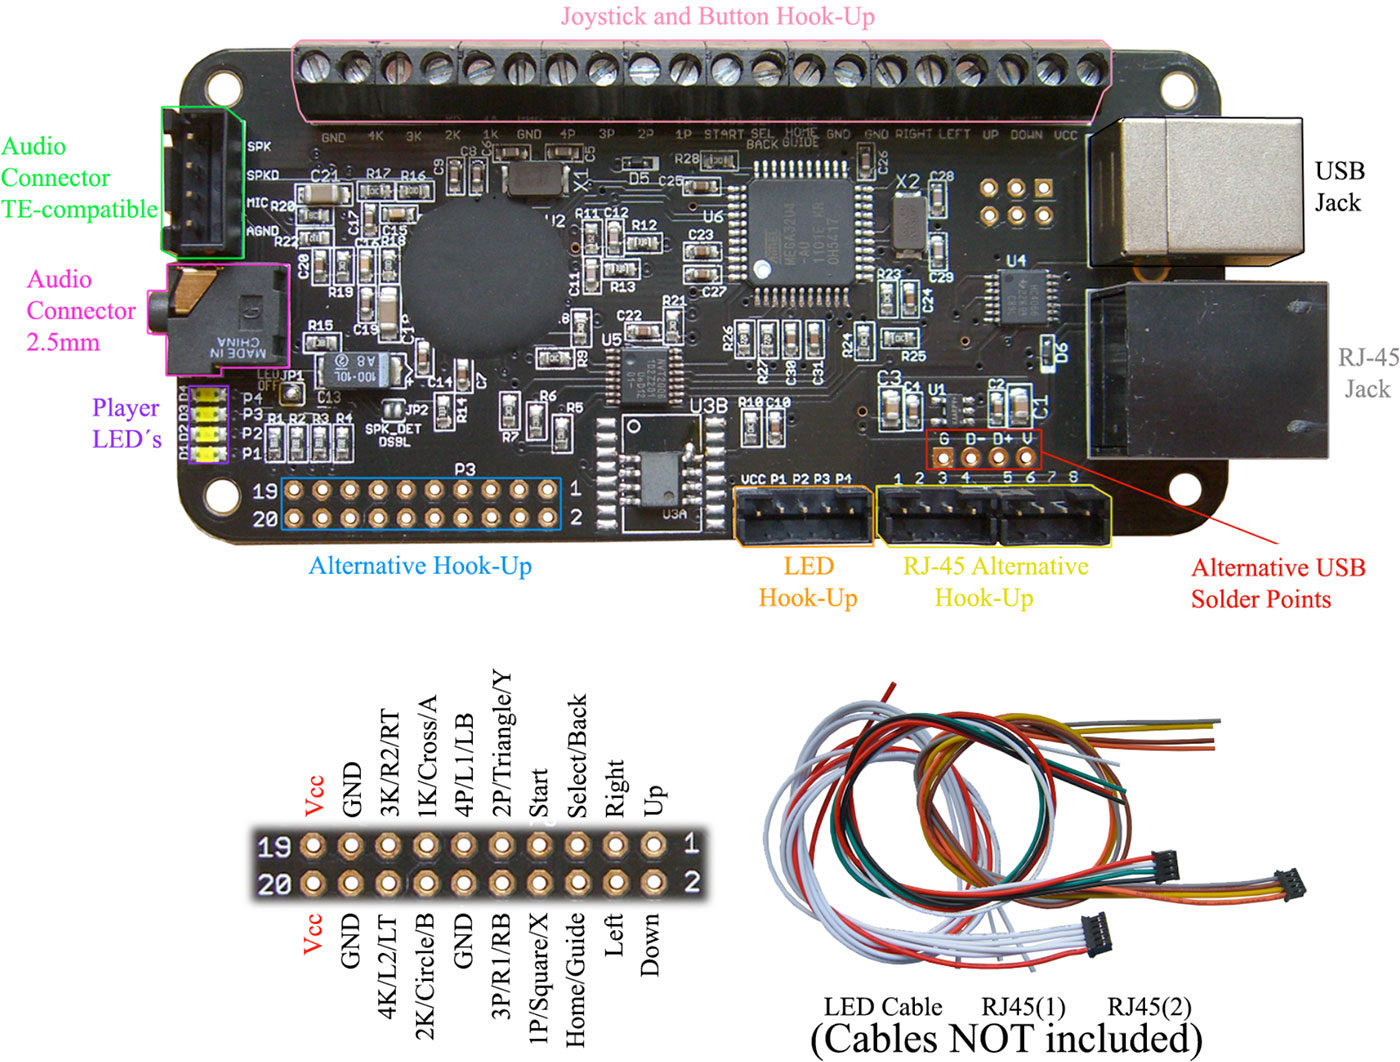
Controller Pinout
The RJ45 interface, due to it's non-standard nature, is protected with a schottky diode on the VCC line. Be aware there will be a nominal 200mV drop in voltage if using this interface. The RJ45 pin numbering is for a tab down orientation of the RJ45 cable. The interface is also brought out with two 2.0mm shrouded JST headers, for use with the PS360+ cable harnesses (cables harnesses not included).
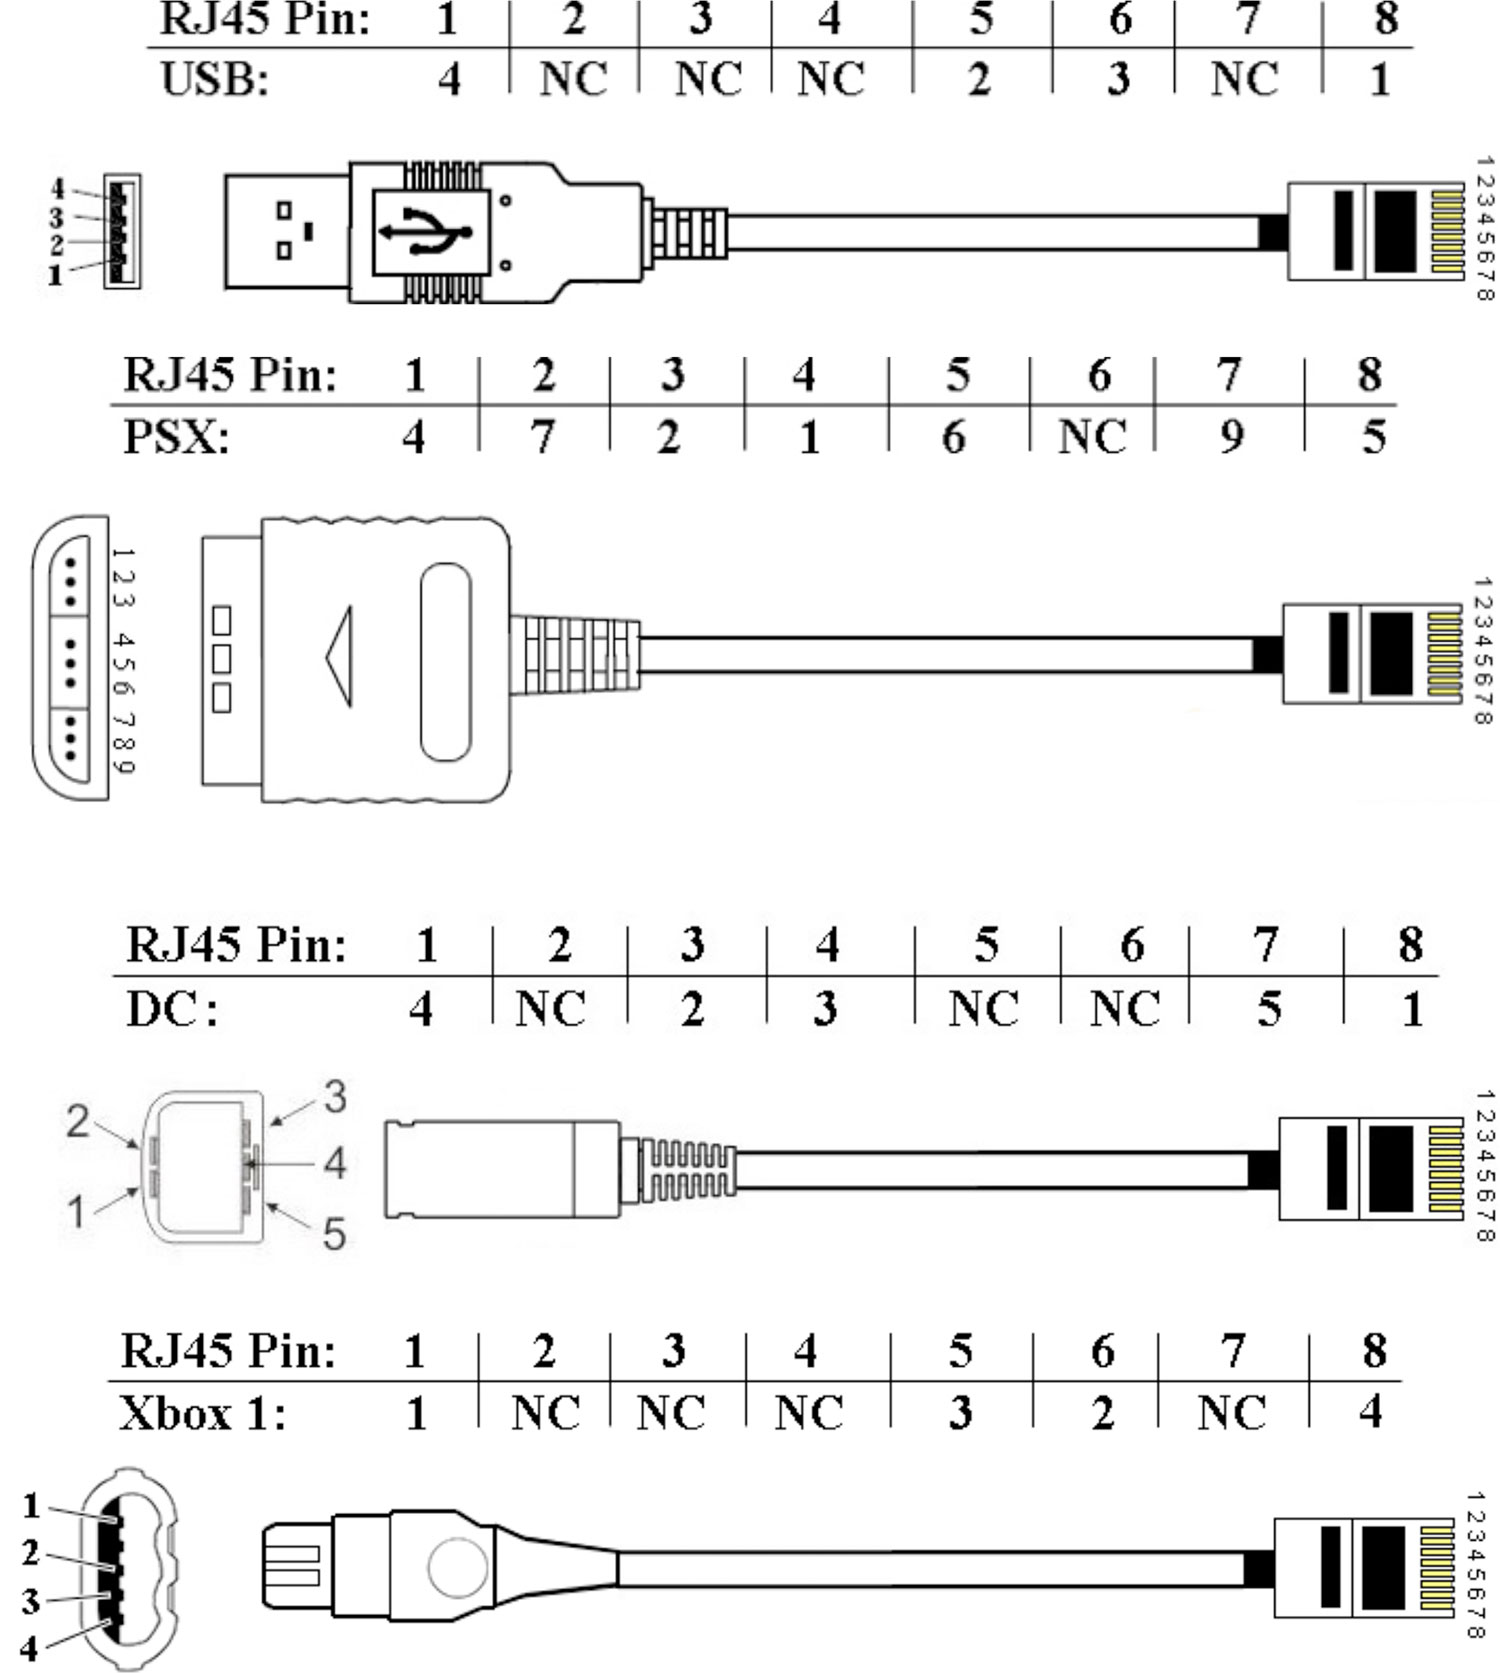
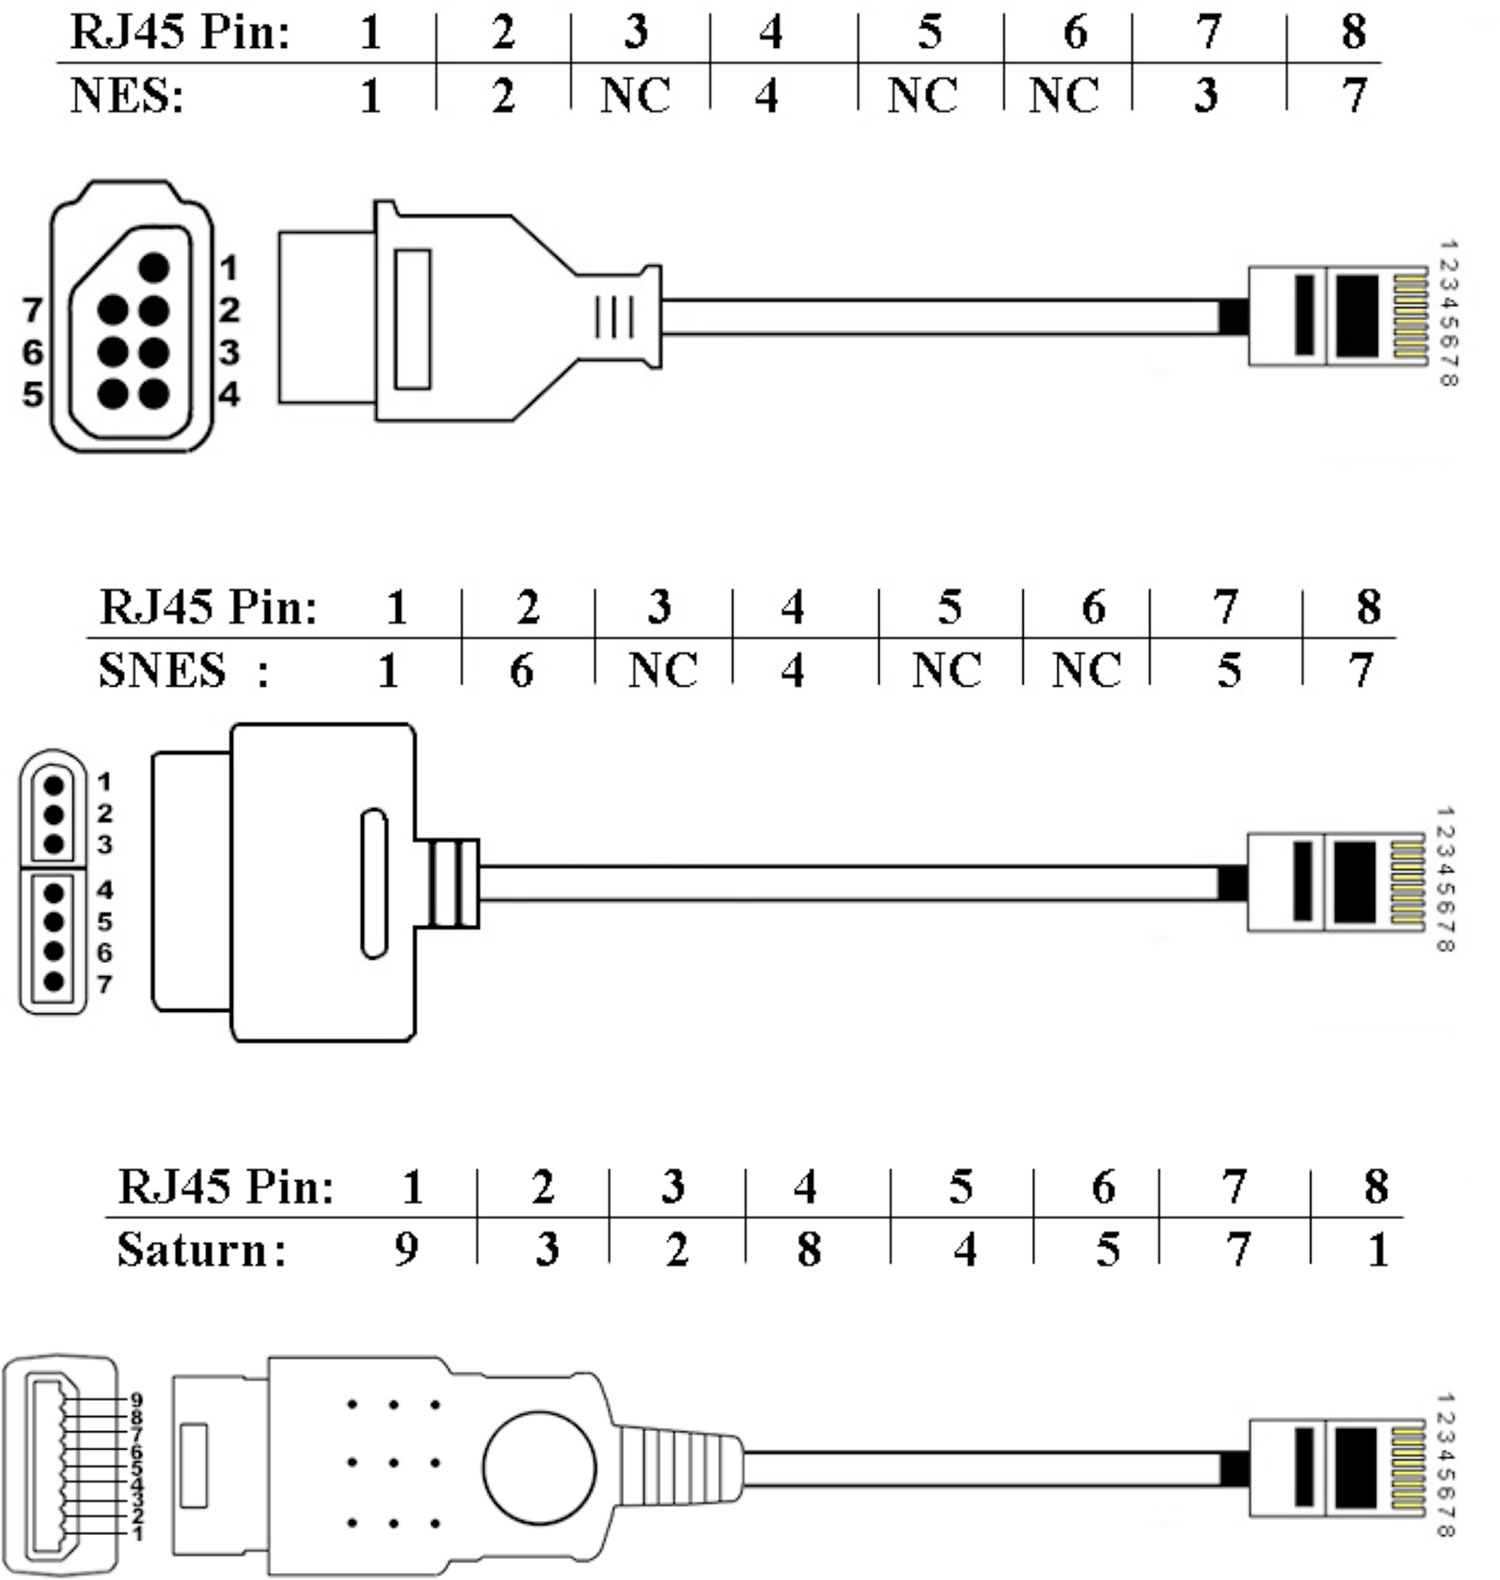
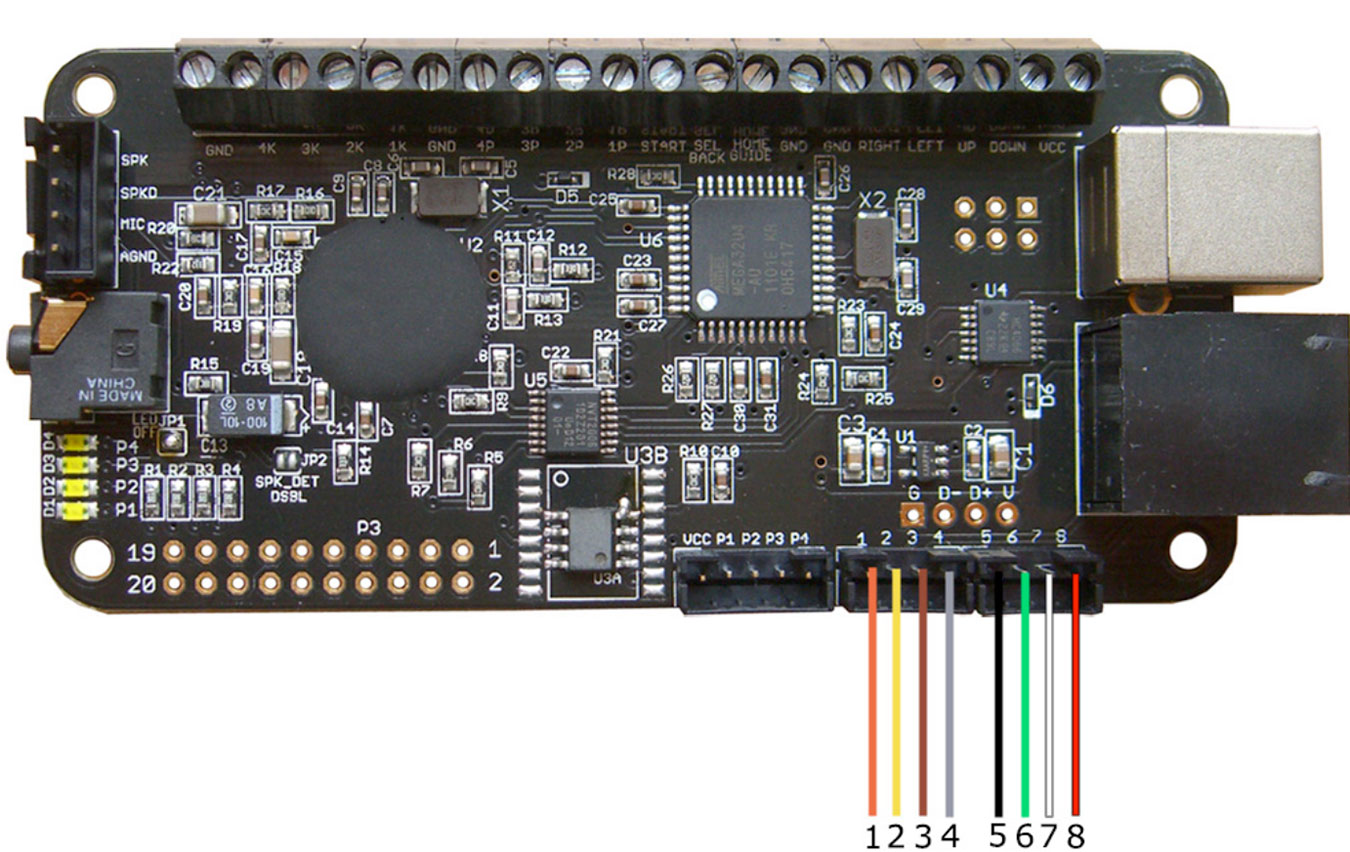
You don't have to use the RJ45 port if you don't want to, you can use the two alternative 4-pin connectors instead like the picture above shows.
IMPORTANT (SATURN)!
If you want to have Saturn support then a wire from Home/Guide needs to be connected to pin 6 on the alternative RJ-45 JST connectors AND you need to physically disconnect the Home/Guide button in your arcade stick to avoid any accidental presses as it's now connected to a USB data line.
Use of Converters
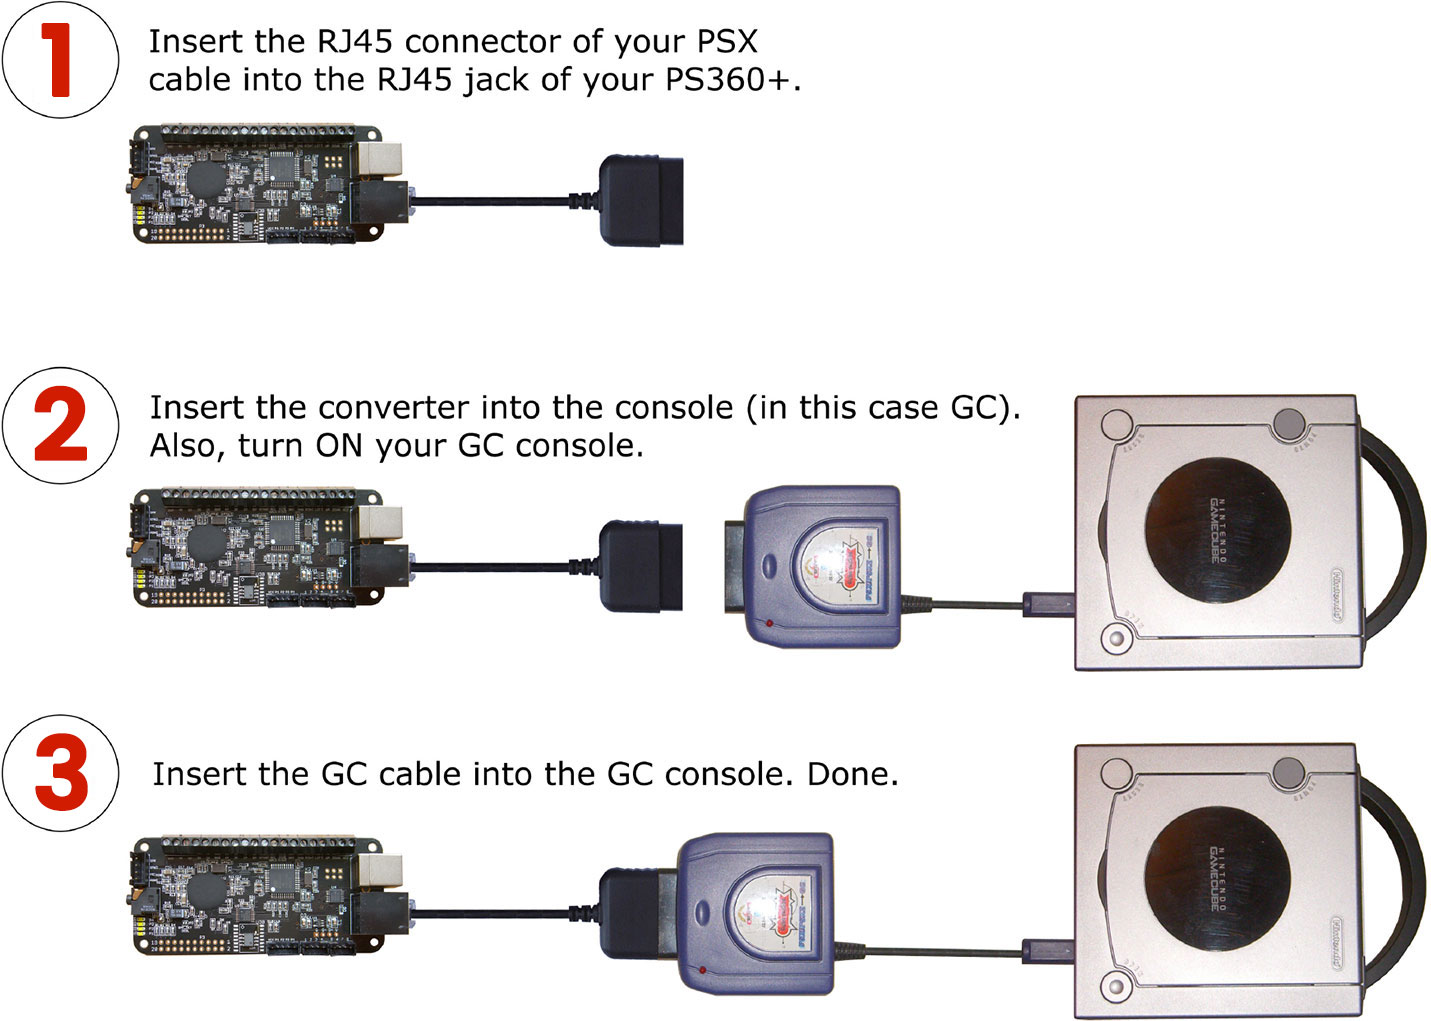
Hook Up Diagram
Supported Systems
The PS360+ supports the following systems:
* Xbox 360
* Xbox
* Playstation 4 (8min Time Out, Soft Reset Possible)
* PlayStation 3 (PS2 backwards compatible for older PS3 systems)
* Playstation 1/2
* Dreamcast
* Saturn
* Wii U / Switch (Pokken)
* SNES
* NES
* PC (Windows)
* Mac (macOS)
* Linux
Start + Select = Home
PS360+ supports S+S=H and it has a slight delay (about 1/3 of a second) to alleviate soft restart issues but retain the macro ability.
Pressing the two buttons together will result in nothing until the time has passed, at which point the HOME/GUIDE function will activate. If you simply press the two buttons together the delay is long enough to allow a soft reset in training modes, but not long enough to be an annoyance.
Configuration Mode
Configuration Mode (Ver. 1.1 to Ver. 1.66)
Select between LS/DP/RS
Enter Configuration Mode by pressing SELECT + 1P, 2P and 3P together, after that it is same as “Pre Ver. 1.0”.
Toggling S+S=H
Enter Configuration Mode by pressing SELECT + 1P, 2P and 3P together, after that it is same as “Pre Ver. 1.0”.
Configuration Mode (Ver. 1.0 and older)
Select between LS/DP/RS
Enter Configuration Mode by pressing SELECT and 2P together. Now you can choose LS/DP/RS by moving the joystick:
Left = LS, Up = DP, Right = RS.
Press START to exit Configuration Mode.
Toggling S+S=H
Enter Configuration Mode by pressing SELECT and 2P together. Now press the joystick DOWN to toggle S+S=H on/off.
You can only toggle S+S=H once per active Configuration Mode to alleviate overlaps while remaining in the mode.
Press START to exit Configuration Mode.
LSB/RSB
LSB/RSB+ (Ver. 1.22 to Ver. 1.66)
LSB = Select + 2P + 3P
RSB = Select + 2K + 3K
LSB + RSB = Select + 2P + 3P + 2K + 3K
4P = Select + 1P + 2P
4K = Select + 1K + 2K
4P + 4K = Select + 1P + 2P + 1K + 2K
LSB/RSB (Ver. 1.1 to Ver. 1.21)
LSB/RSB (thumb stick buttons) activate in this manner:
LSB = Select+1K+2K
RSB = Select+2K+3K
*LSB=Left (Thumb)Stick Button. *RSB=Right (Thumb)Stick Button.
Forced Modes
Forced Modes
Although the PS360+ supports smart detection of the supported systems, it is possible to force the specifically wanted mode in case the detection is not working as designed or you want a specific mode to be run.
1P = PS3/PC ; 1K = PSx ; 1P+2P = *PS3 BC
1P+1K = PS4 ; 2P = Xbox 360 ; 2P+2K = Xbox 360(PC) ; 2K = Xbox
2P+3P = Saturn ; 3P = Dreamcast ; 3K = NES/SNES
3P+3K = Wii U / Switch (Pokken)
*Playstation 3 Backwards Compability.
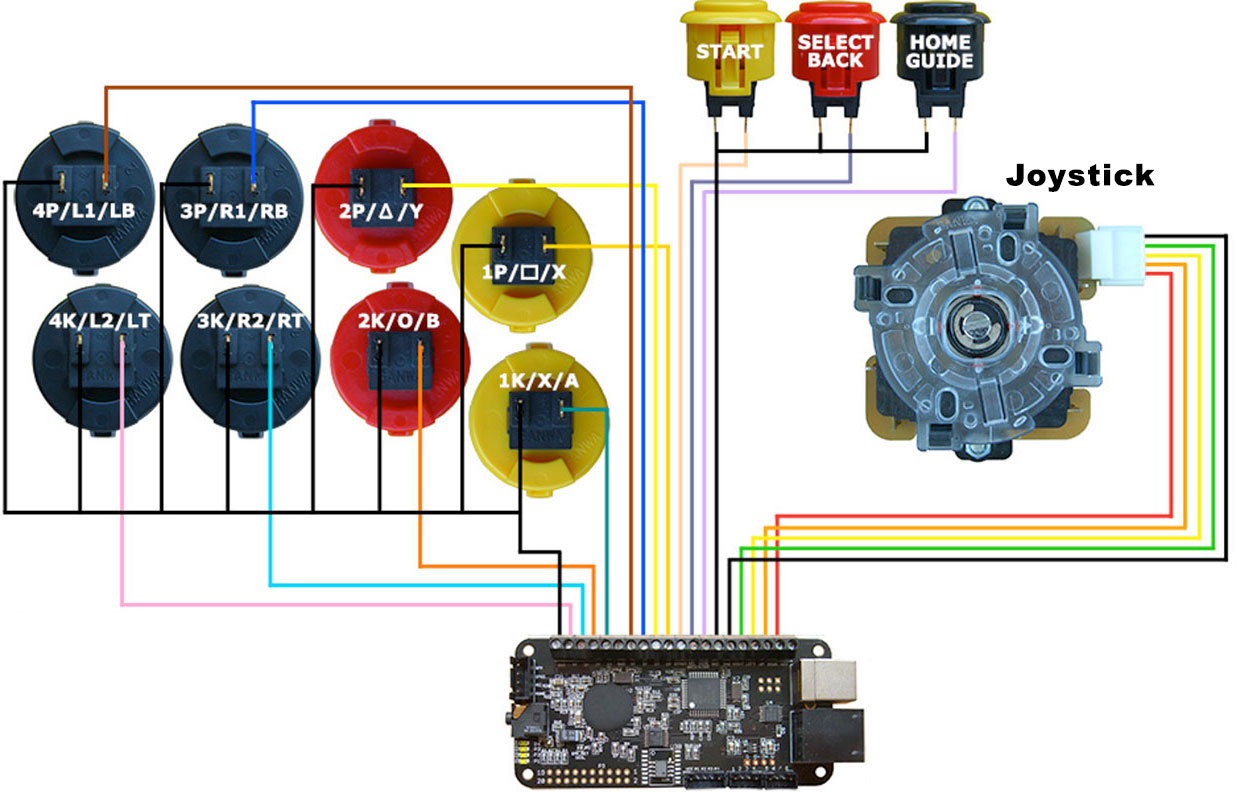
Button Mapping
| PS360+ |
P1 |
P2 |
P3 |
P4 |
K1 |
K2 |
K3 |
K4 |
Start |
Select |
Home |
| Xbox 360 |
X |
Y |
RB |
LB |
A |
B |
RT |
LT |
Start |
Back |
Guide |
| Xbox |
X |
Y |
White |
LT |
A |
B |
Black |
RT |
Start |
Back |
| Playstation 4 |
◼ |
▲ |
R1 |
L1 |
X |
O |
R2 |
L2 |
Option |
Share |
Home |
| Playstation 3 |
◼ |
▲ |
R1 |
L1 |
X |
O |
R2 |
L2 |
Start |
Select |
Home |
| Playstation 1/2 |
◼ |
▲ |
R1 |
L1 |
X |
O |
R2 |
L2 |
Start |
Select |
|
| Dreamcast |
X |
Y |
Z |
A |
B |
C |
|
|
Start |
|
|
| Saturn |
X |
Y |
Z |
|
A |
B |
C |
|
Start |
|
|
| Wii U/Switch |
Y |
X |
L |
ZL |
B |
A |
R |
ZR |
Start |
Select |
|
| SNES |
Y |
X |
L |
|
B |
A |
R |
|
Start |
Select |
|
| NES |
|
|
|
|
B |
A |
|
|
Start |
Select |
|
How to Update - Windows
Pre-Update Procedure (Windows 7 Version)
In order to update the firmware on the PS360+ you must install Atmel’s free FLIP (FLexible In-system Programmer) software. You’ll also need to have Java installed. If you don’t have it installed, you can download the special version of FLIP that includes the Java runtime.
Download Software Here
Updating your PS360+ ATMEL Drivers (Windows 7 Version)
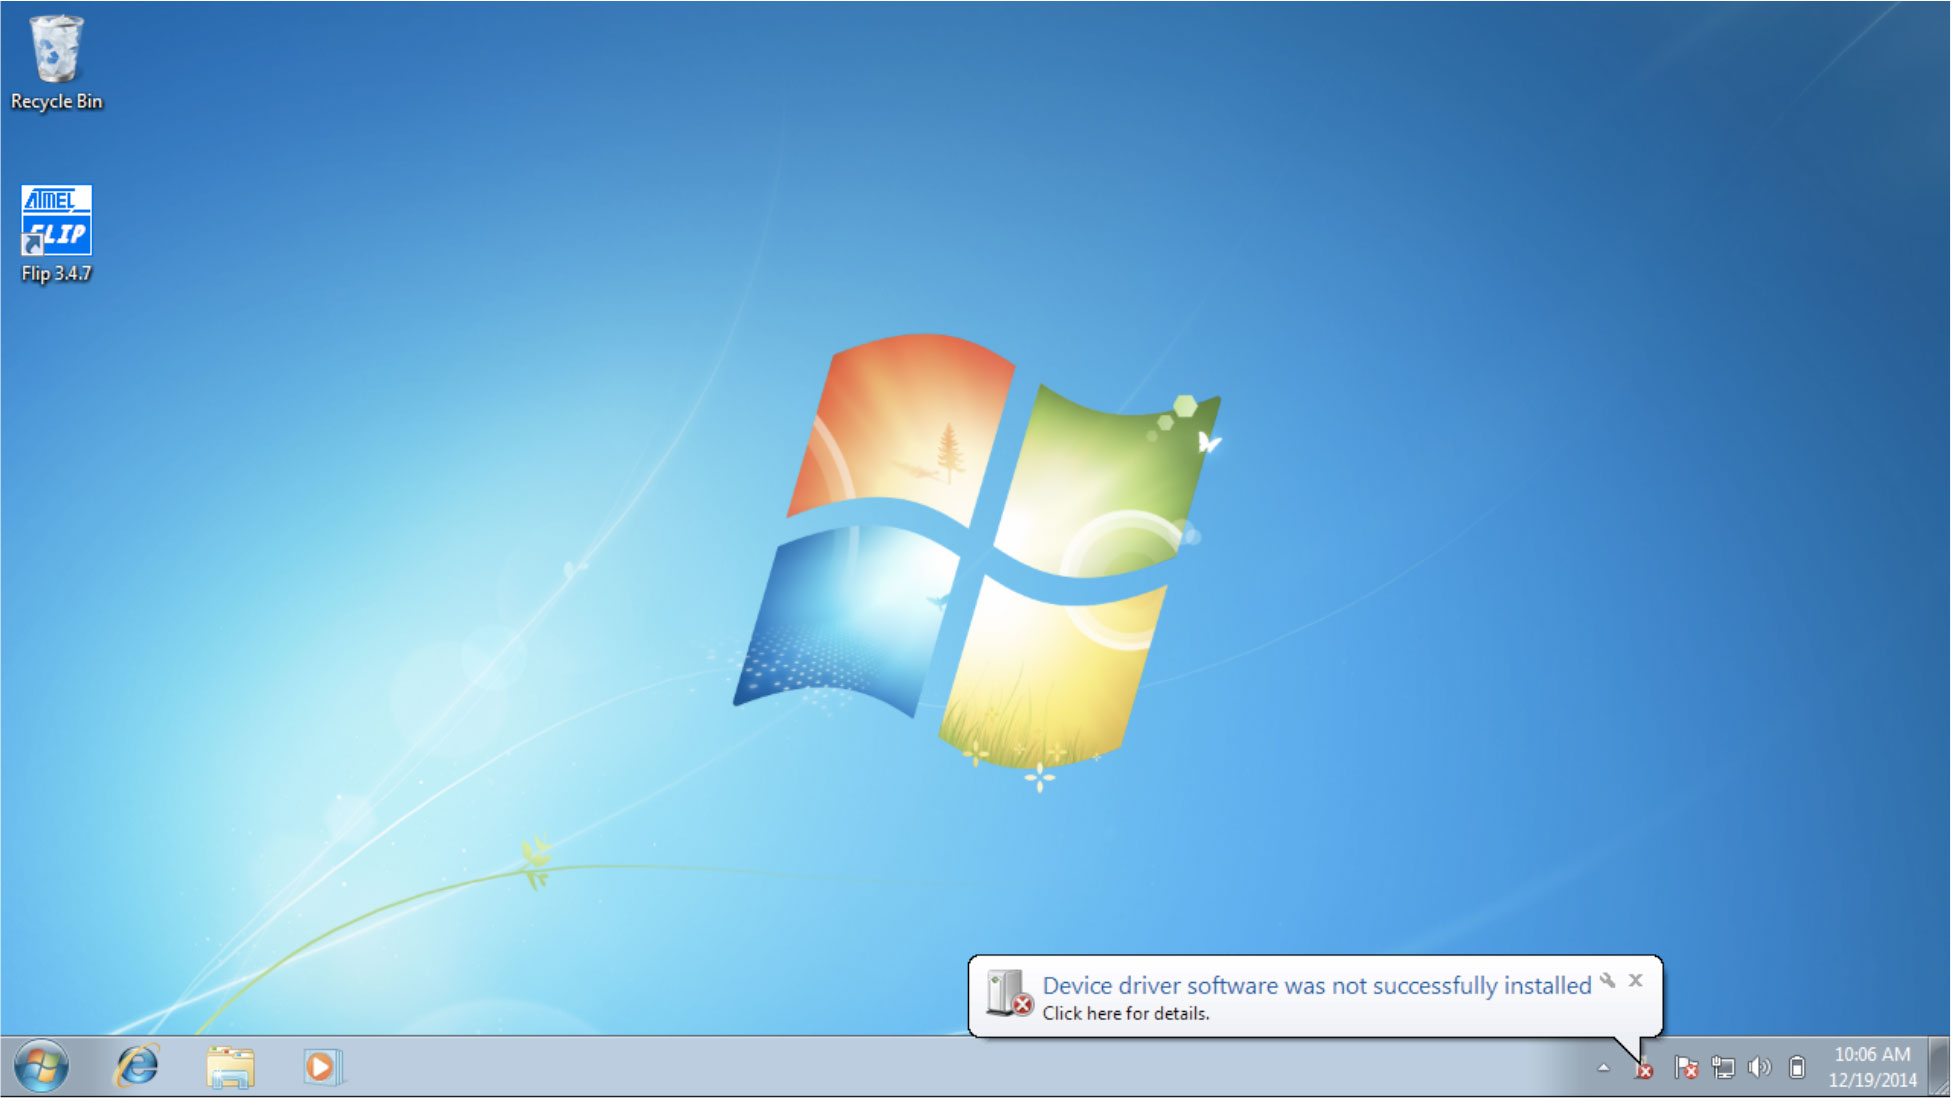
1. Plug in your PS360+ while holding start button, this should make the LEDs go back and forth on the PS360+.
In Windows 7 it will most likely look like the picture below saying ”Device driver software not successfully installed”.
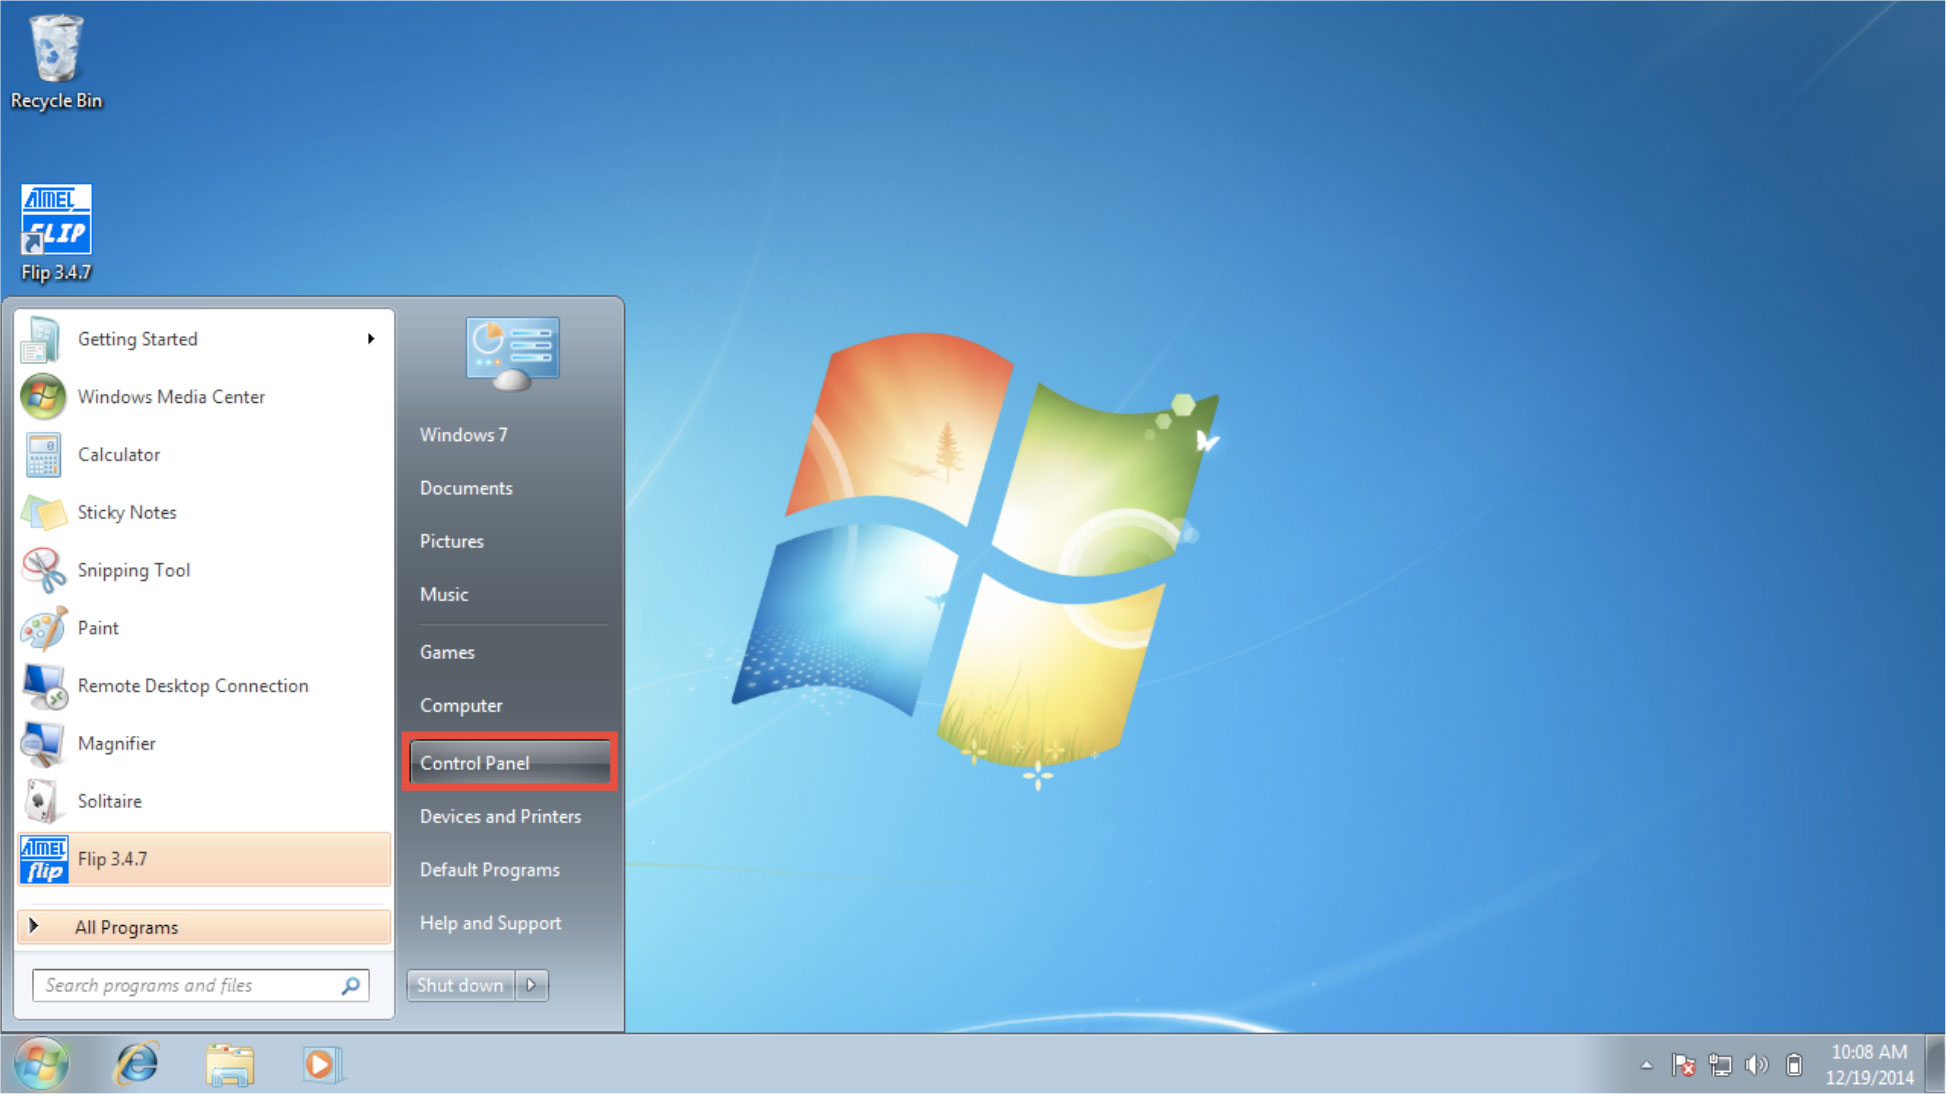
2. Go to ”Control Panel”.
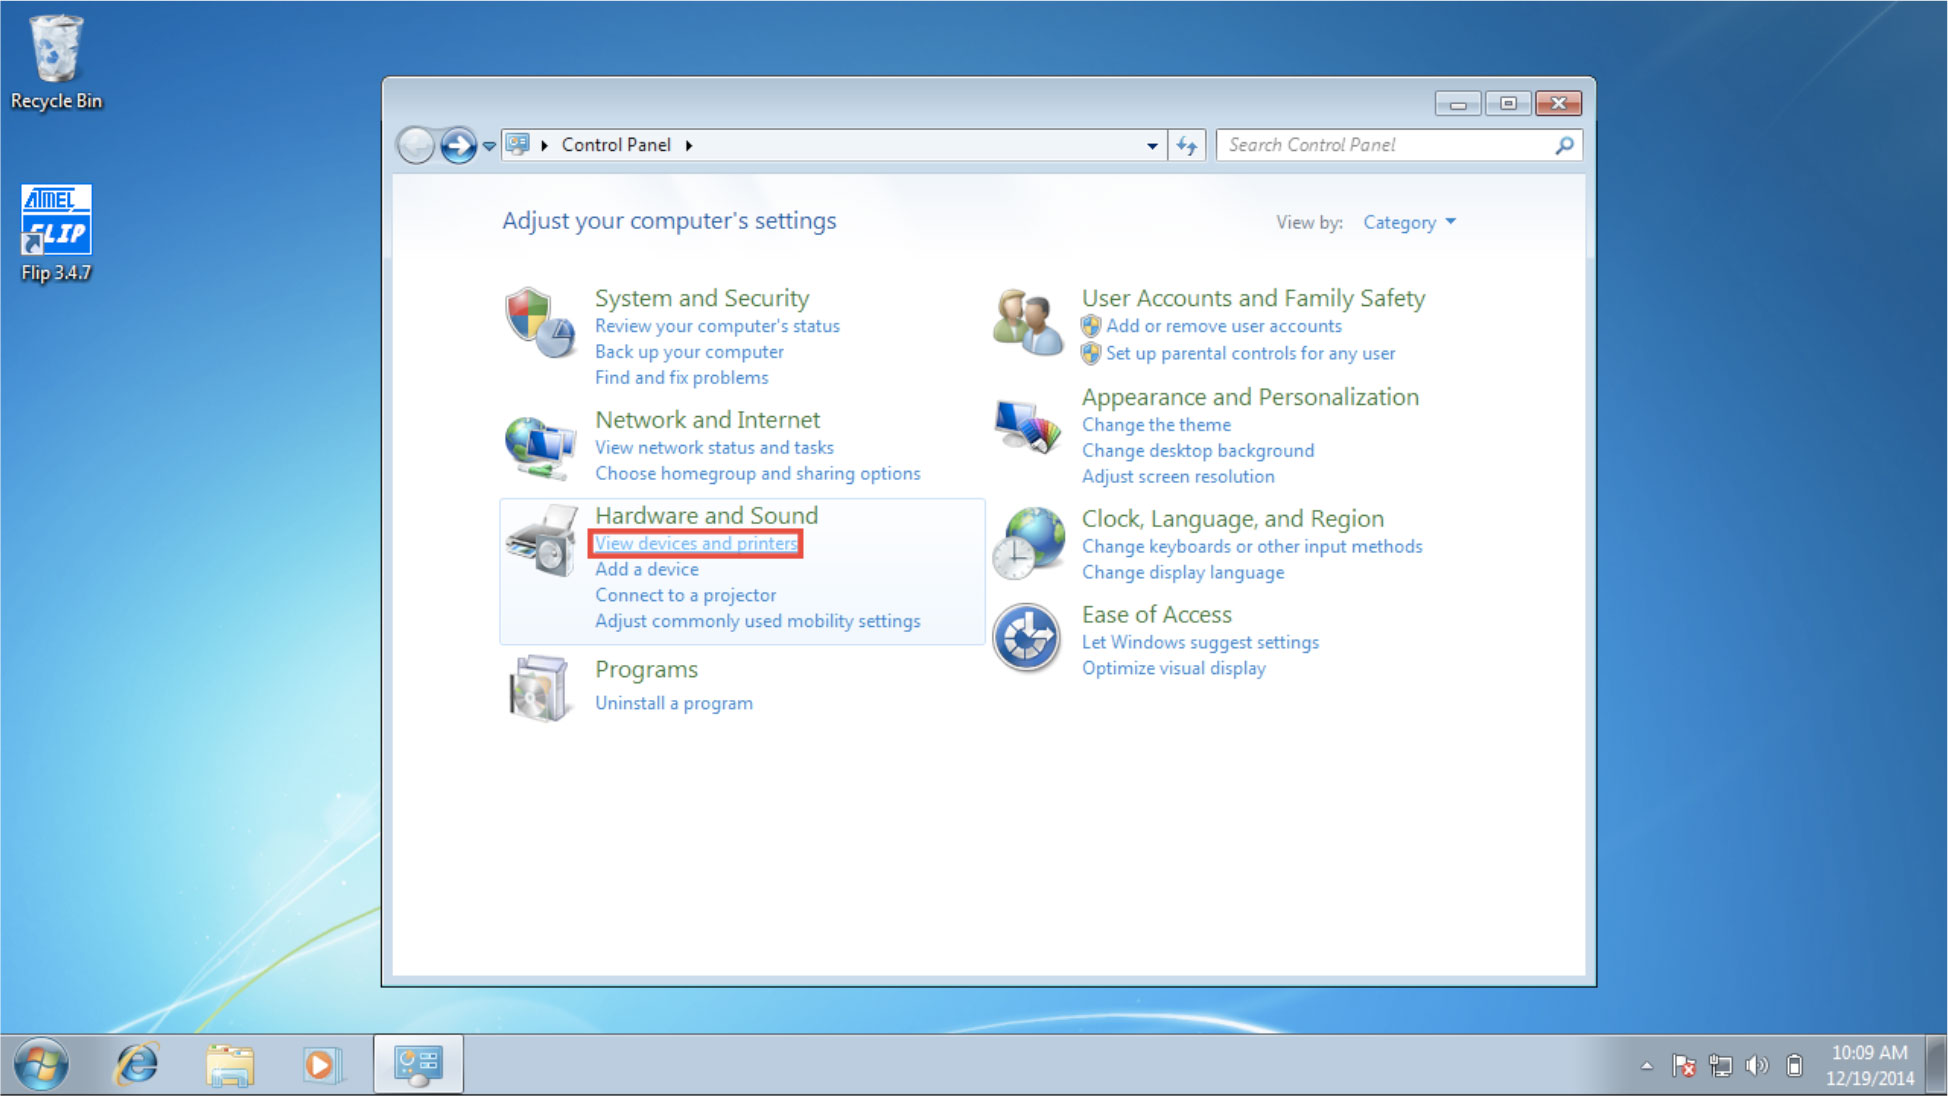
3. Go to ”View devices and printers”.
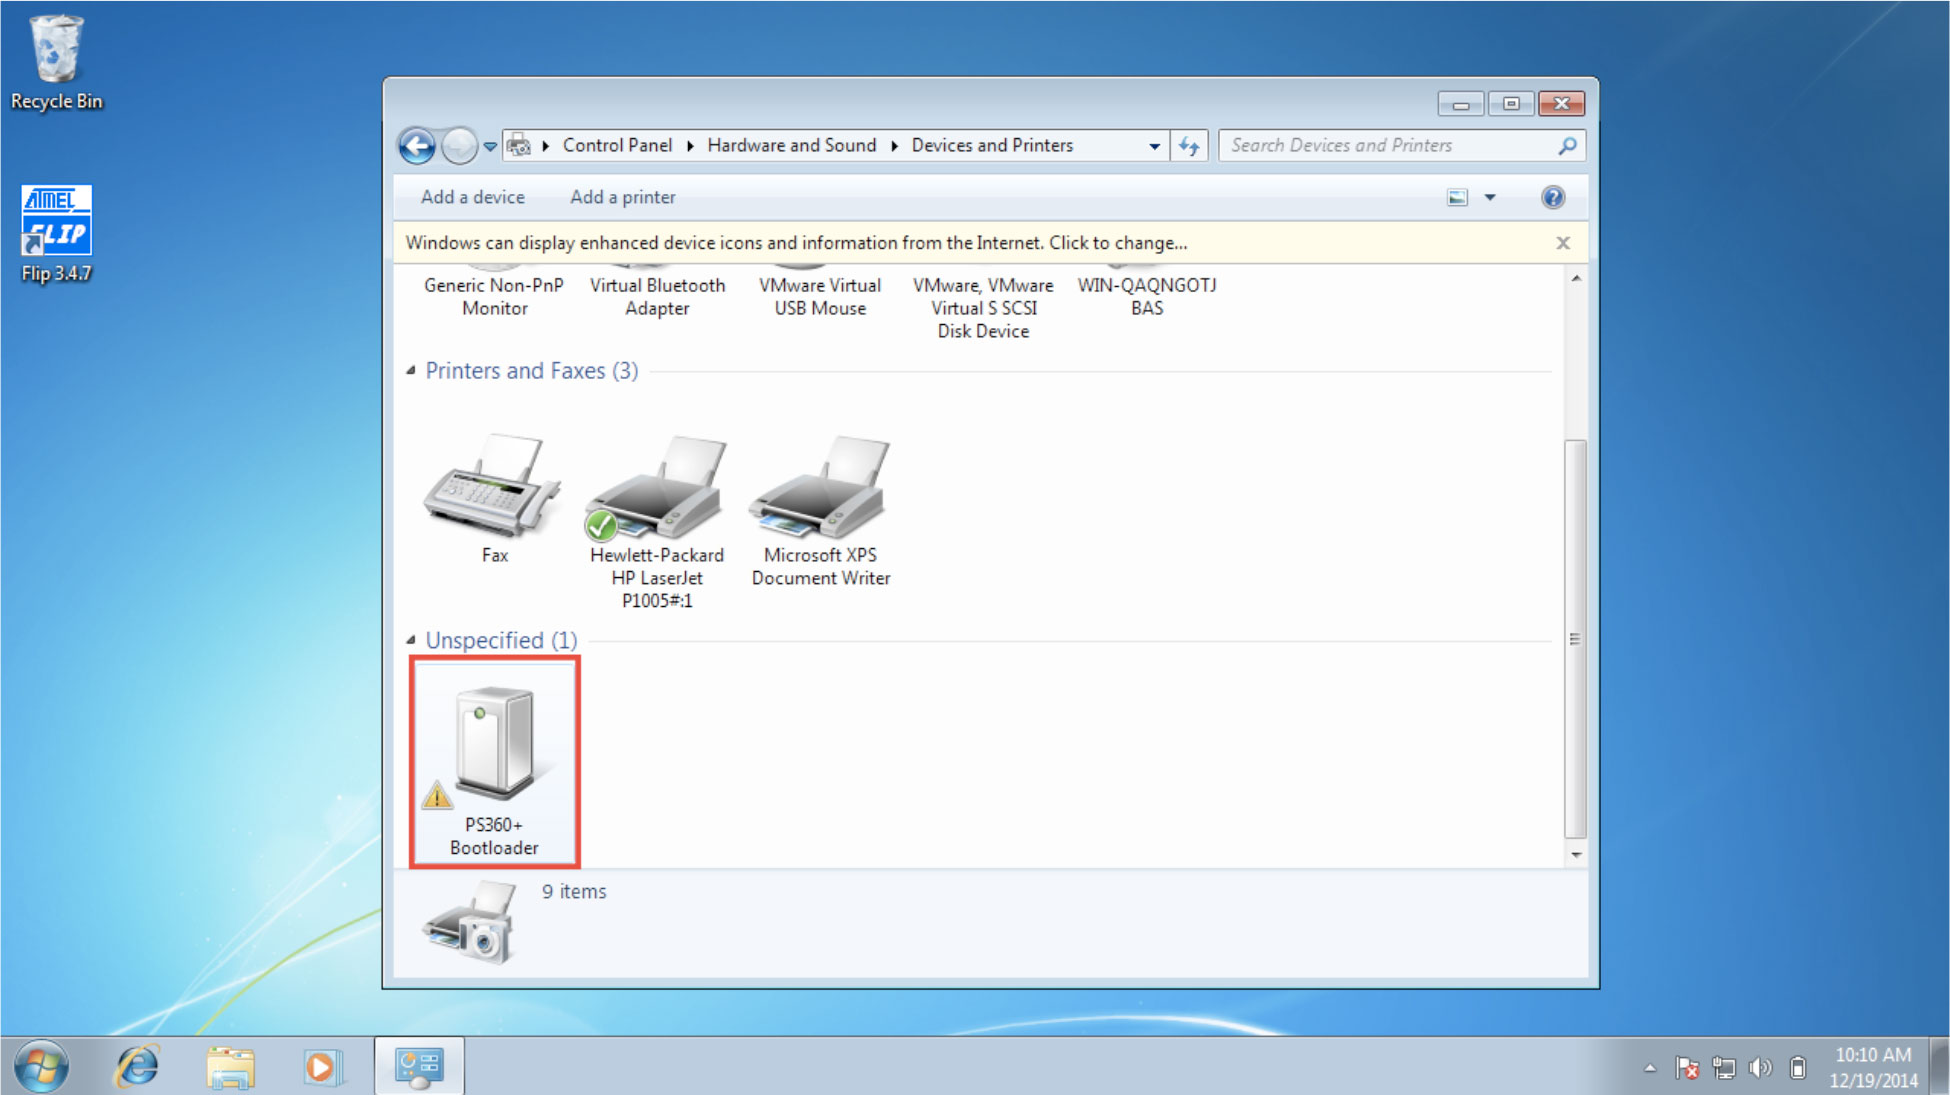
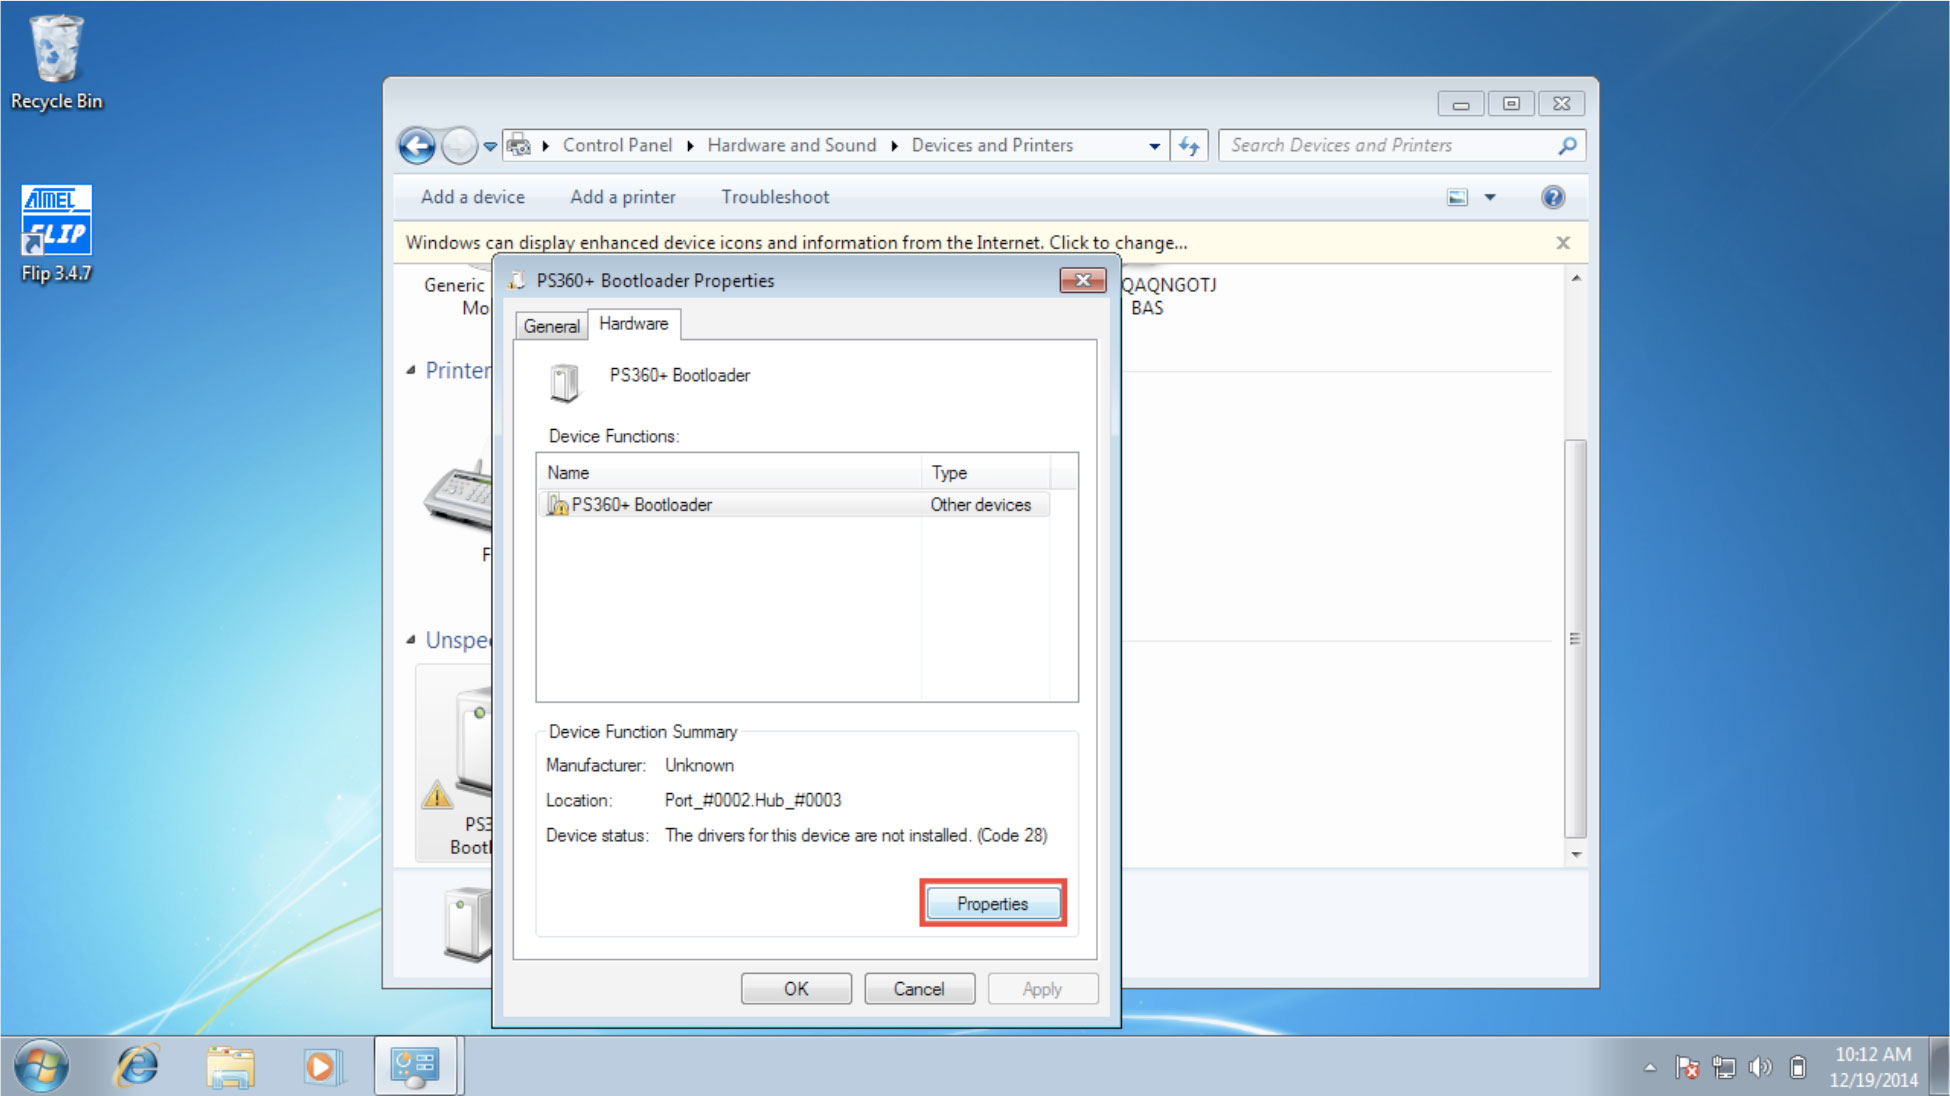
4. Go to ”PS360+ Bootloader” and double click on the icon.
5. Click on ”Properties”.
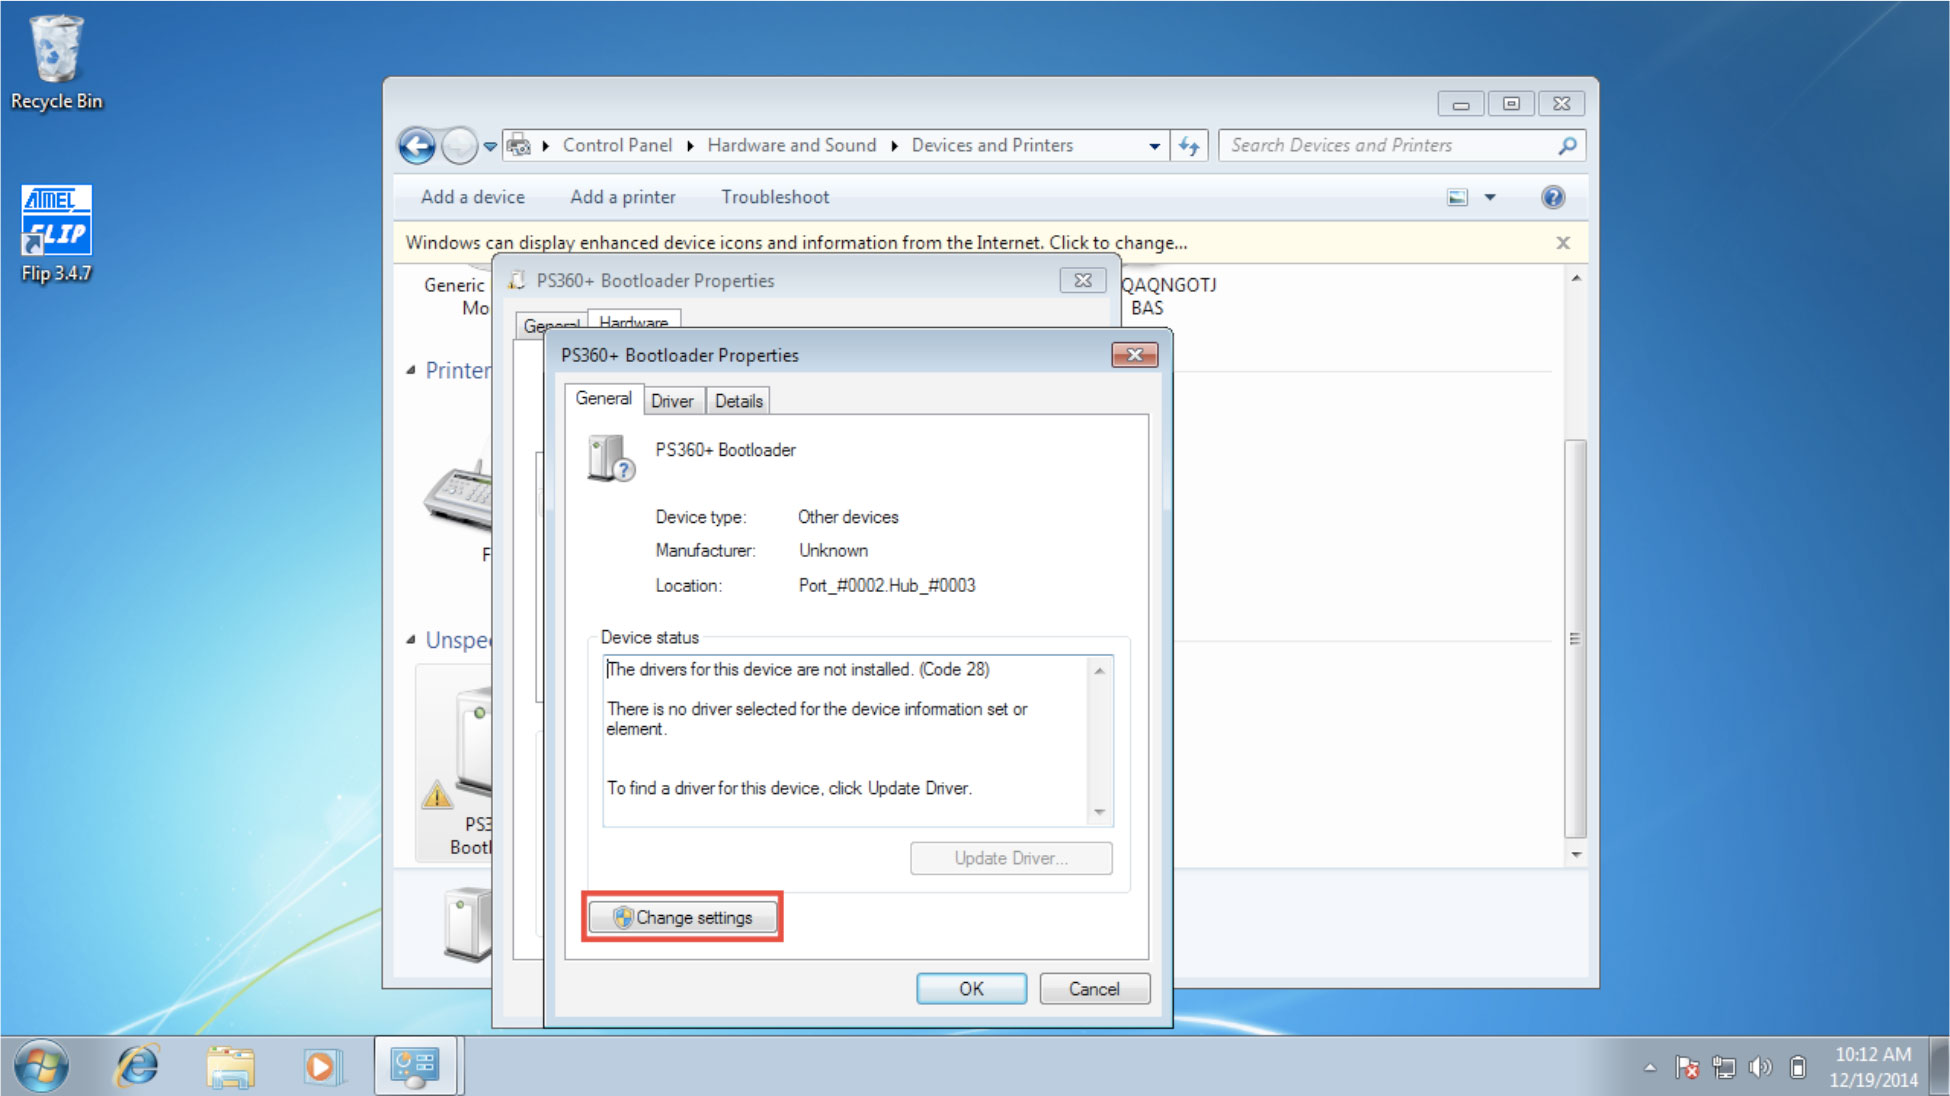
6. Click on ”Change settings”.
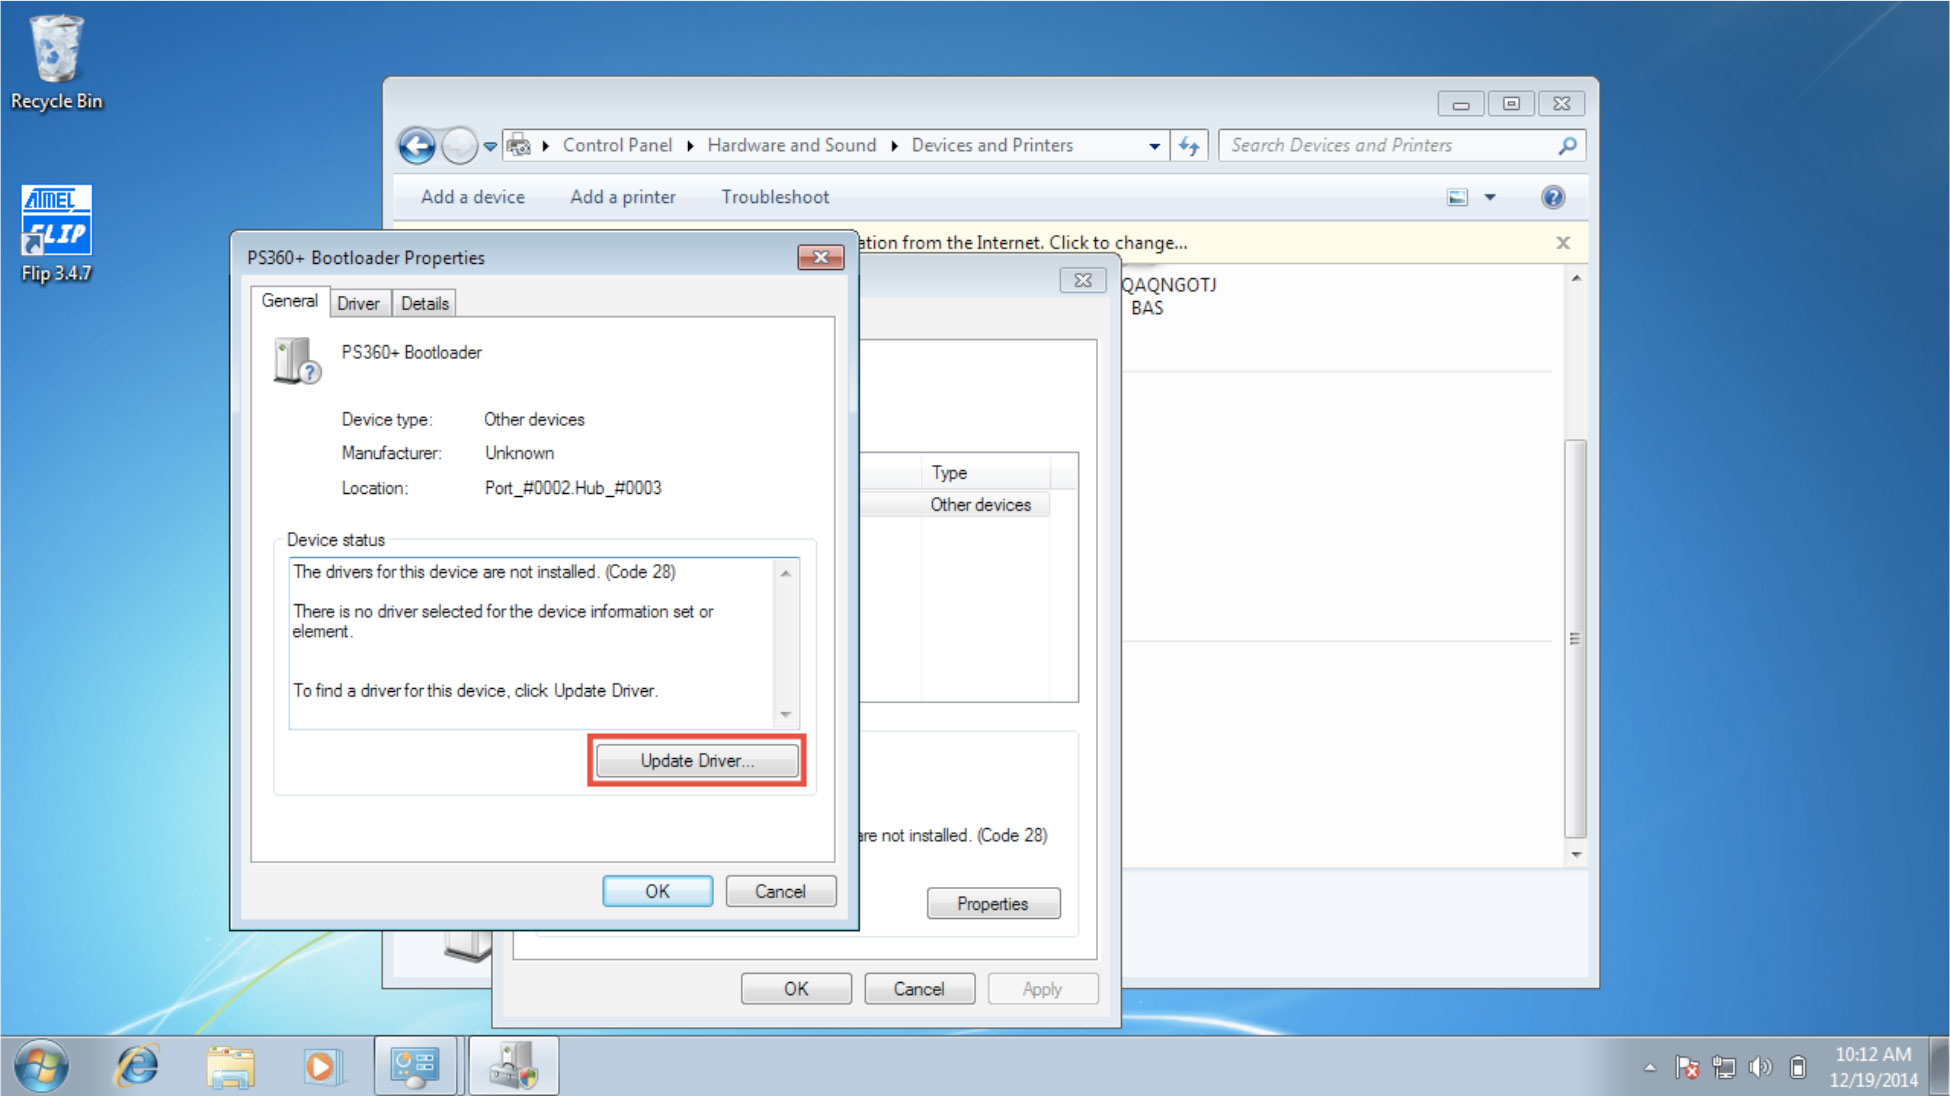
7. Click on ”Update Driver”.
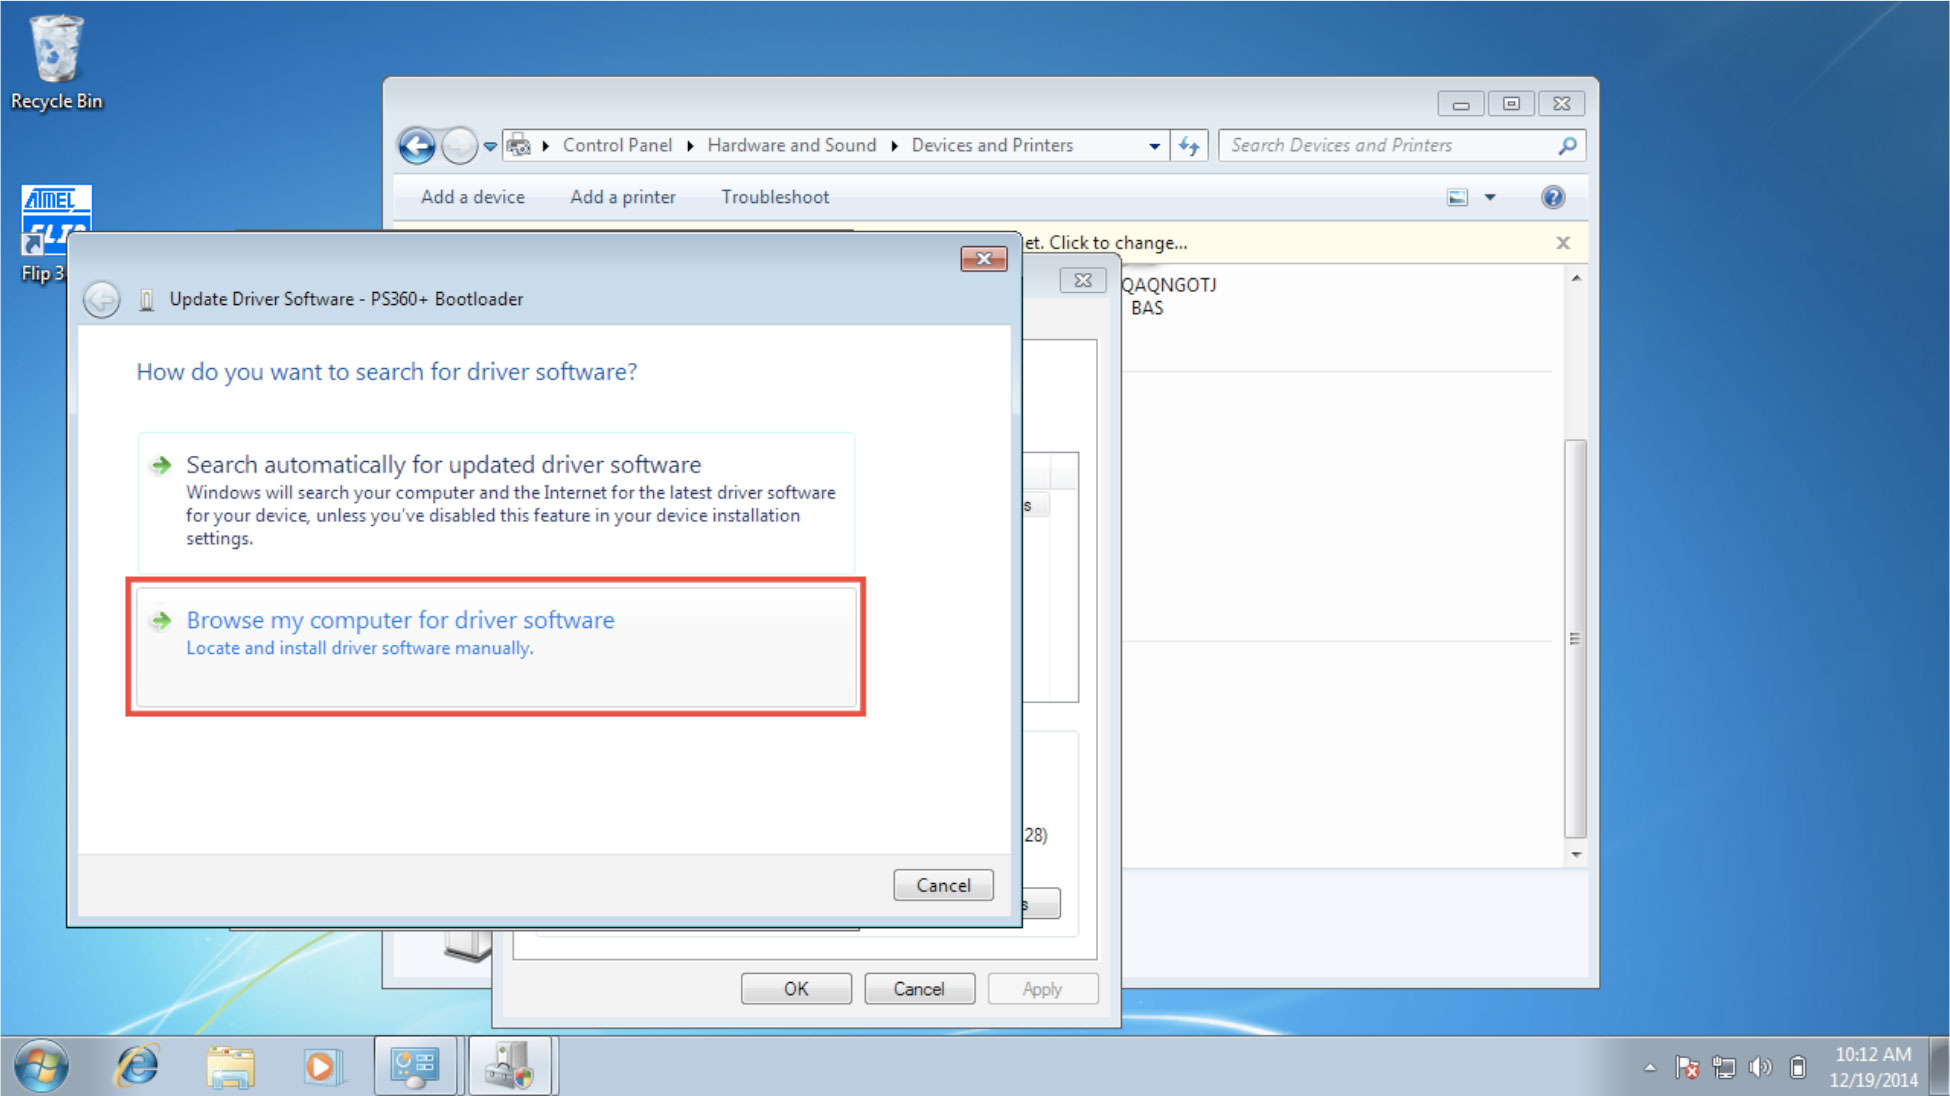
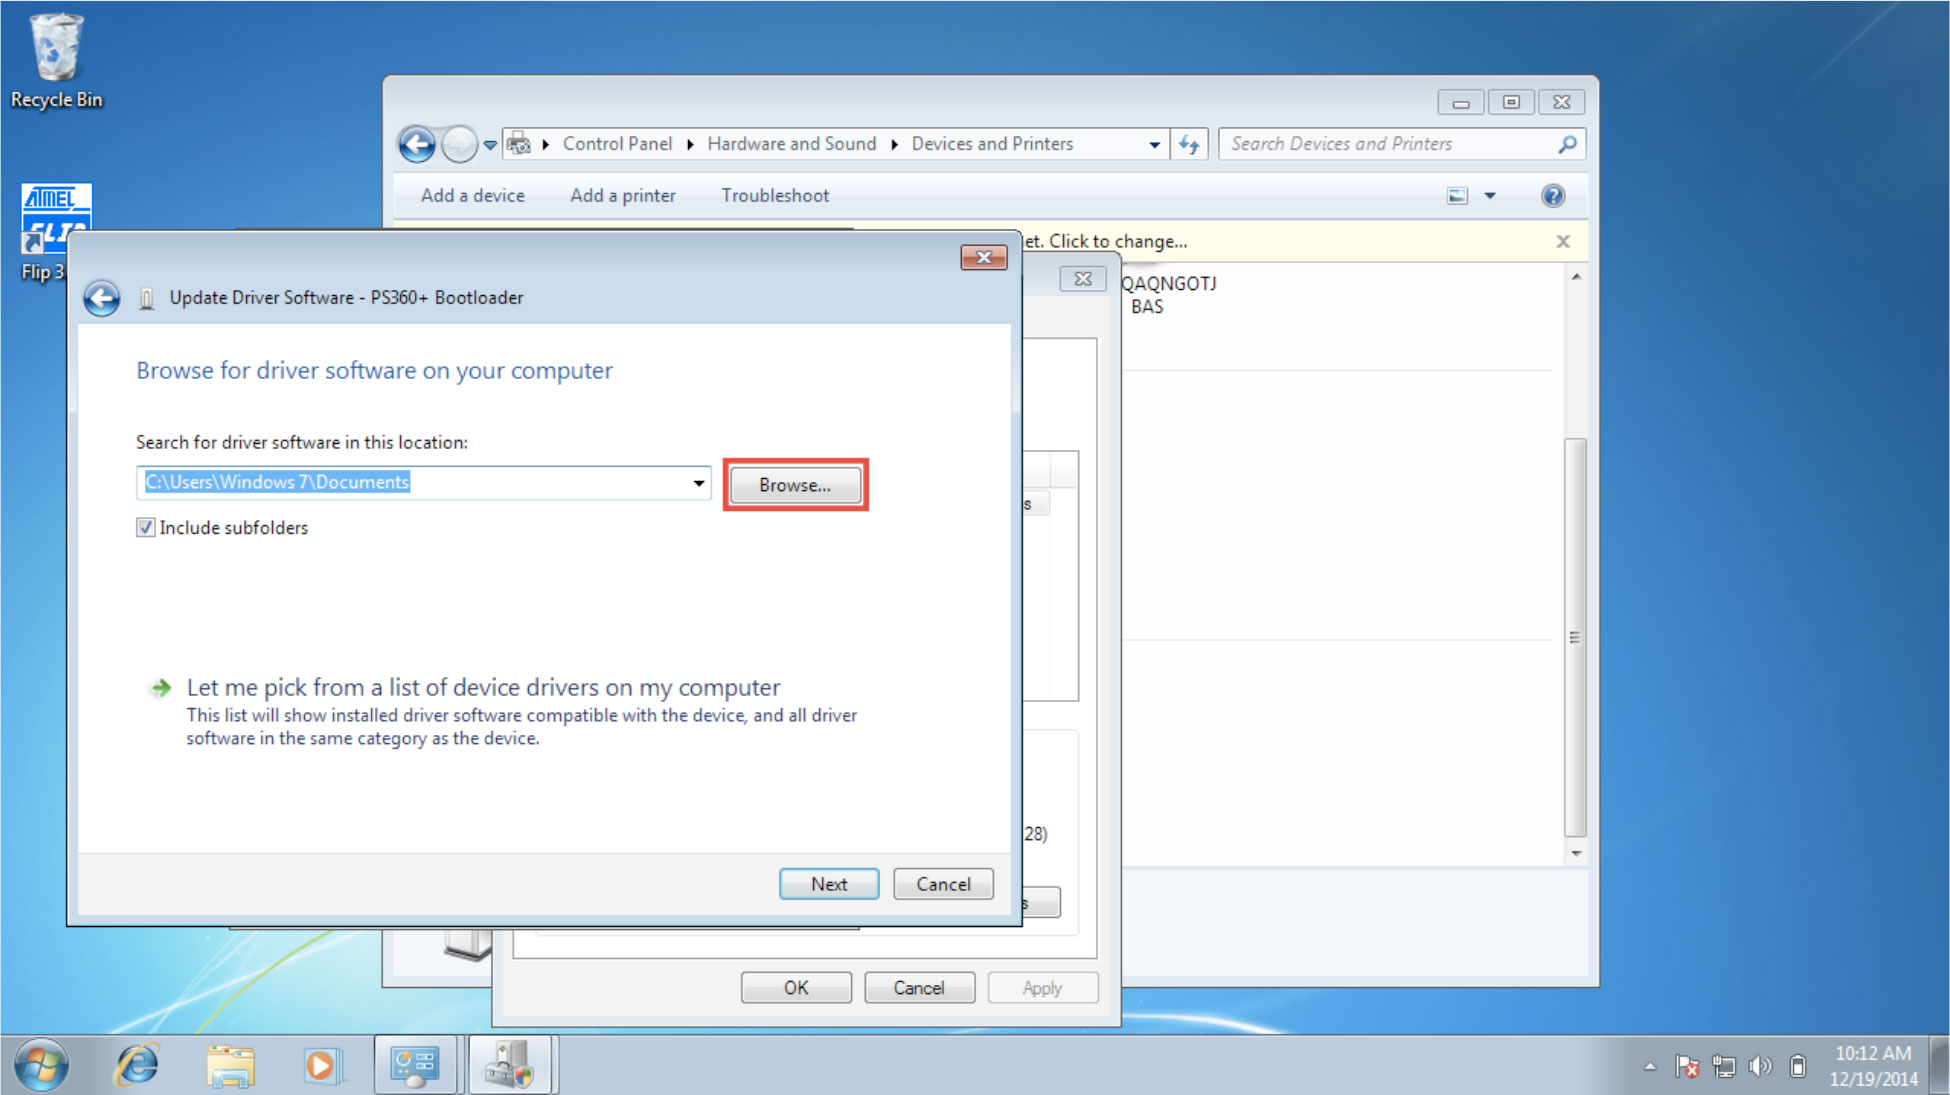
8. Click on ”Browse my computer for driver software”.
9. Click on ”Browse”. Now you need to find where you installed the FLIP software.
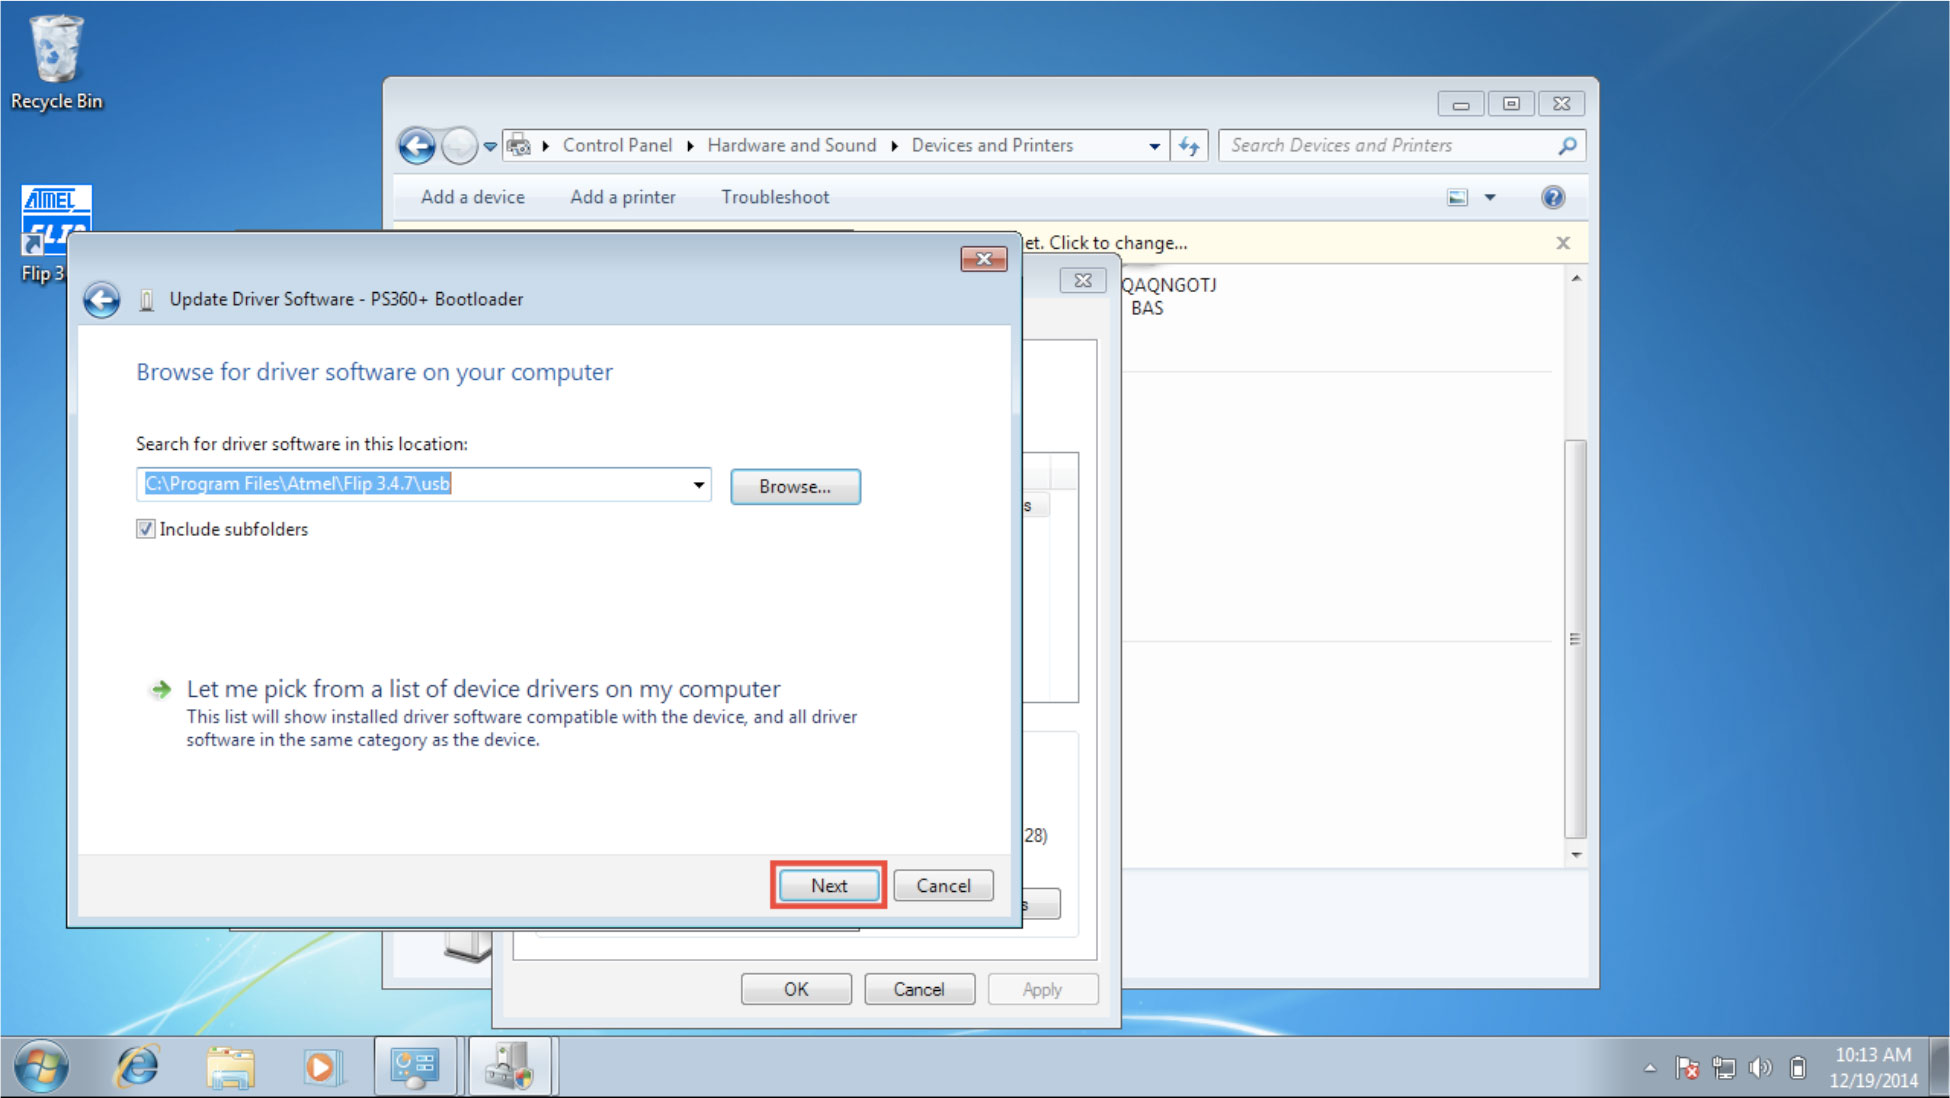
10. Notice the driver location is in a sub folder called ”usb”. Click on ”Next”.
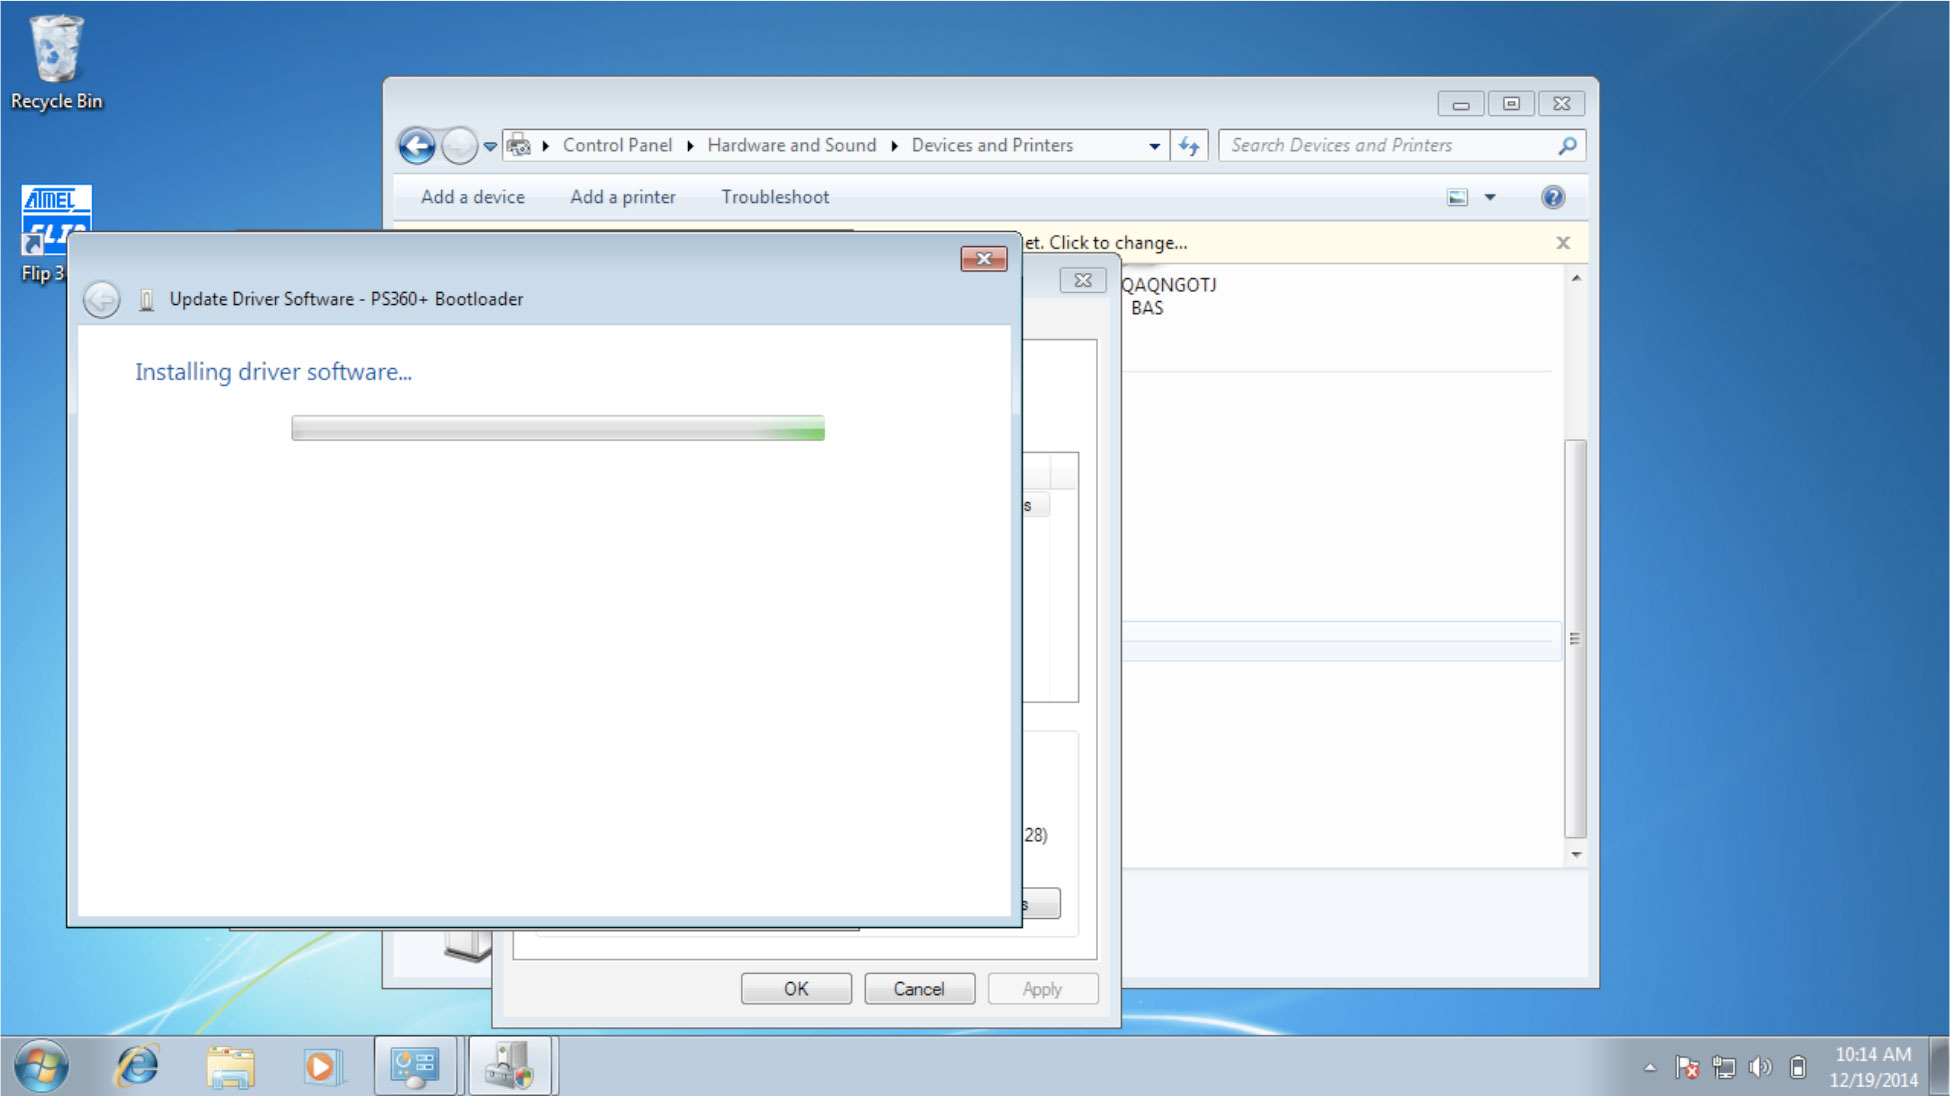
11. Now it will install...
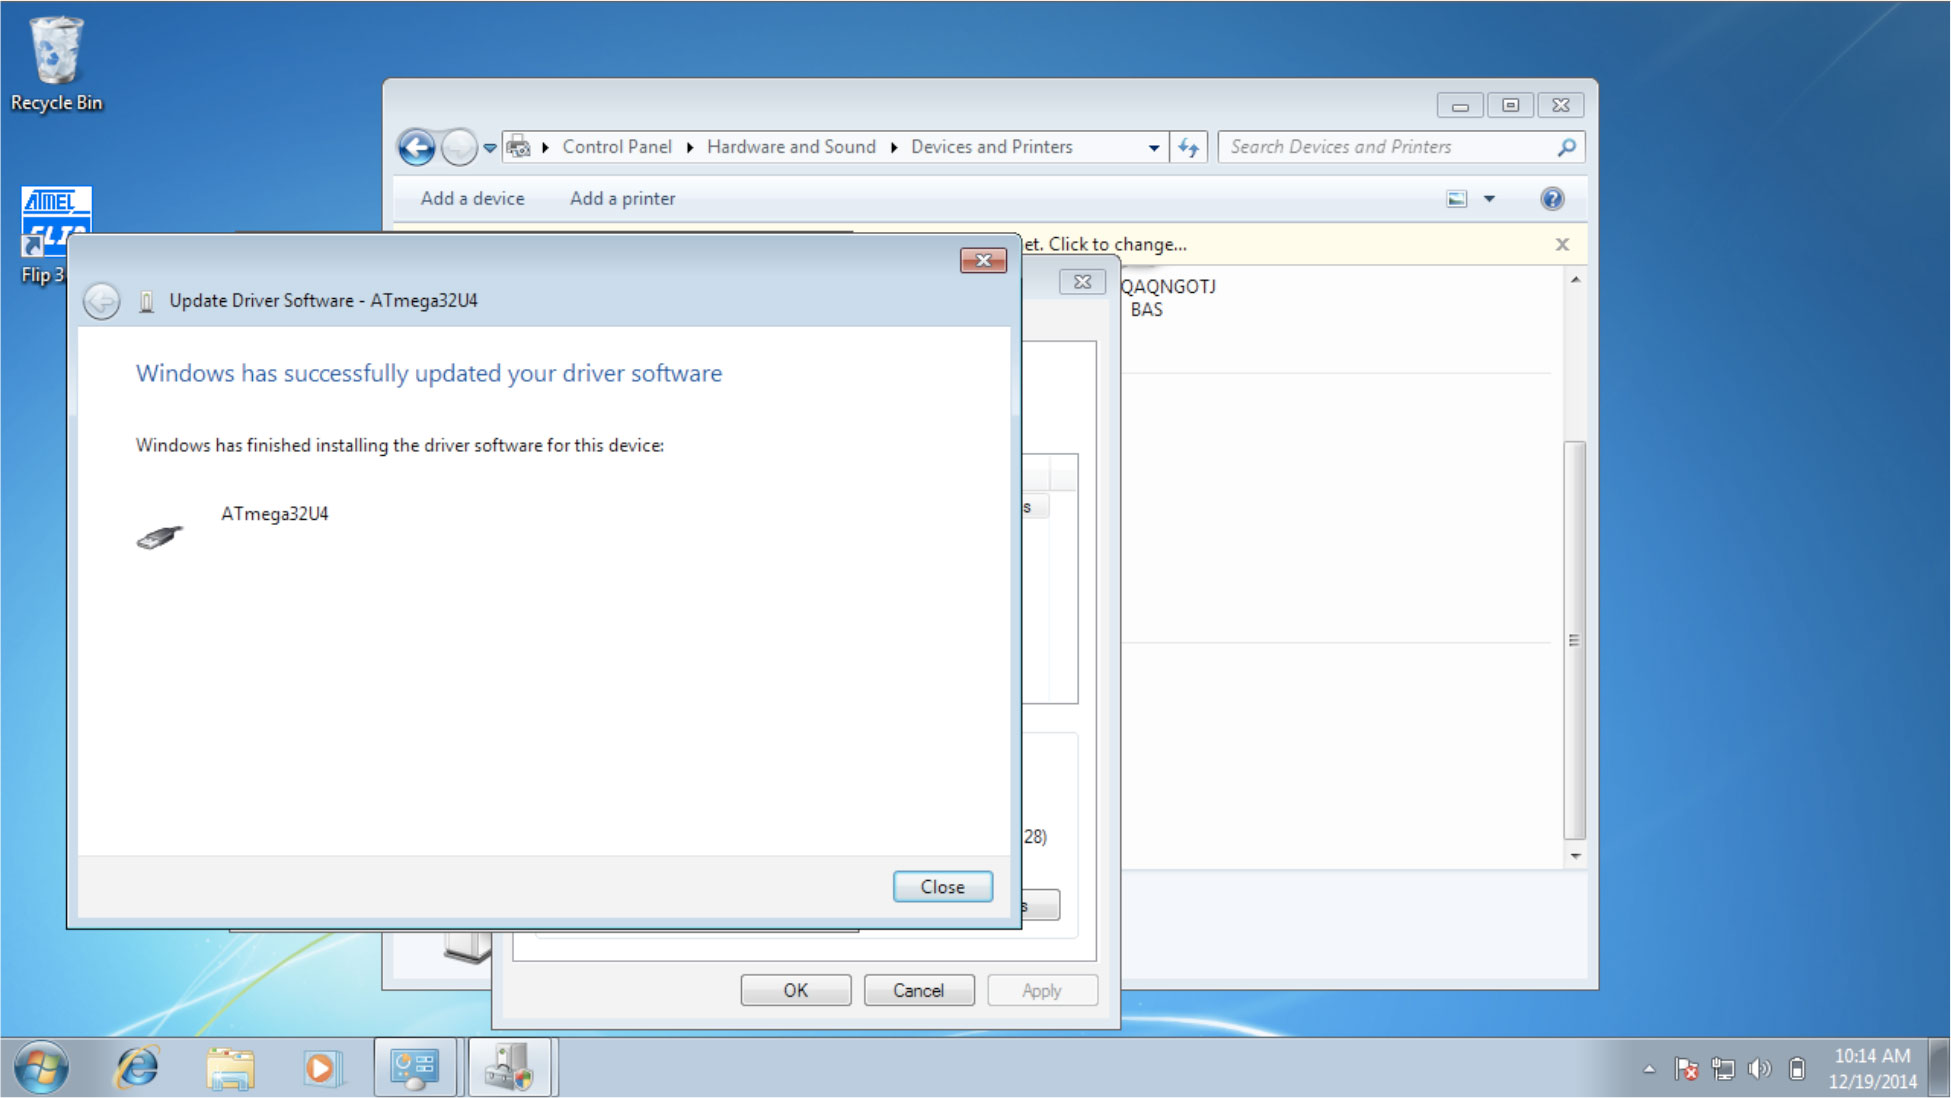
12. Now it should say it was successfully installed like picture below. You are now done with updating the driver.
Updating your PS360+ Firmware (Windows 7 Version)
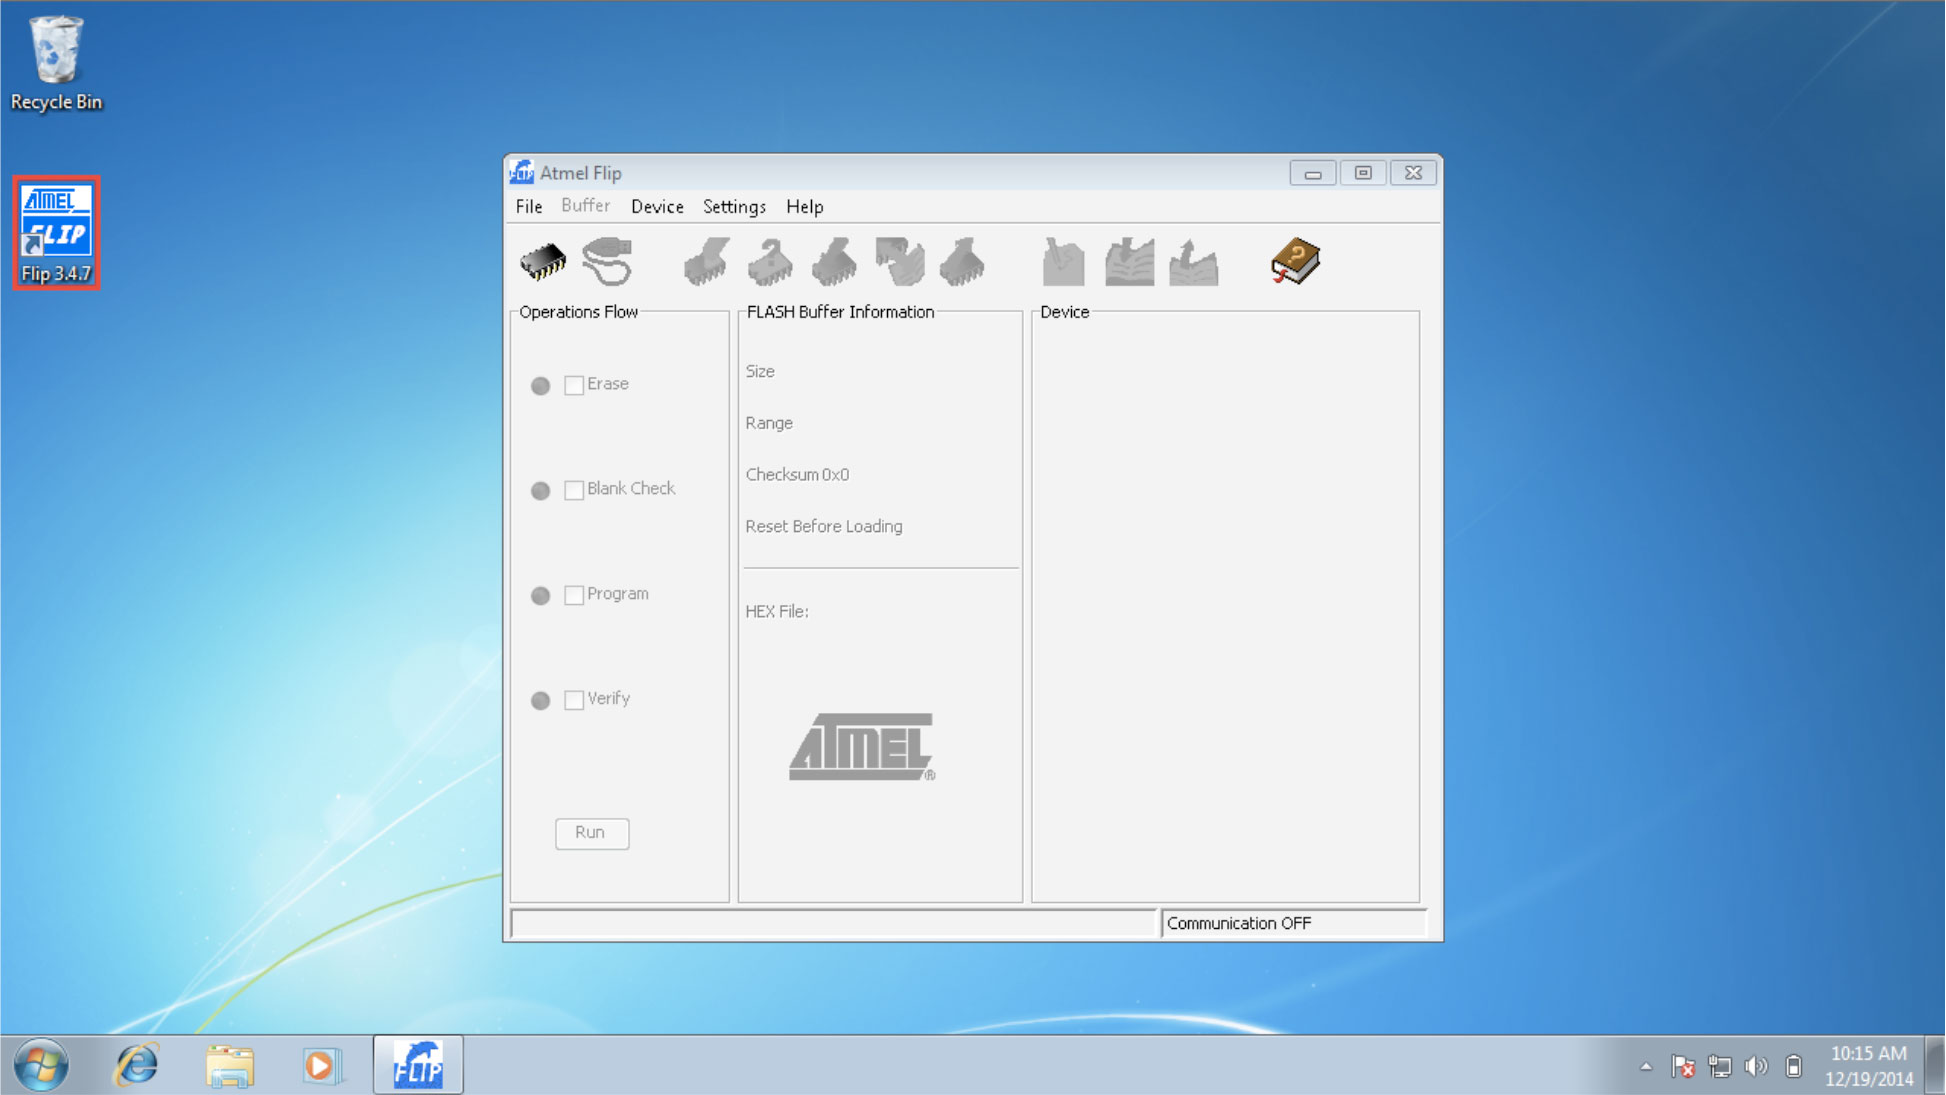
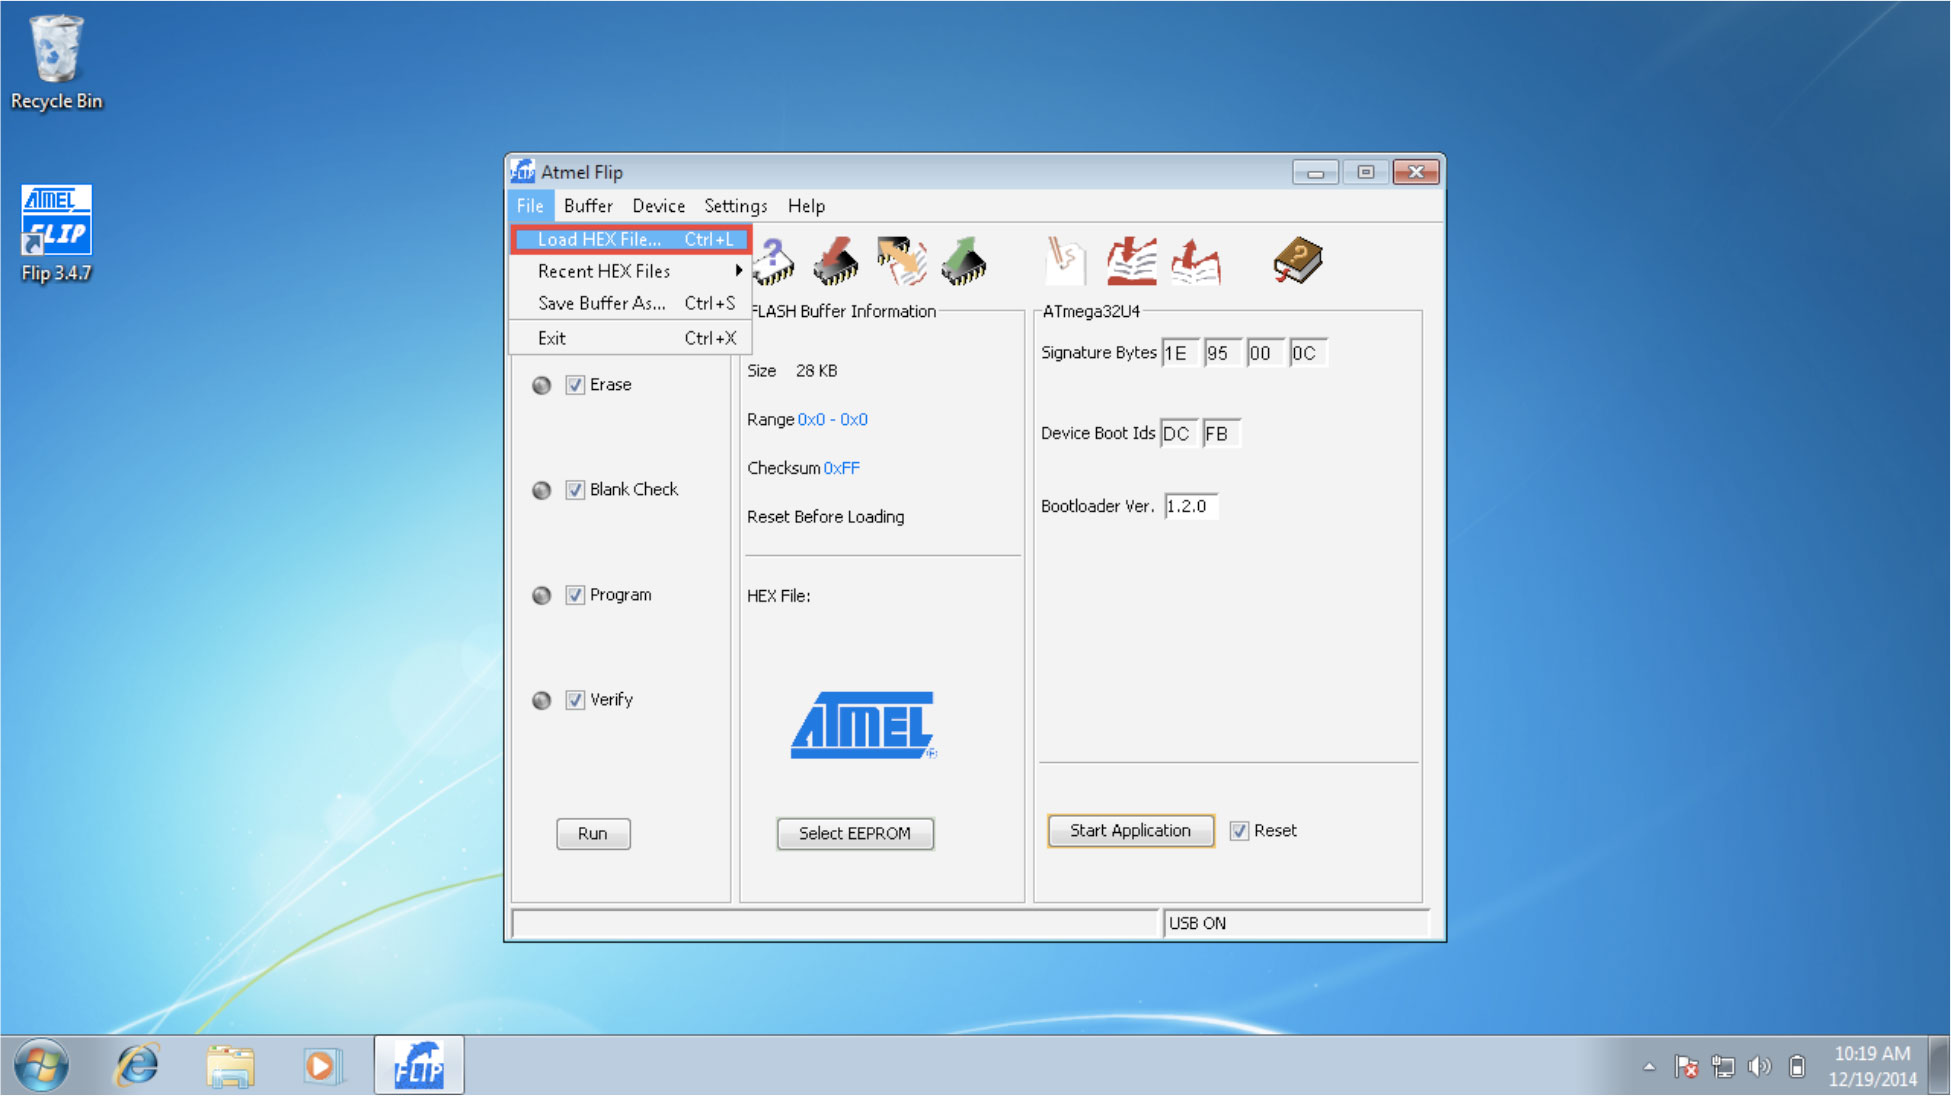
1. Start FLIP software.
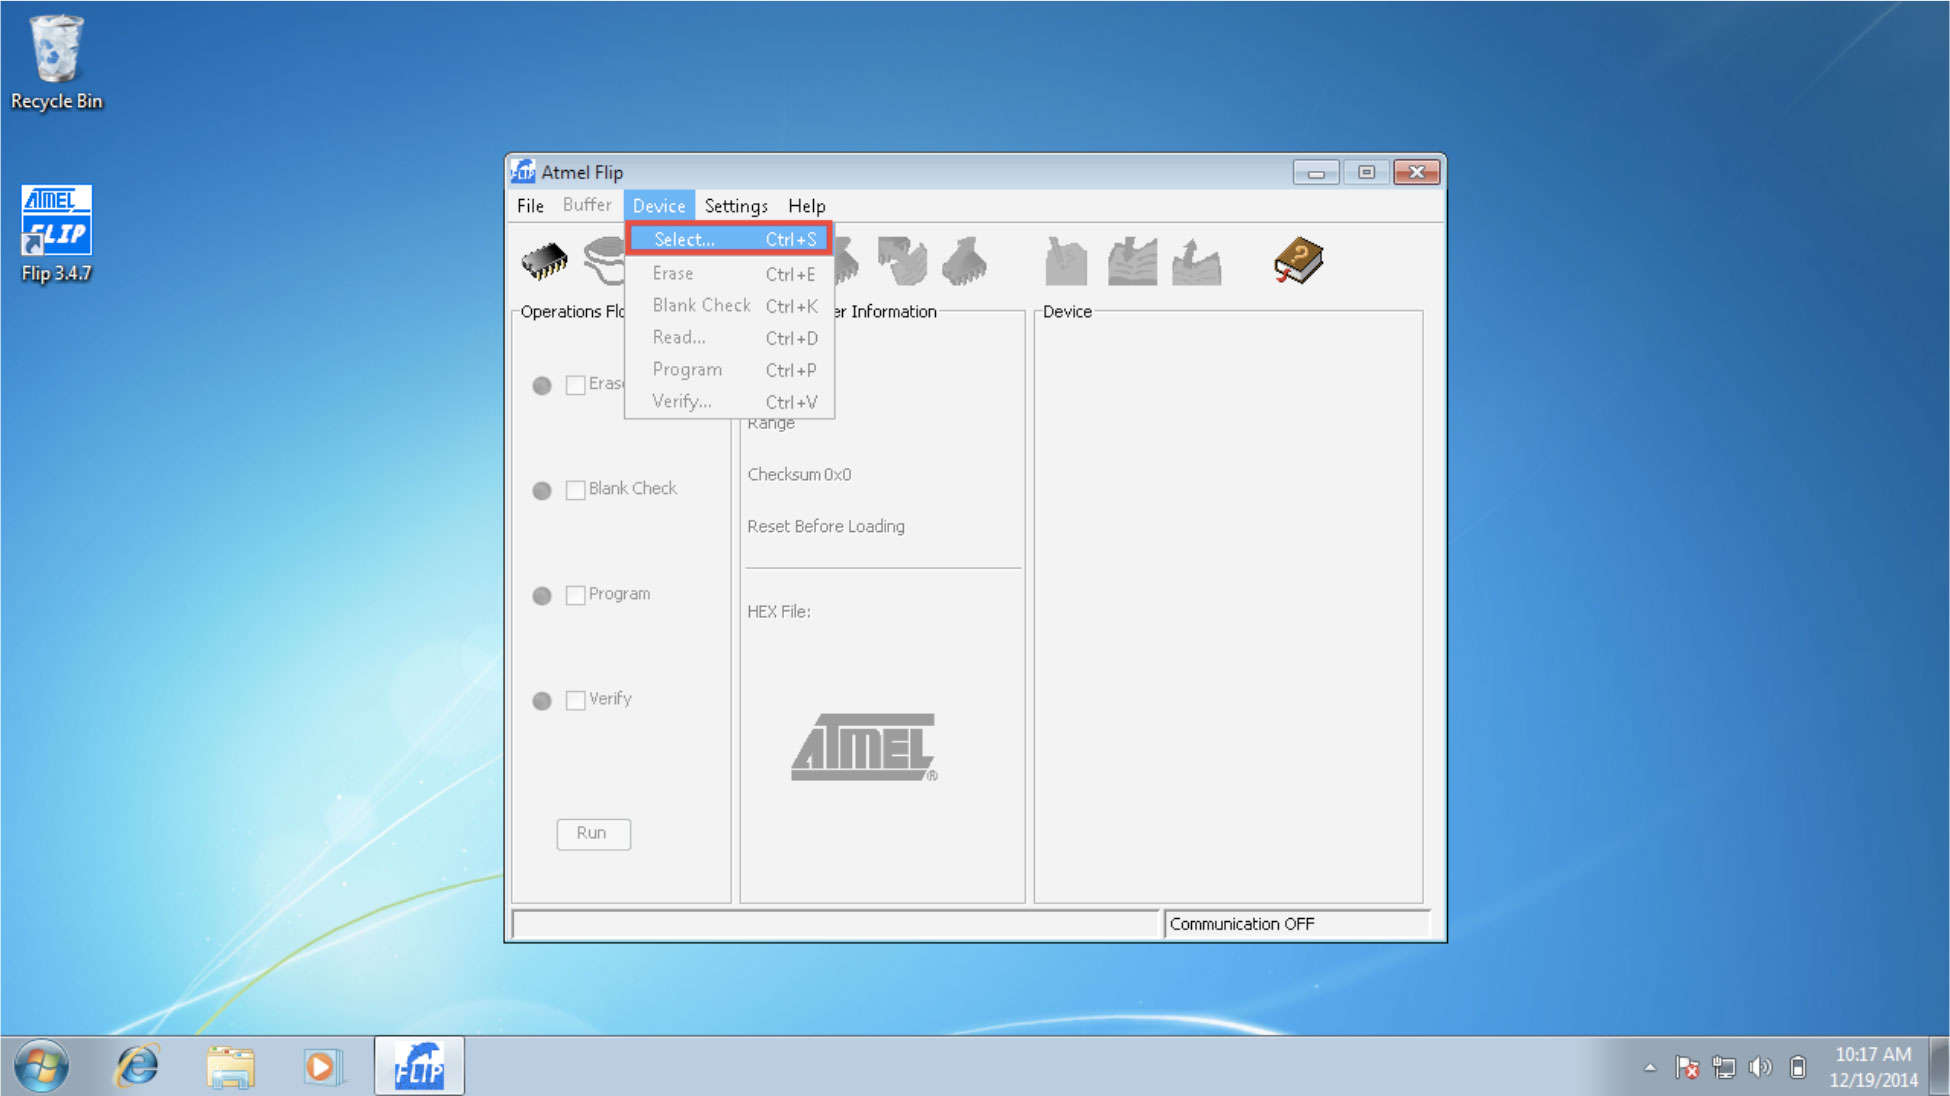
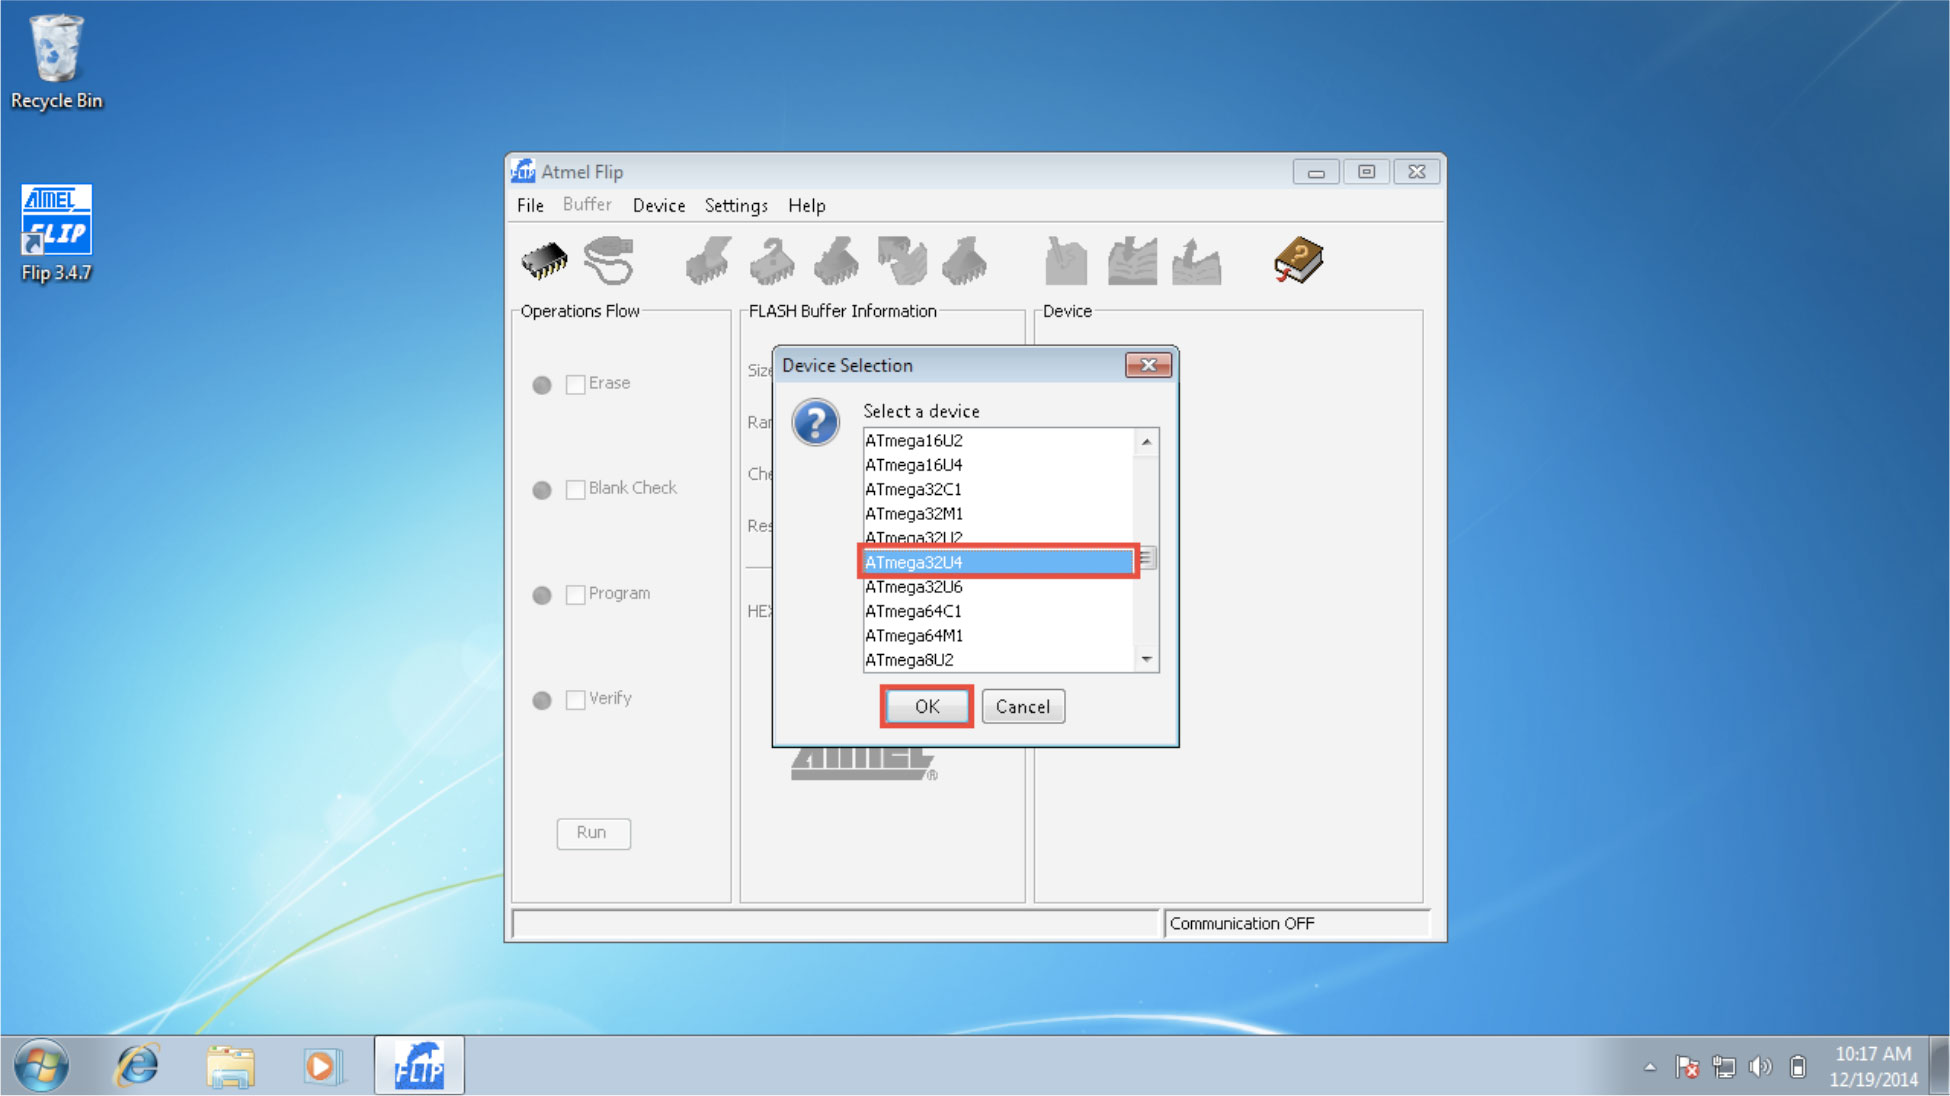
2. Click on ”Device -> Select”. Select ”ATmega32U4” and click on ”OK”.
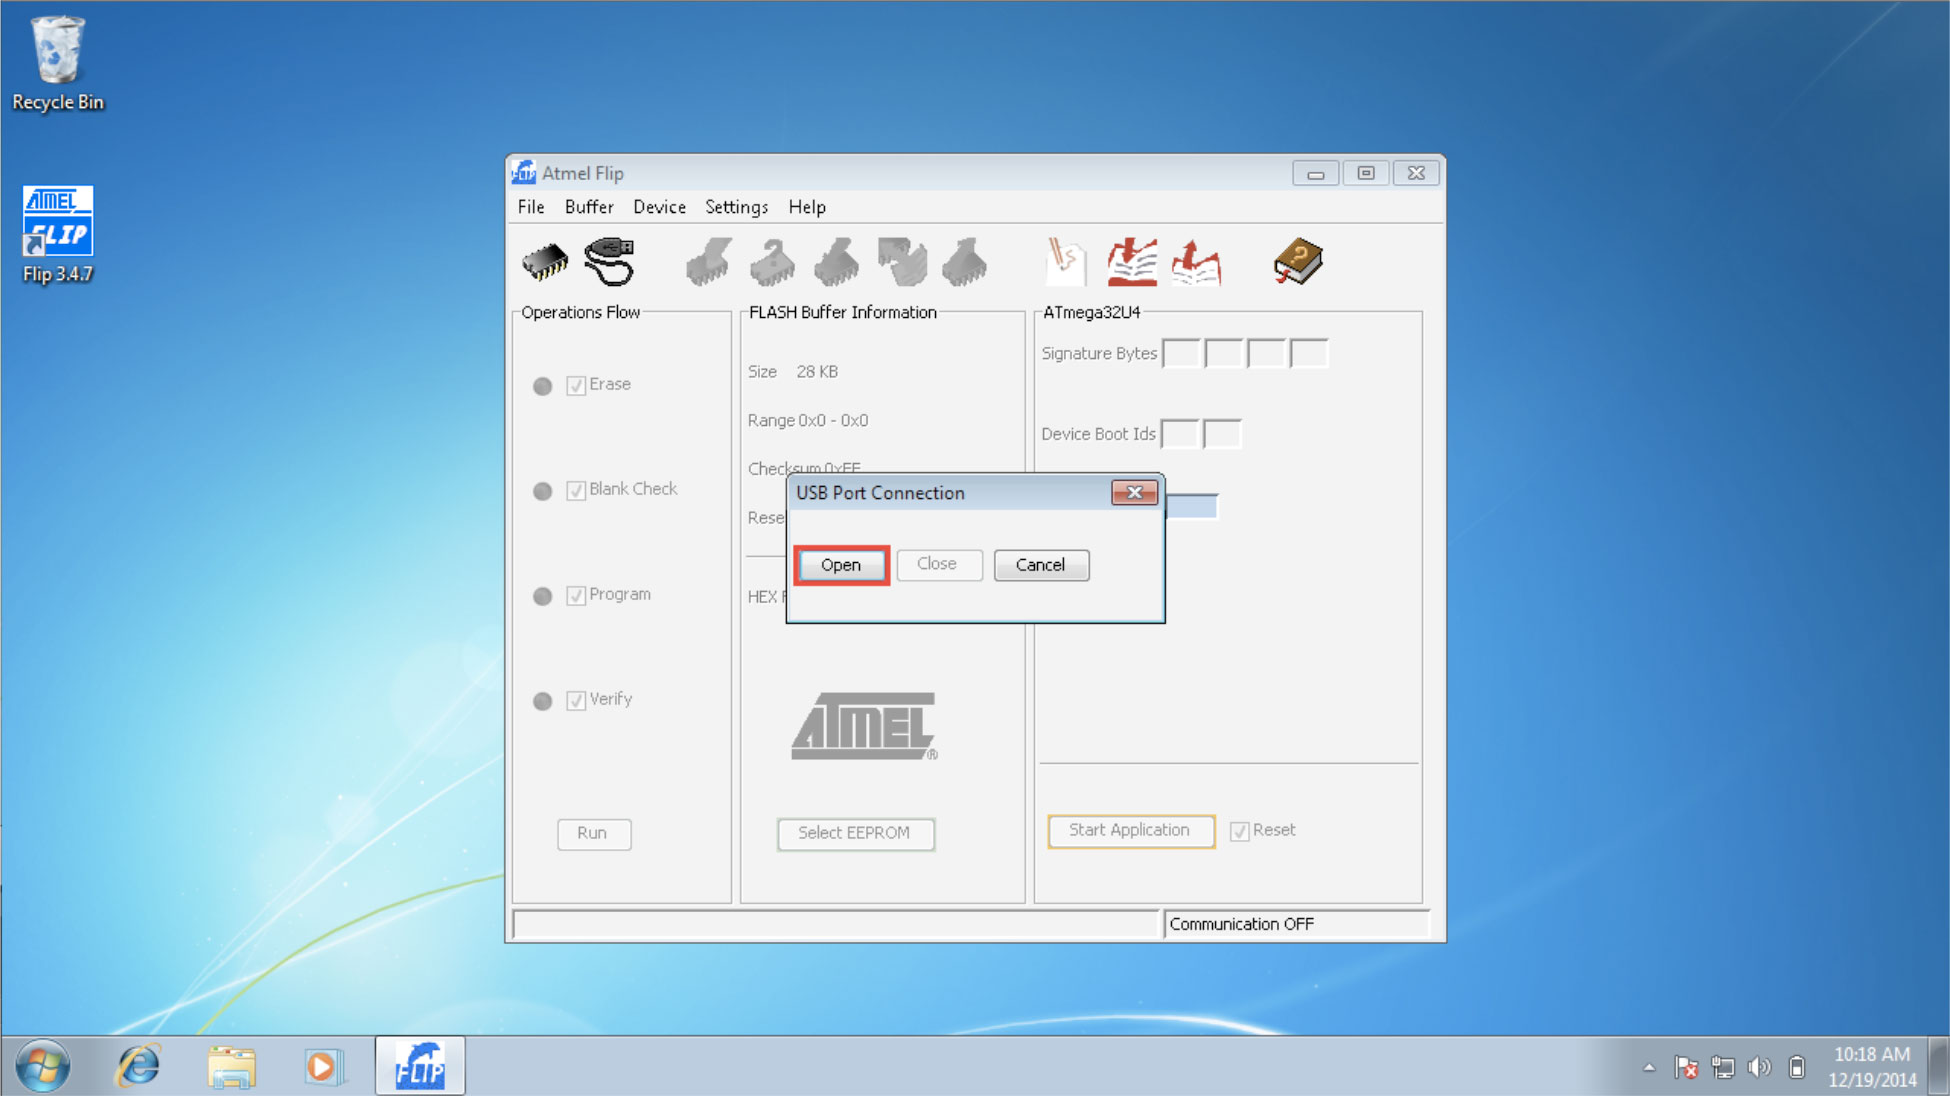
3. Click on ”Settings -> Communication -> USB”. In the new window click on ”Open”.

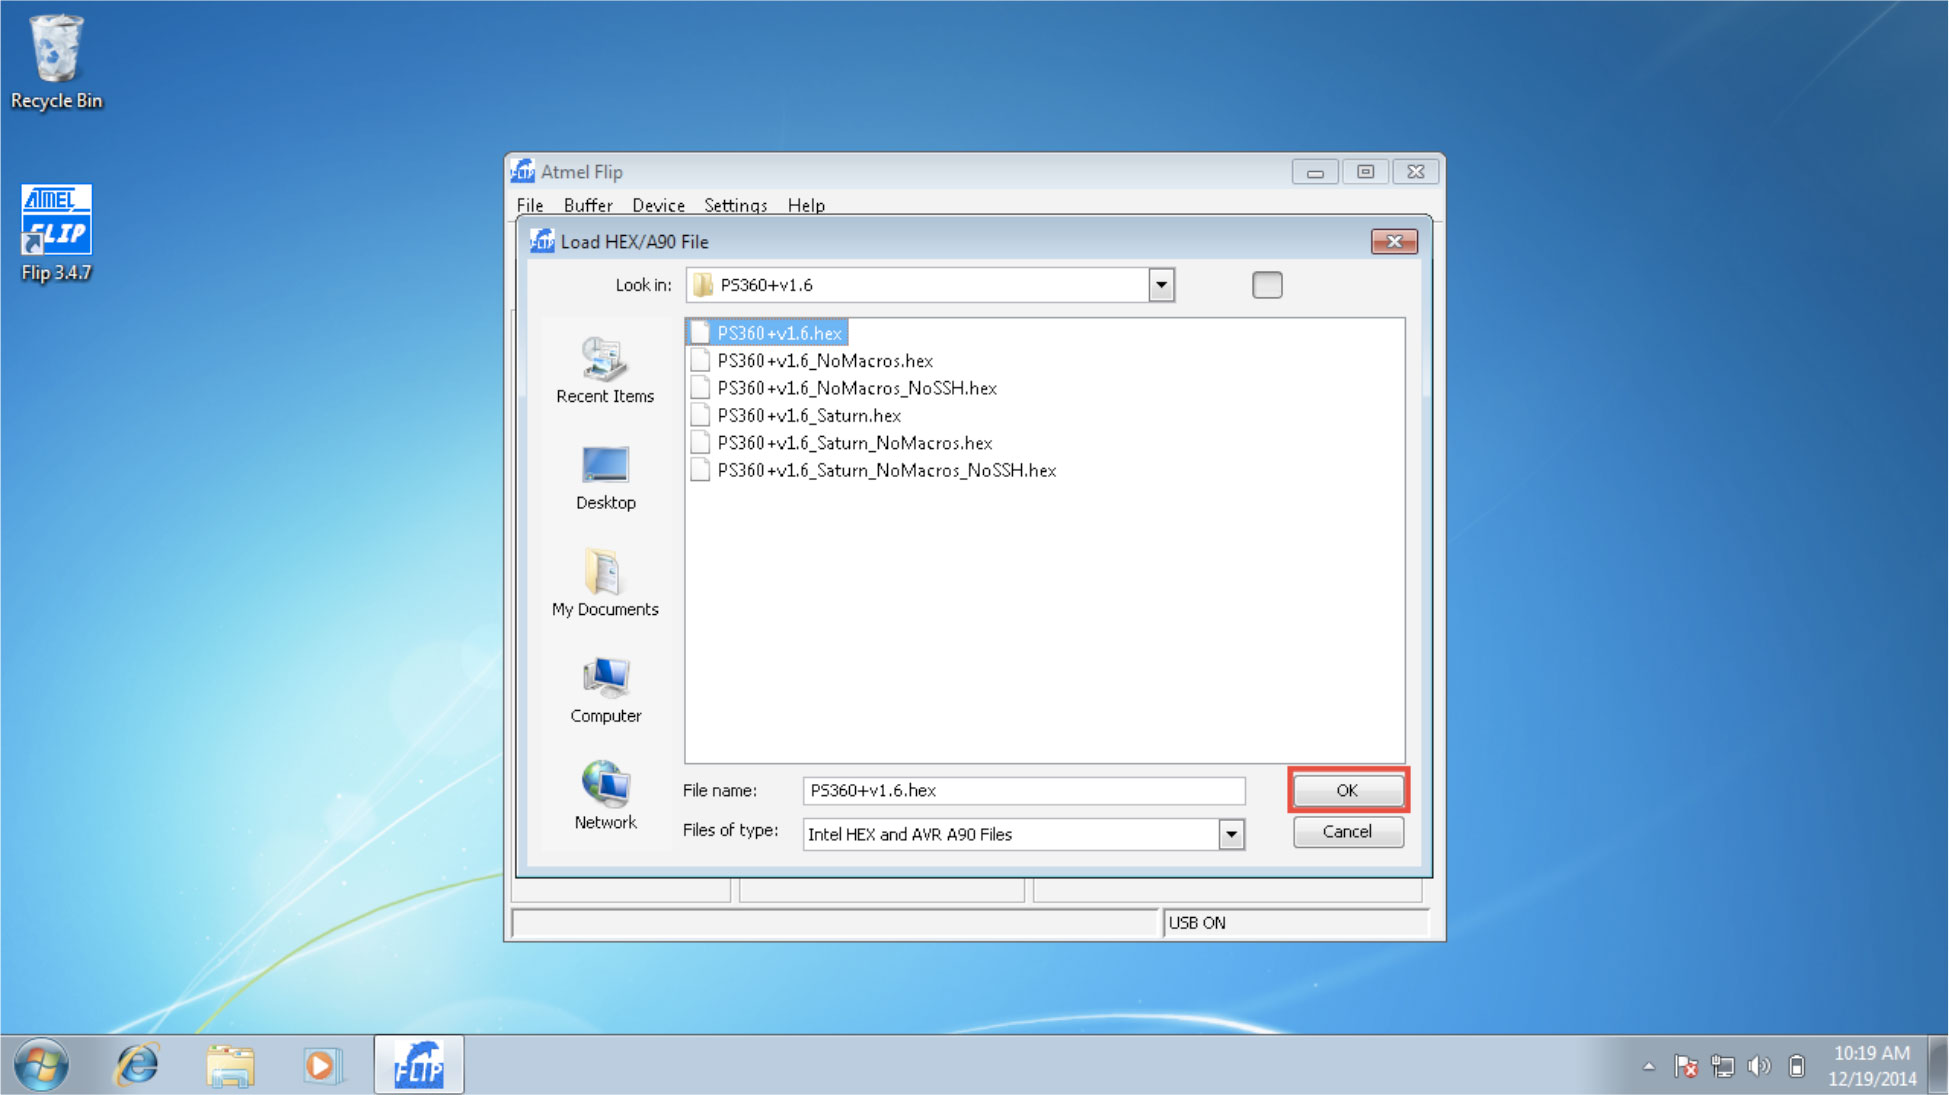
4. Click on ”File -> Load HEX File...”. Find the ”.hex” file you want to update with and click ”OK”.
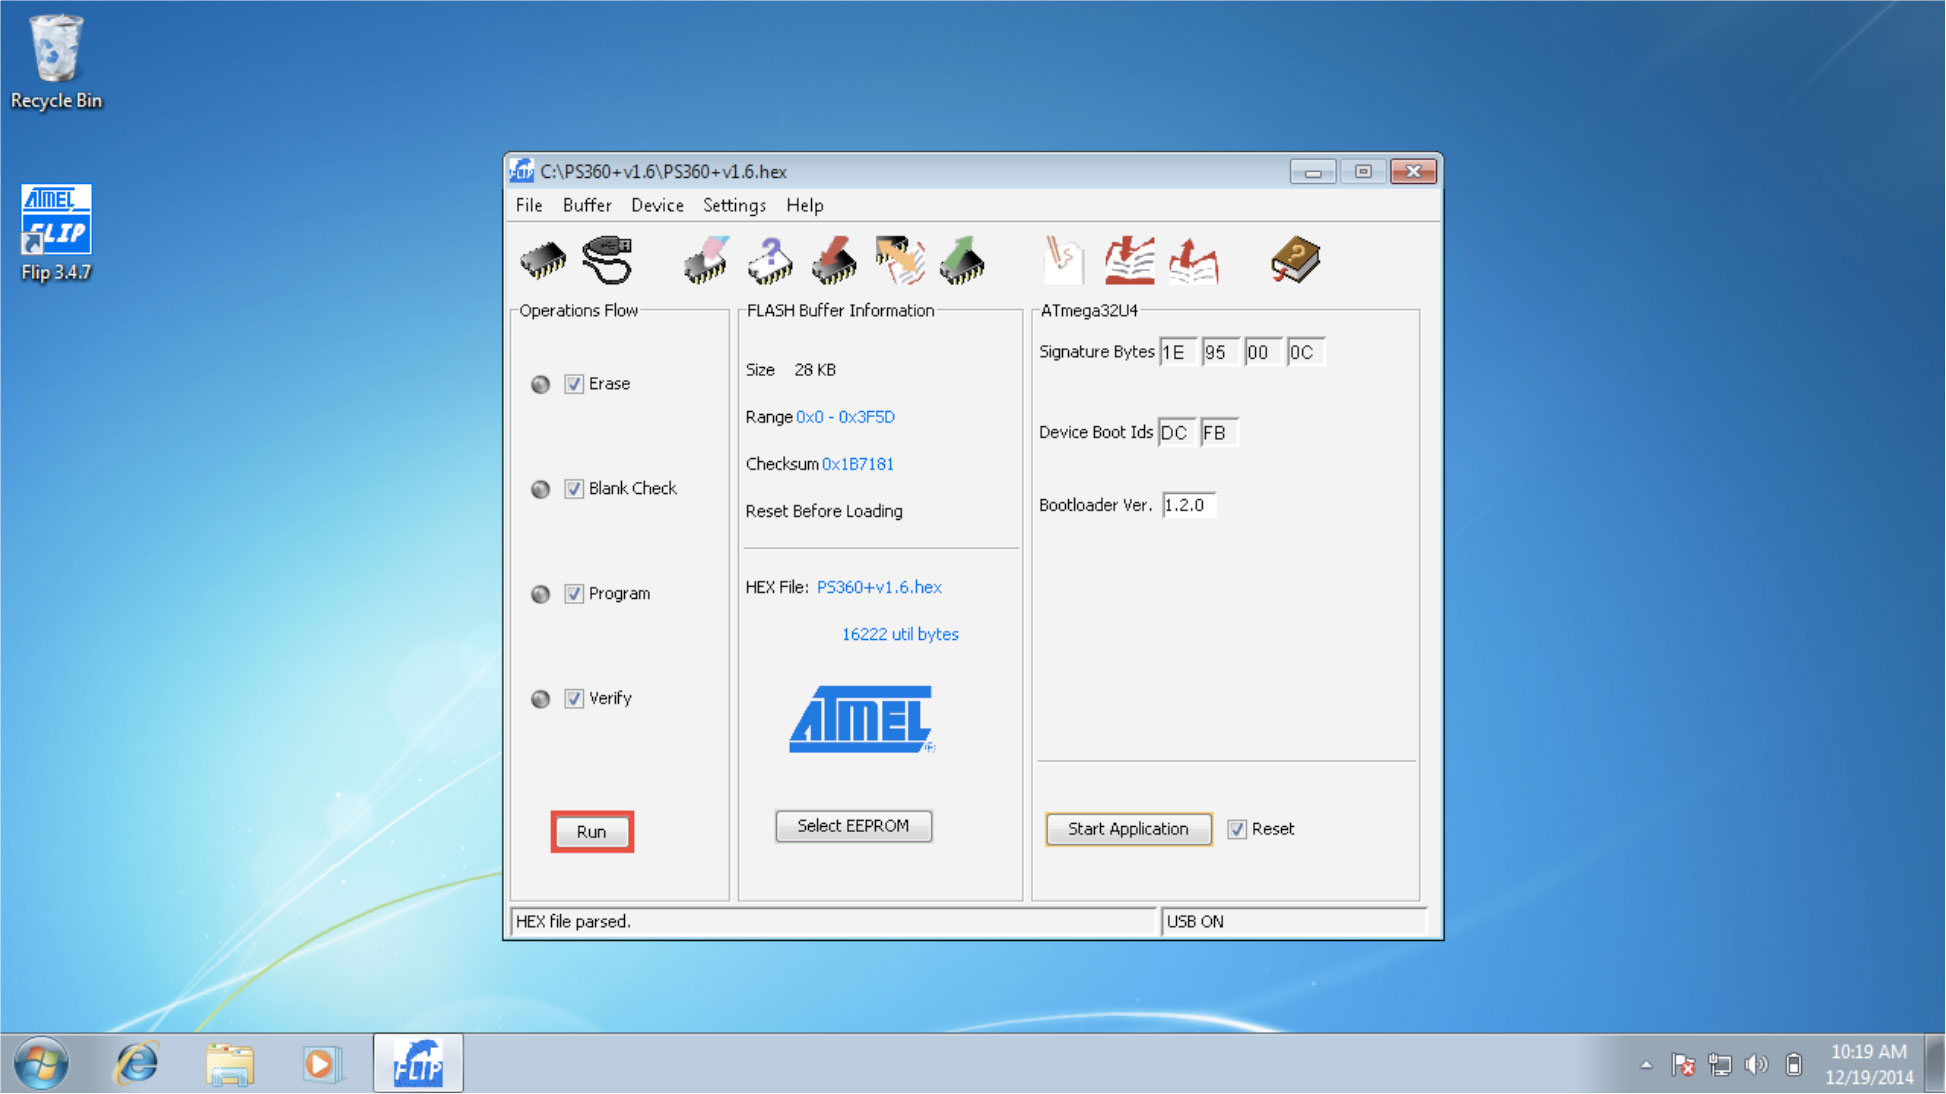
5. Click on ”Run”. Now it will start programming the Atmel chip. After it is done the four round balls to the left will have a green color. DONE.

How to Update - Mac
Pre-Update Procedure (Mac Version)
Before you can update anything on the PS360+ with the Mac you need to install a few things first.
1. Download XCode from the Mac App Store.
2. Download MacPorts: http://www.macports.org/install.php
3. Install XCode.
4. Install MacPorts.
Updating your PS360+ Firmware (Mac Version)
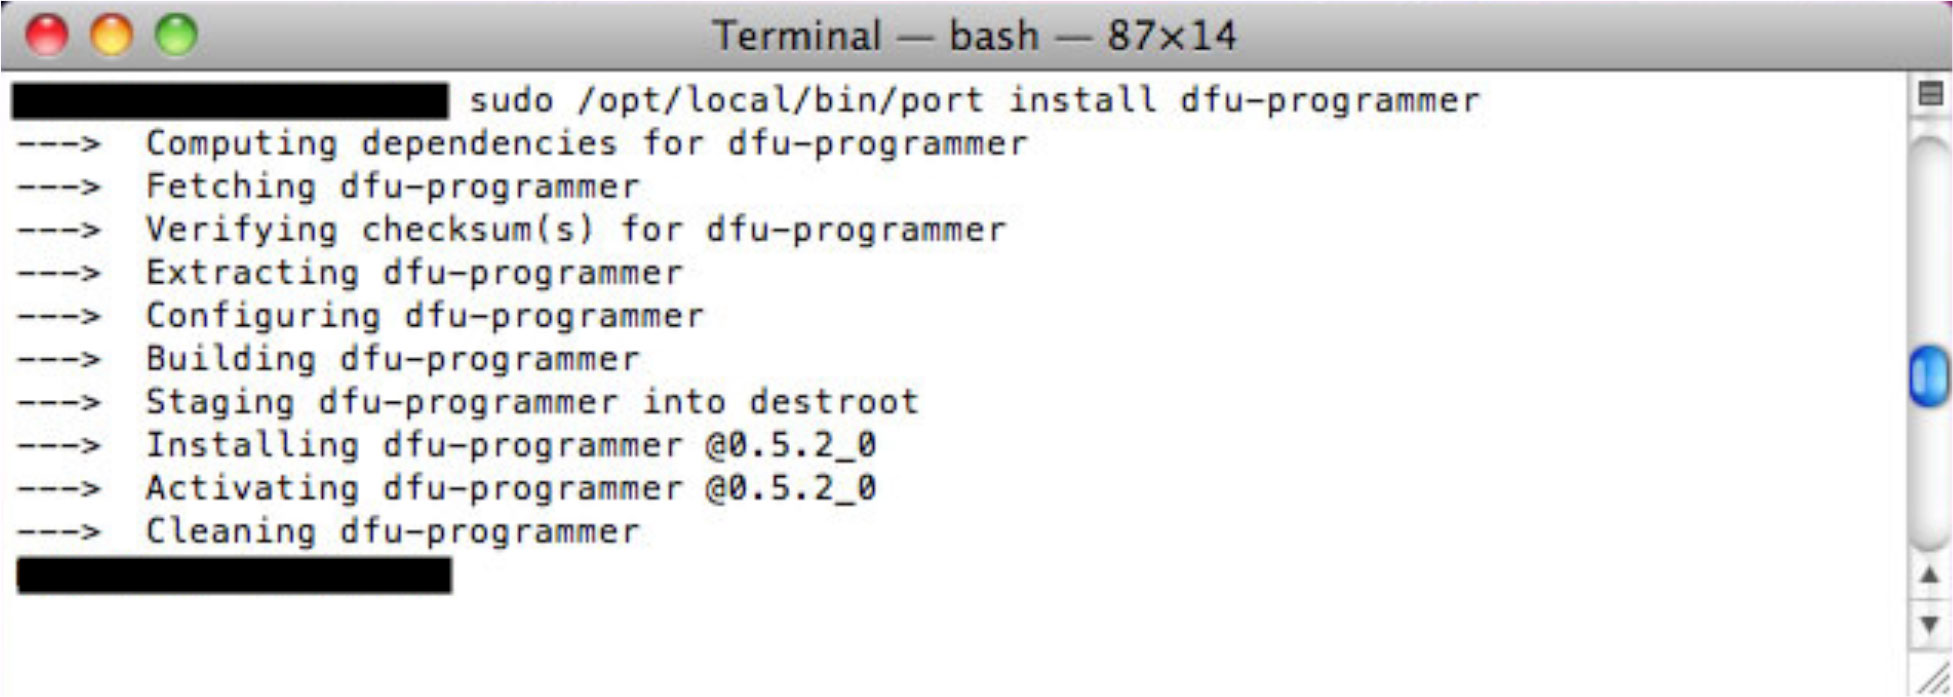
1. Go to the Terminal and write (and afterwards hit enter):
sudo /opt/local/bin/port install dfu-programmer
Now the programmer should get installed and you should see around 10 rows with text.
2. Restart the Terminal.
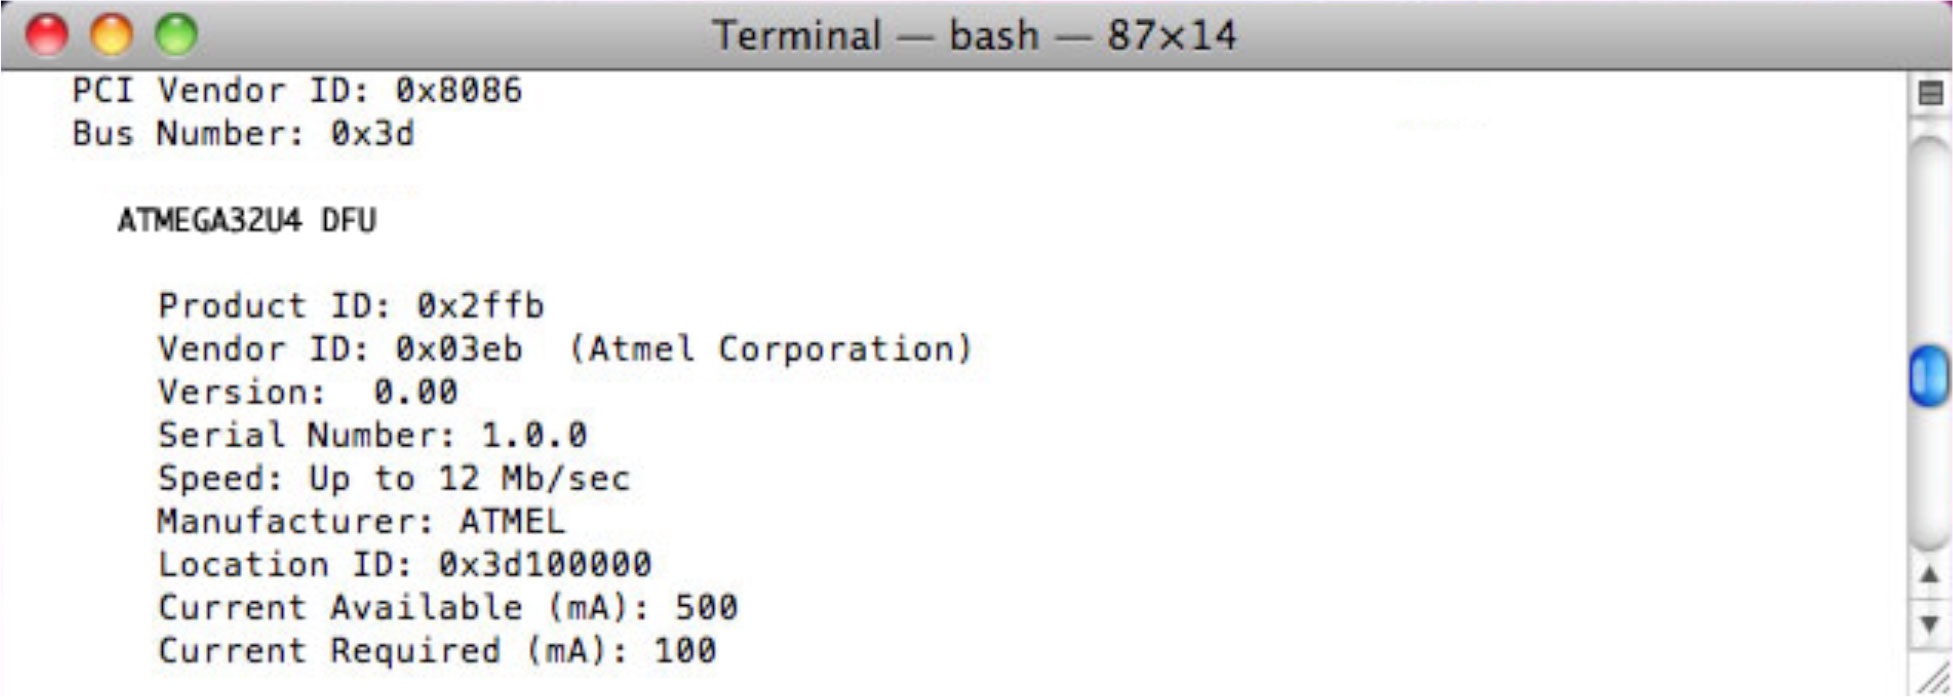
3. Put PS360+ in Bootloader Mode by inserting the USB cable with Start held down. You can check so it is correct by writing in the Terminal (and afterwards hit enter):
system_profiler SPUSBDataType
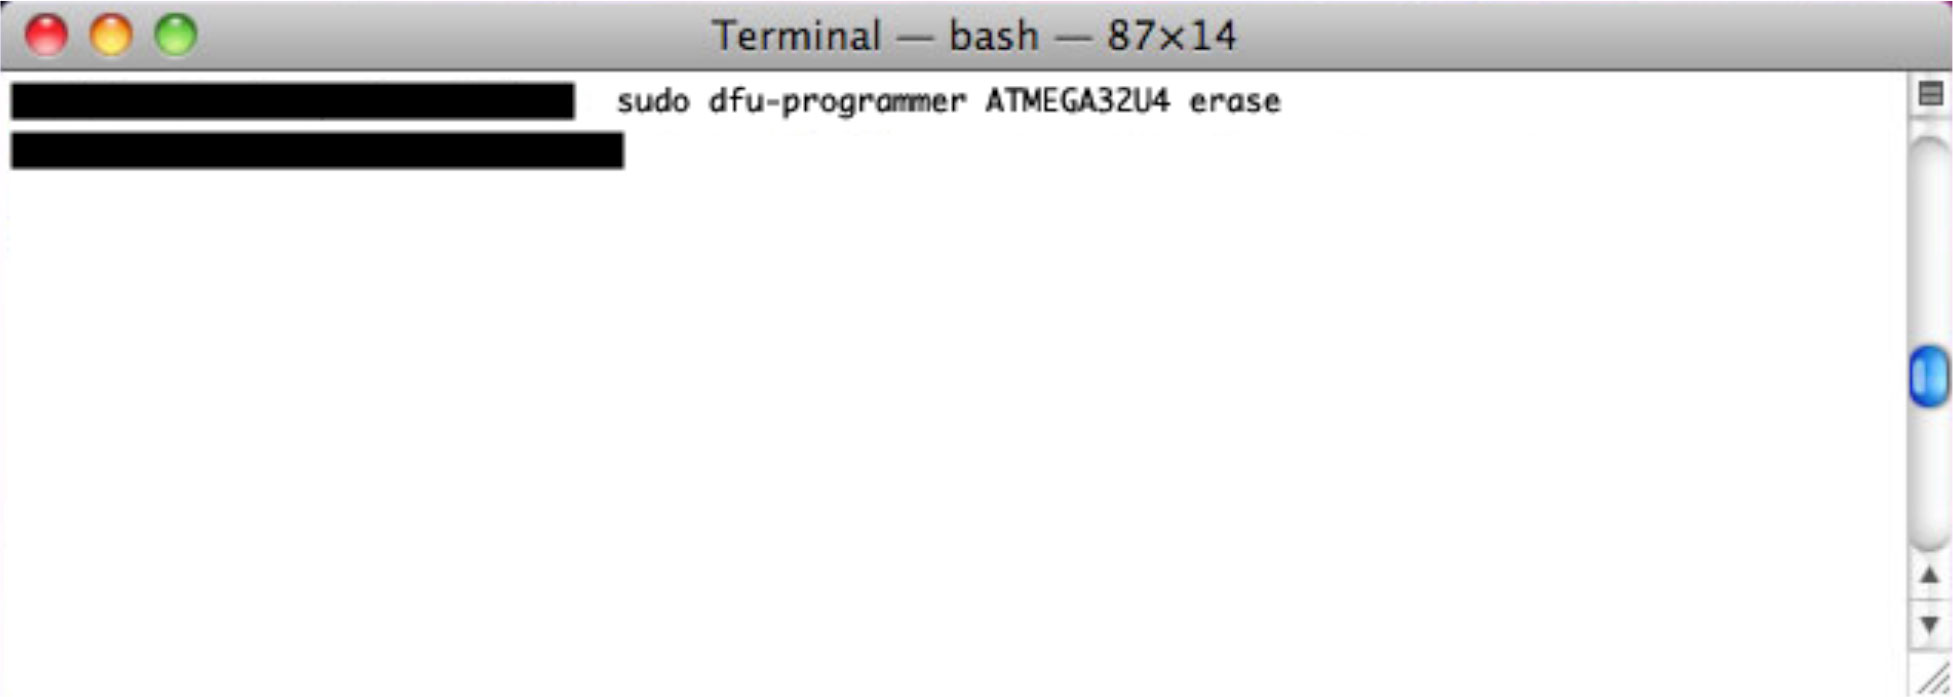
4. Erase the PS360+:
Write in the Terminal (and afterwards hit enter):
sudo dfu-programmer atmega32u4 erase
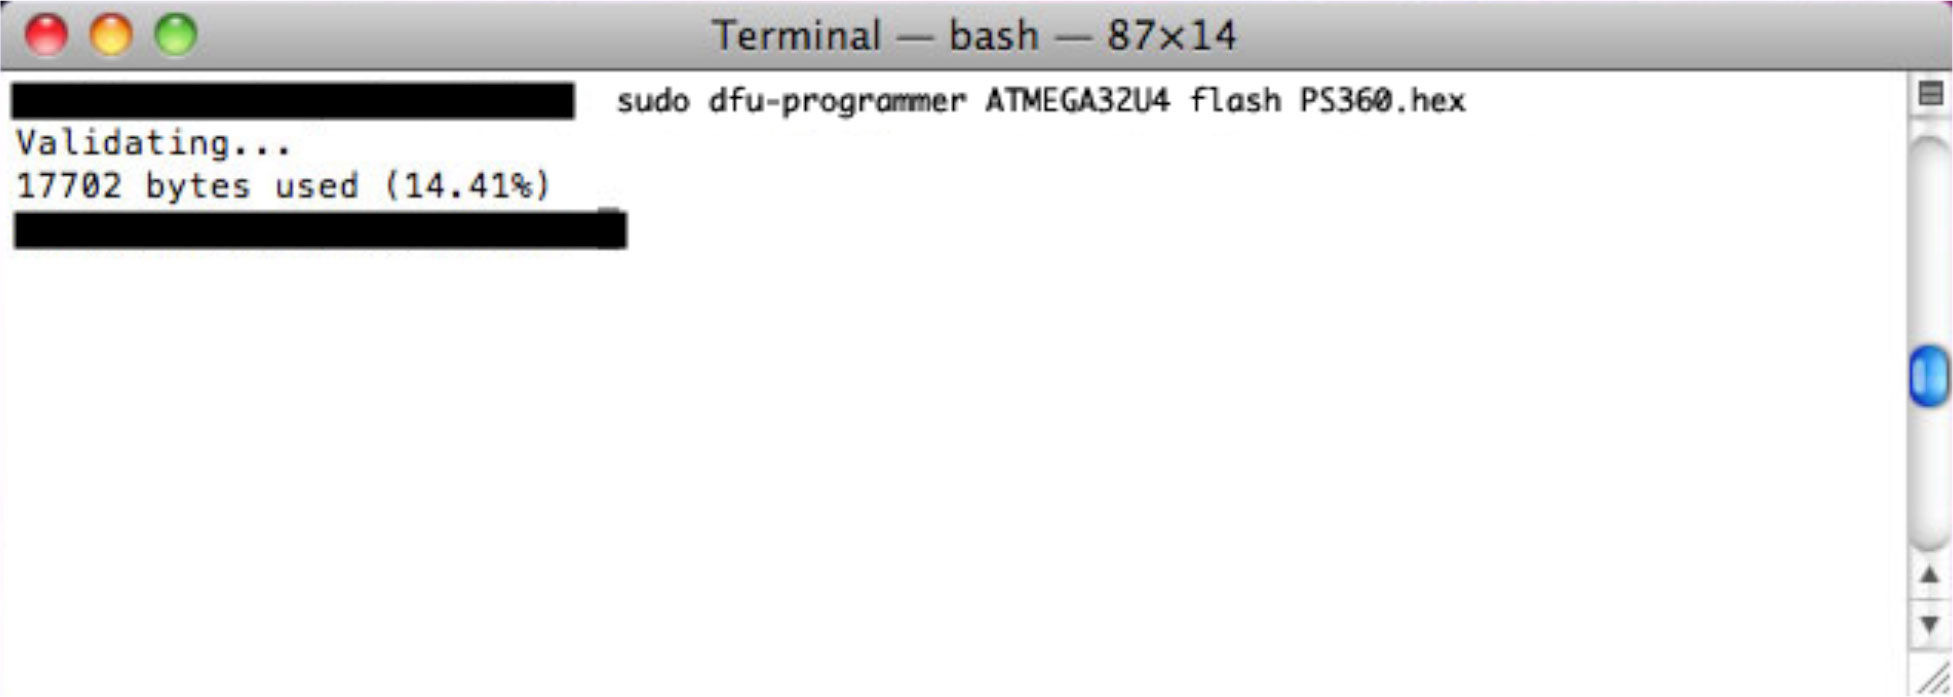
5. Flash the PS360+:
Write in the Terminal (and afterwards hit enter):
sudo dfu-programmer atmega32u4 flash “name of file”.hex
(Do not include the quotation marks when you write the name of your file)
DONE.
How to Update - Linux
Updating your PS360+ Firmware (Ubuntu Version)
Linux (Ubuntu v9.10 or higher)
(The reason this tutorial uses "Ubuntu v9.10 or higher" is because it supports the most recent build of the dfu-programmer which is what we want).
1. Download DFU-Programmer: http://dfu-programmer.sourceforge.net/ Extract the file to the desktop.
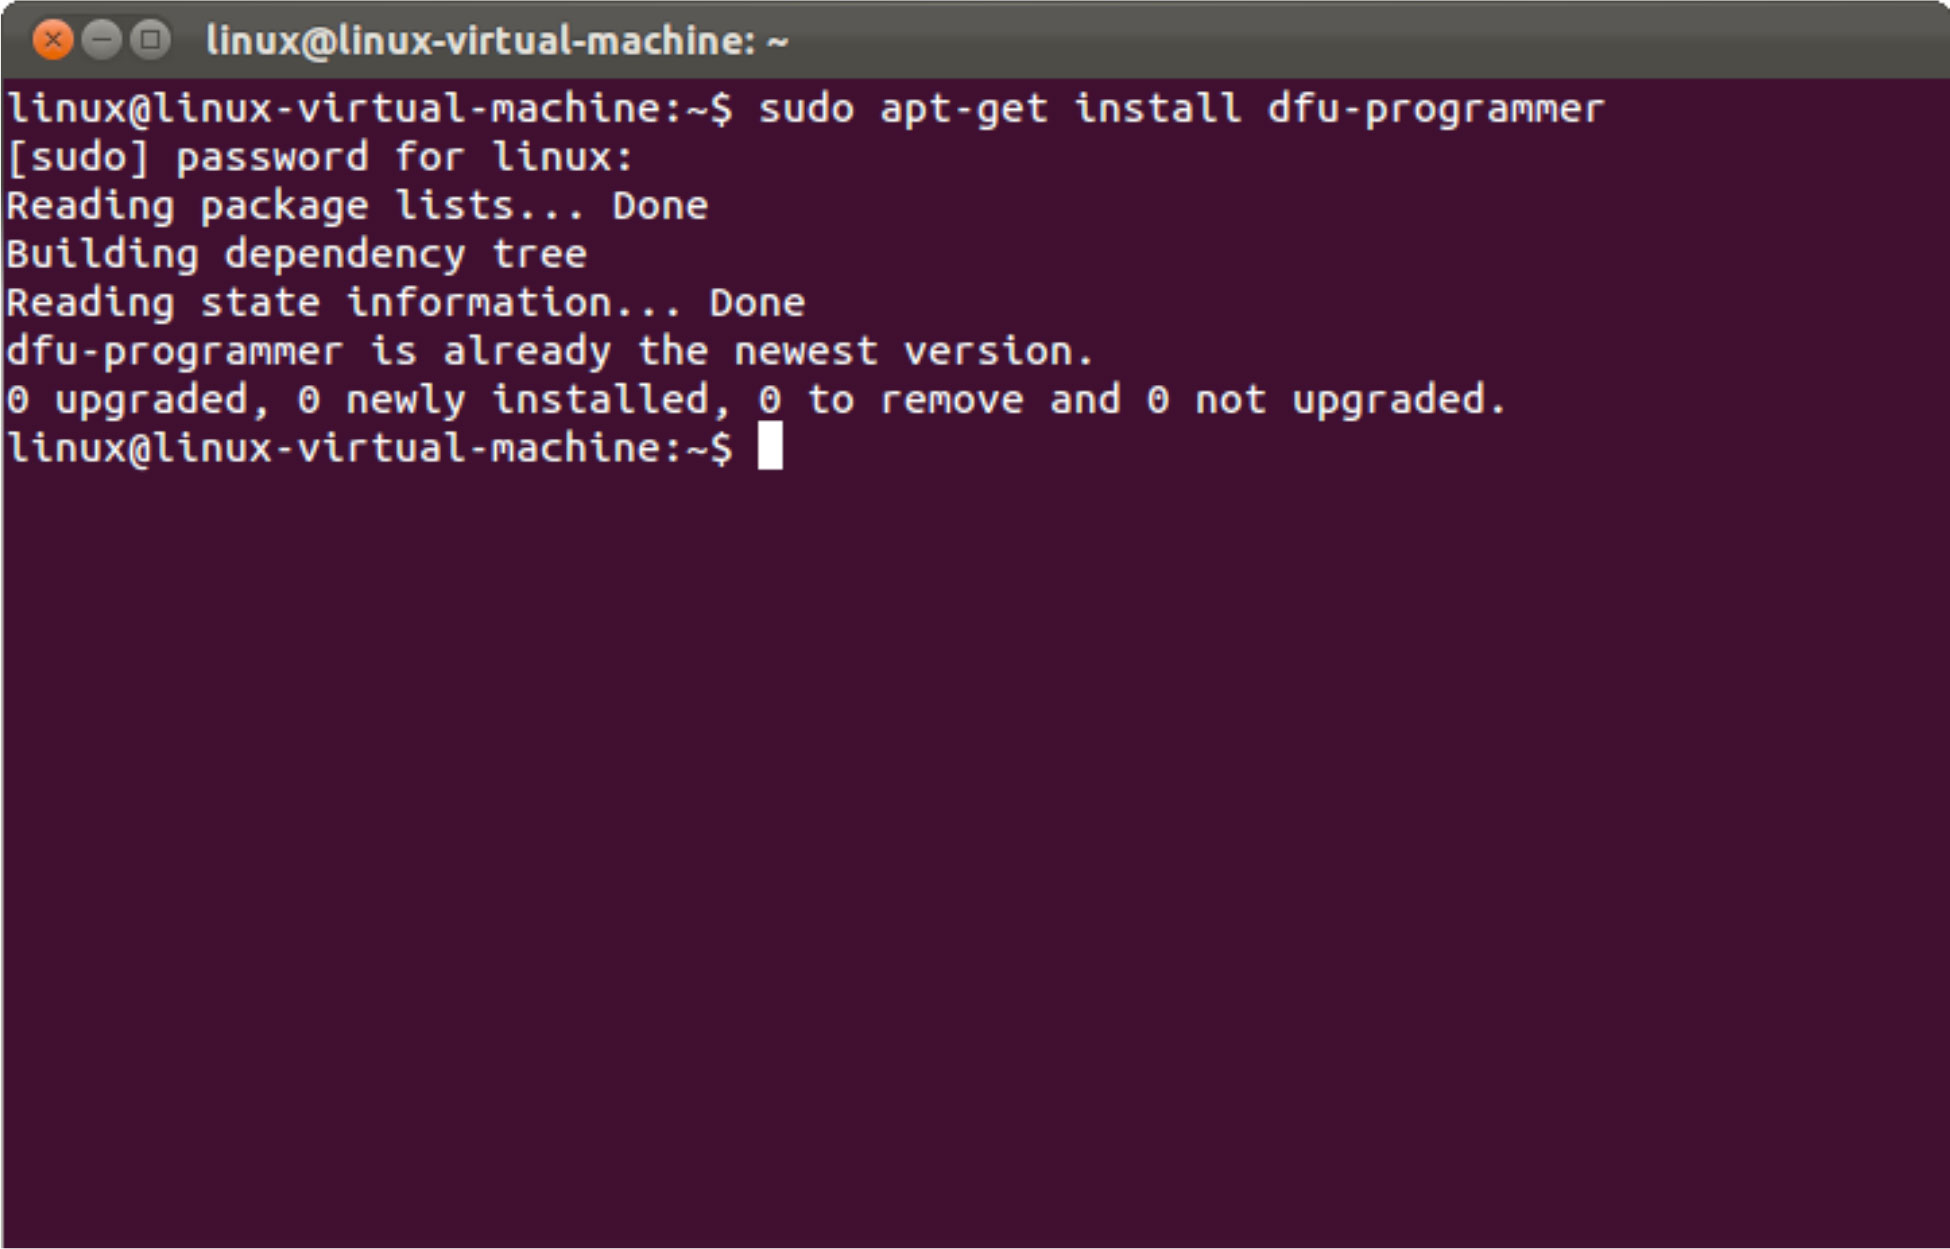
2. Start the terminal by clicking: Ctrl + Alt + T.
3. Write: sudo apt-get install dfu-programmer and hit enter. Enter password also (if it asks for it) and hit enter again.
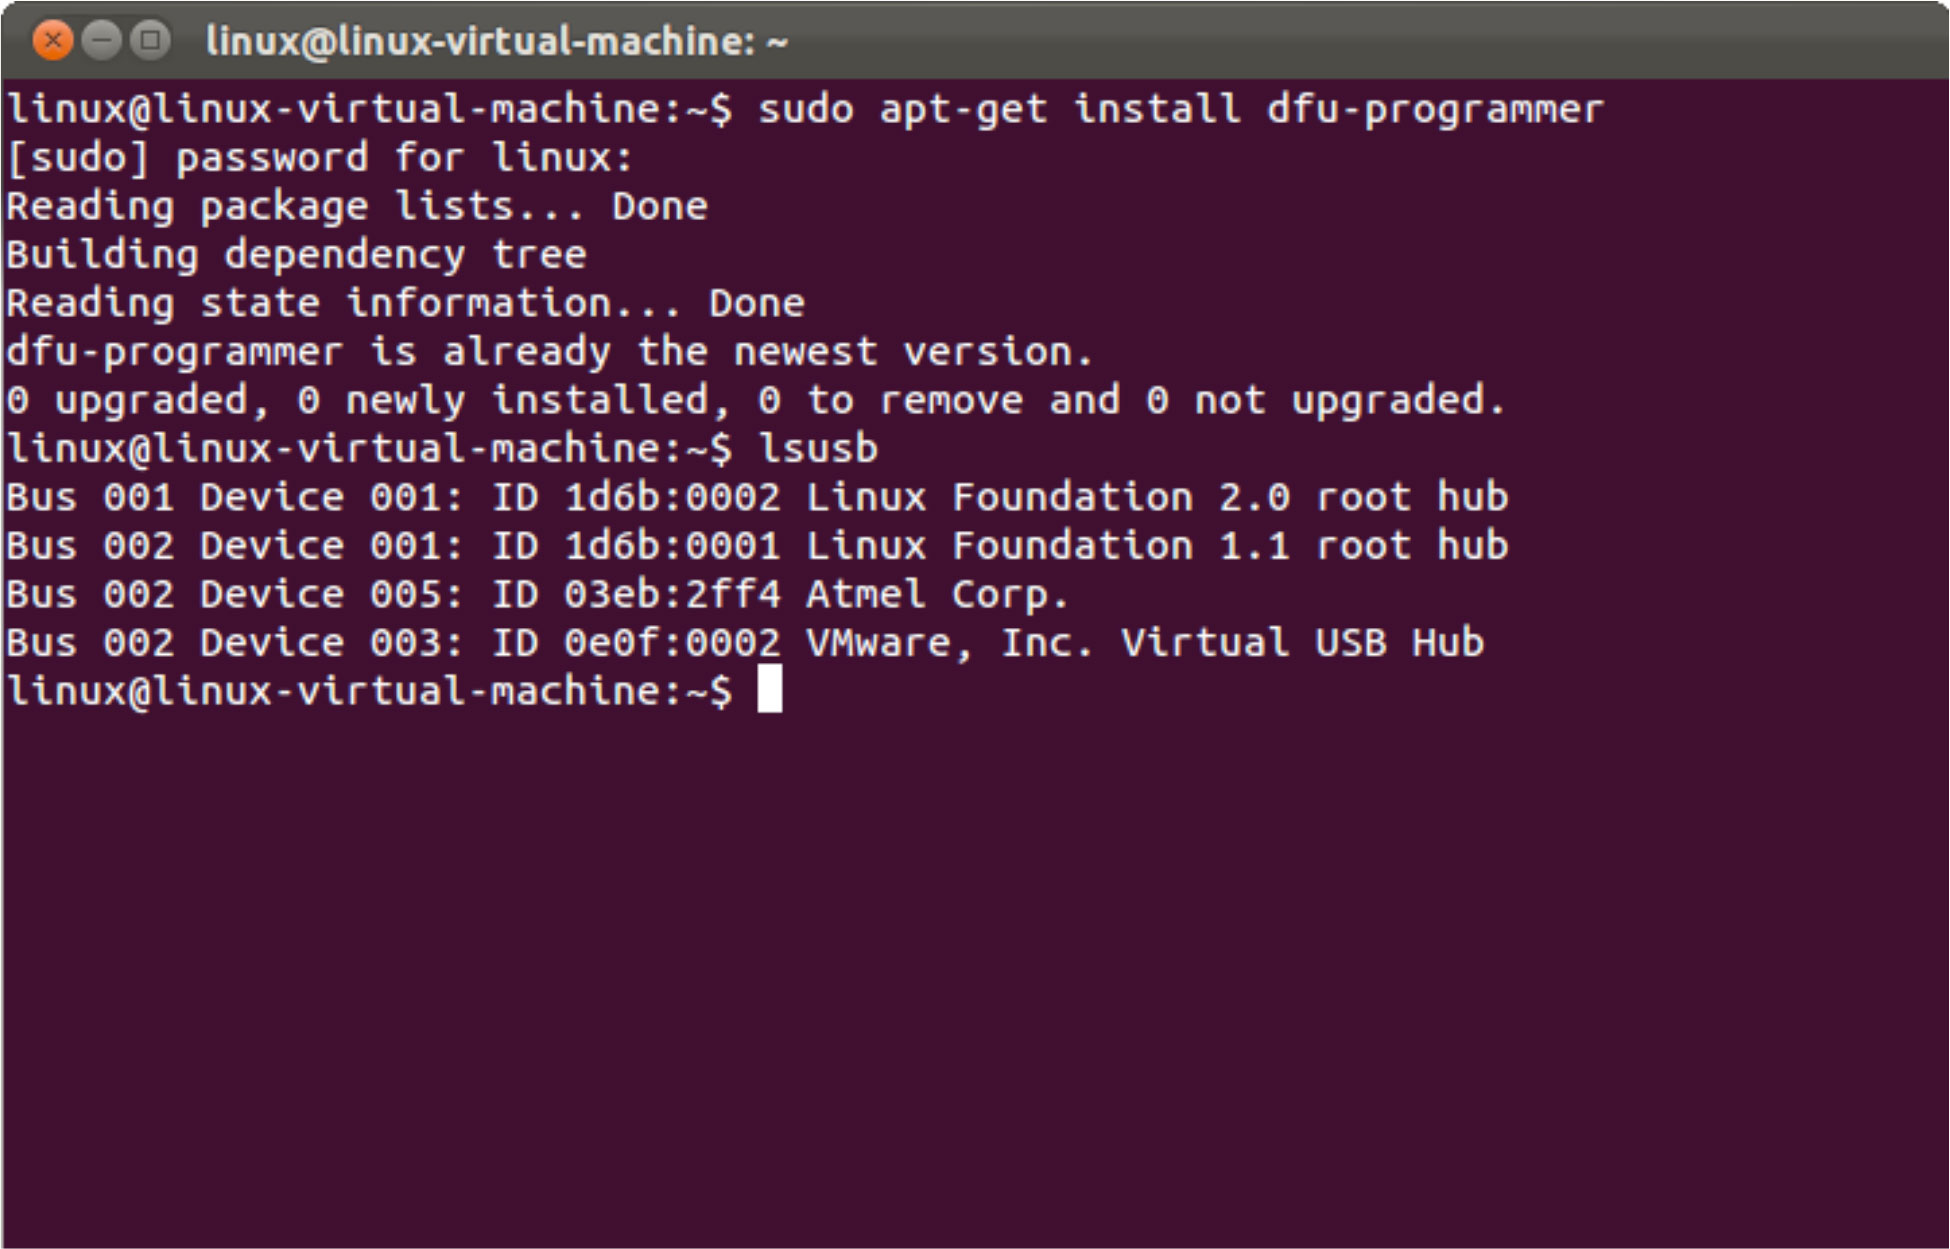
4. Hold down the start button on PS360+ and connect the USB cable.
To make sure it recognizes the PS360+ in bootloader mode go to the Terminal and type: lsusb
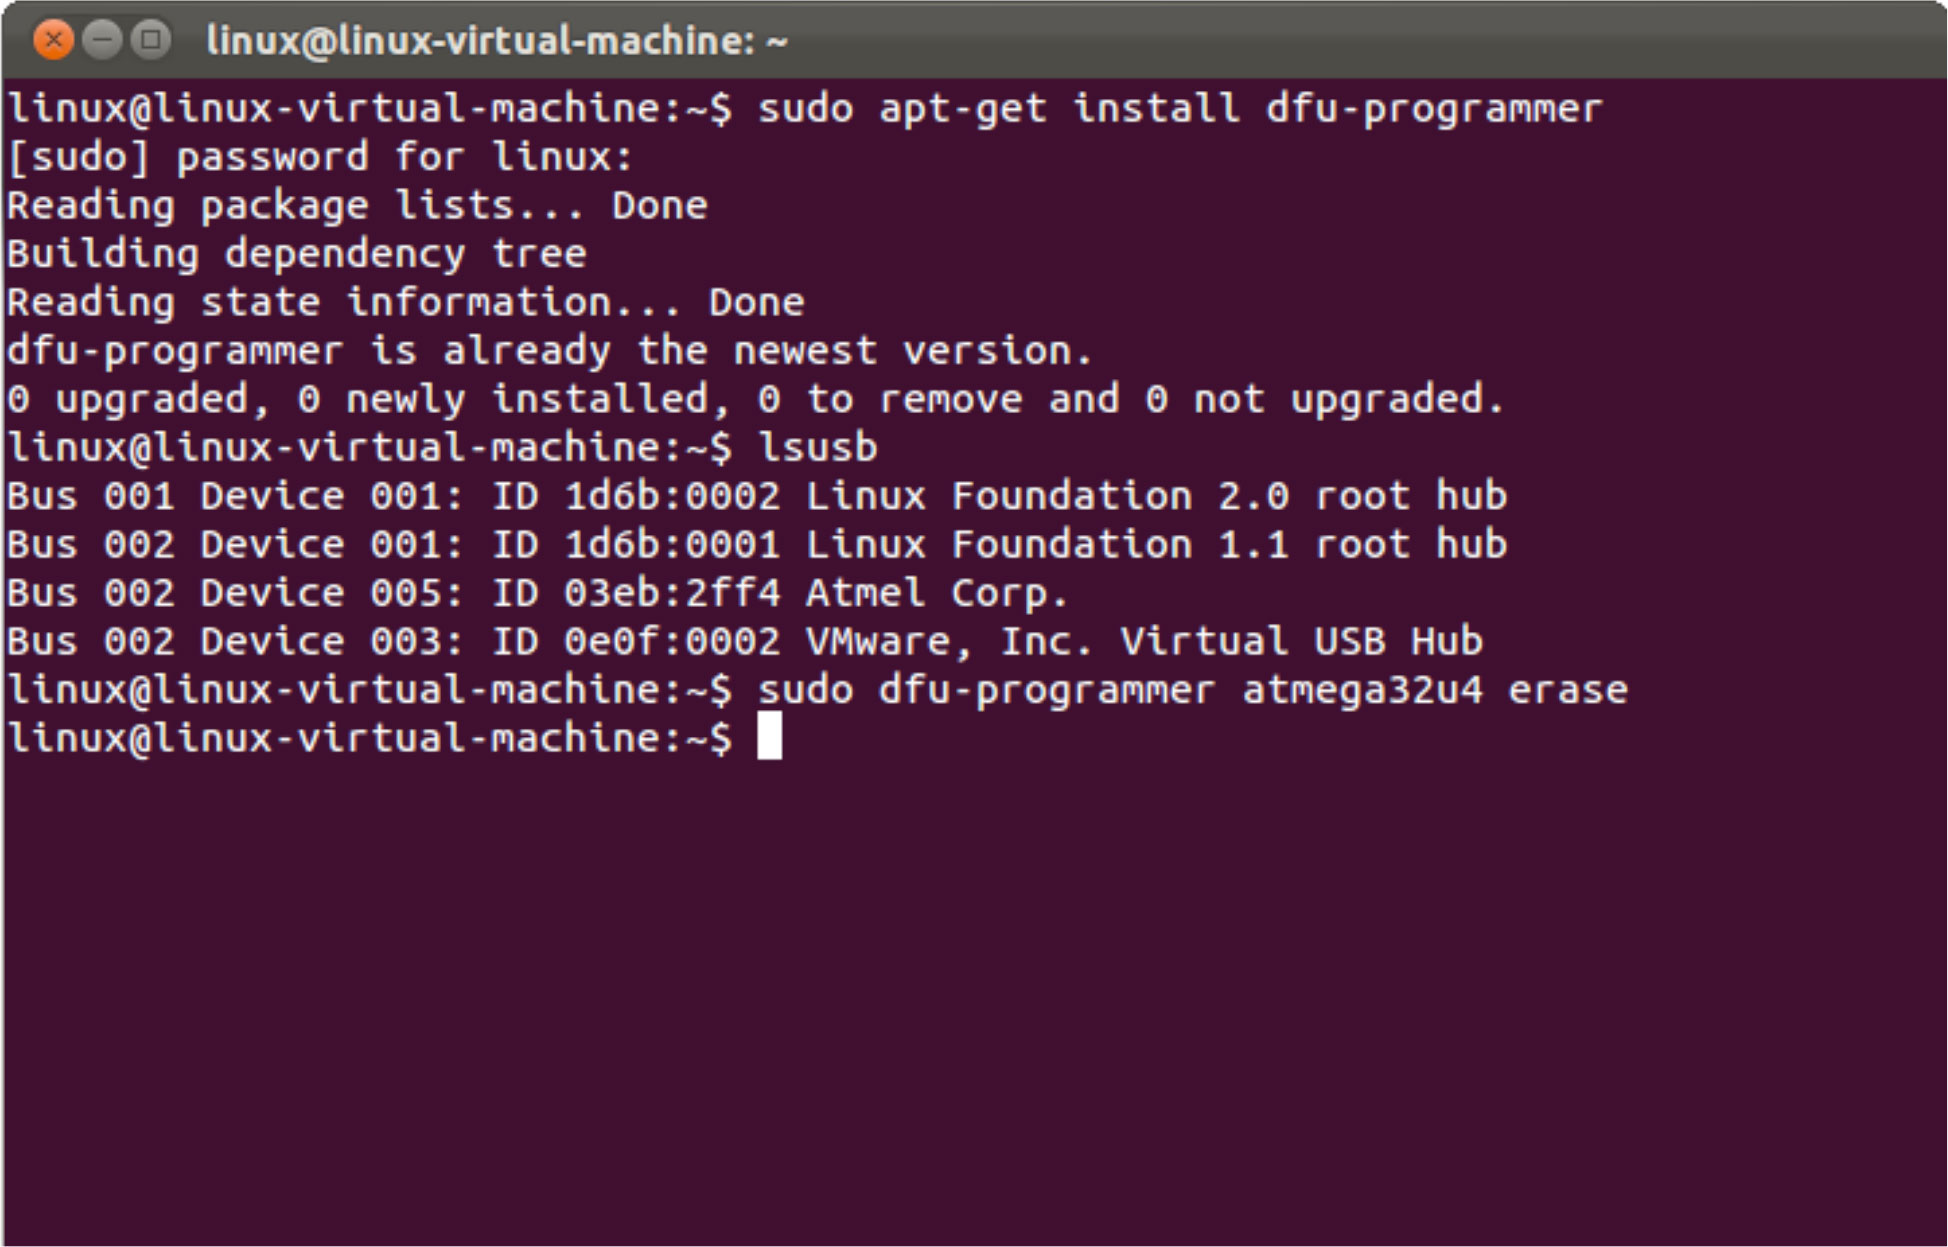
5. Erase the PS360+ first by typing this in the Terminal:
sudo dfu-programmer atmega32u4 erase
6. Flash the PS360+ by typing this in the Terminal:
sudo dfu-programmer atmega32u4 flash ” name of file”.hex
(Do not include the quotation marks when you write the name of your file)
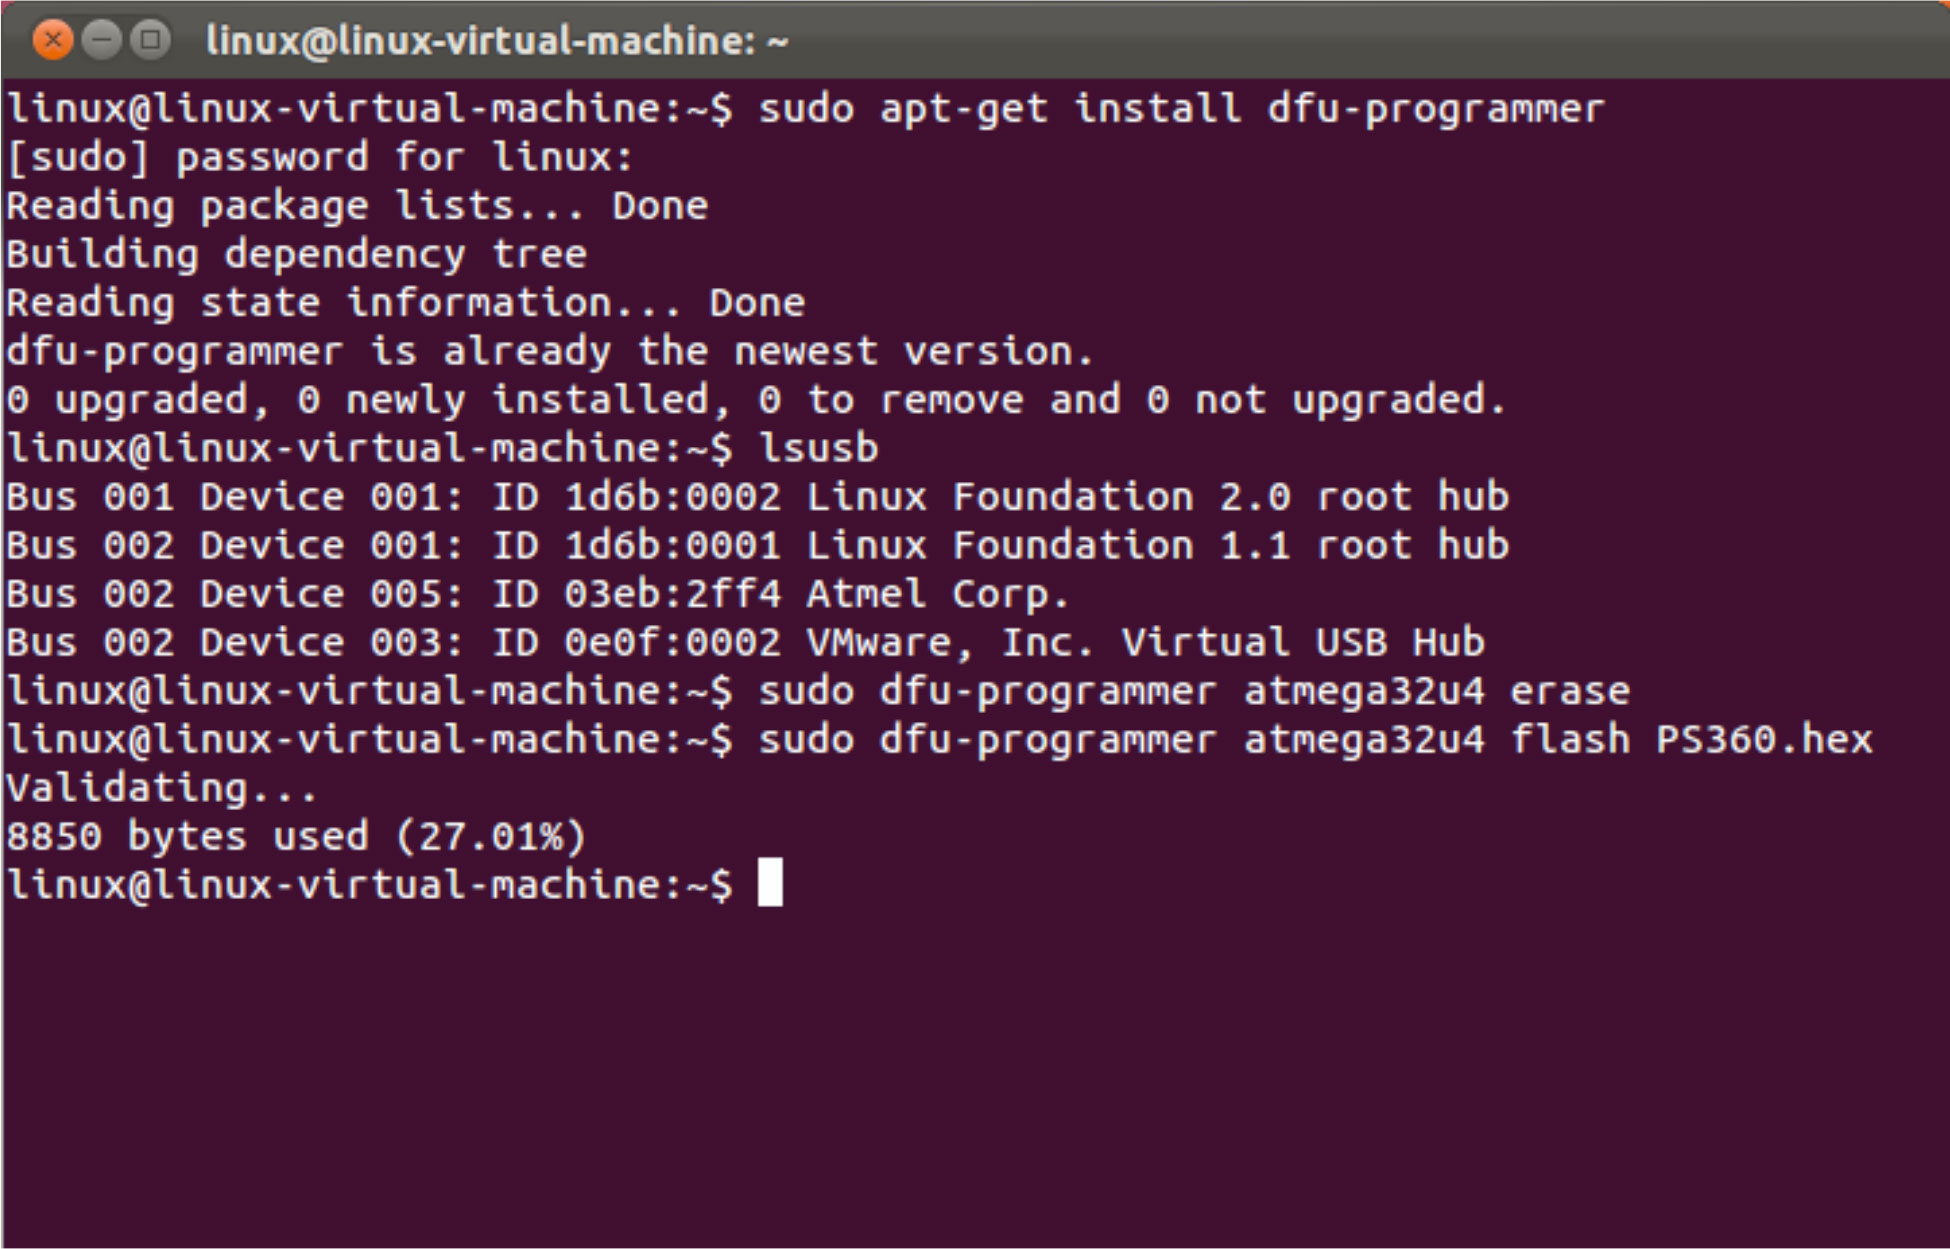
Remember to have the hex file in the Home folder otherwise it will not find it.
7. Done.
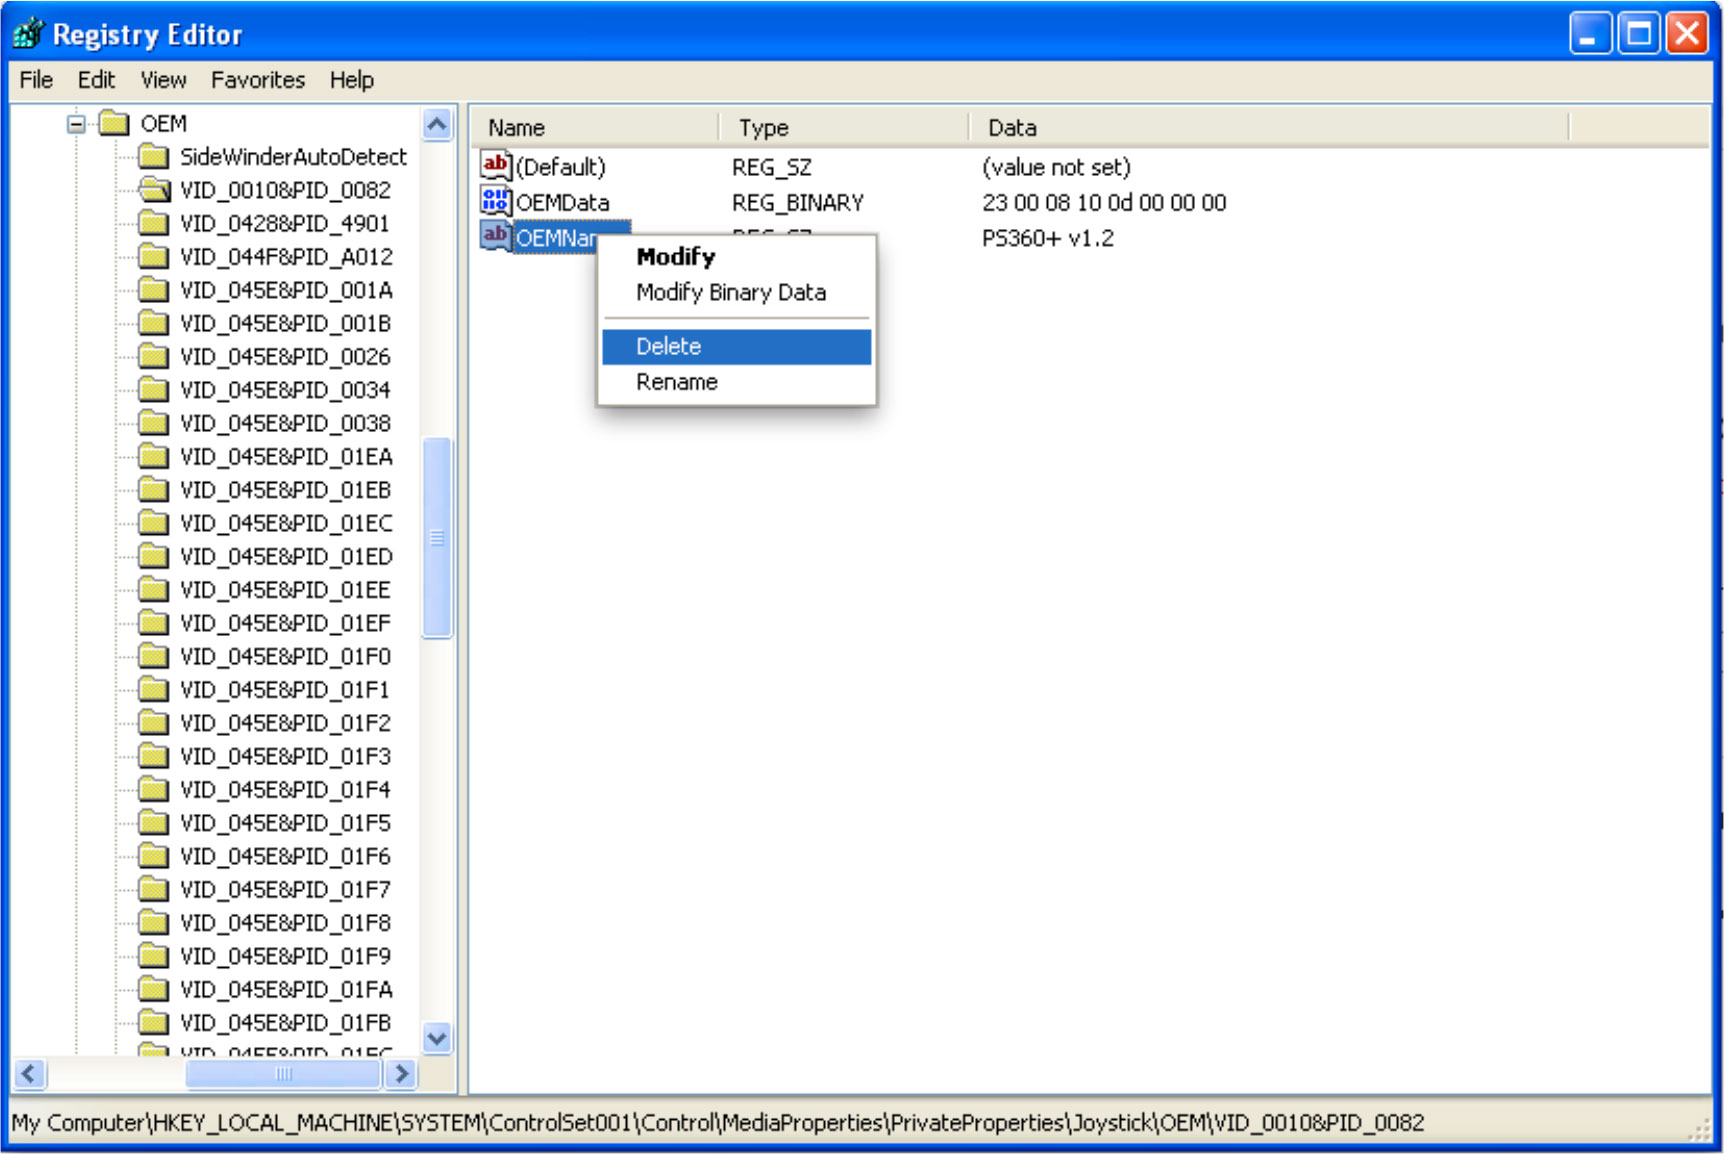
Update Discriptor Name
Since the update 1.23.hex for PS360+ it is now possible to see the correct descriptor name on for example Windows, but before it is possible you need to follow this simple guide:
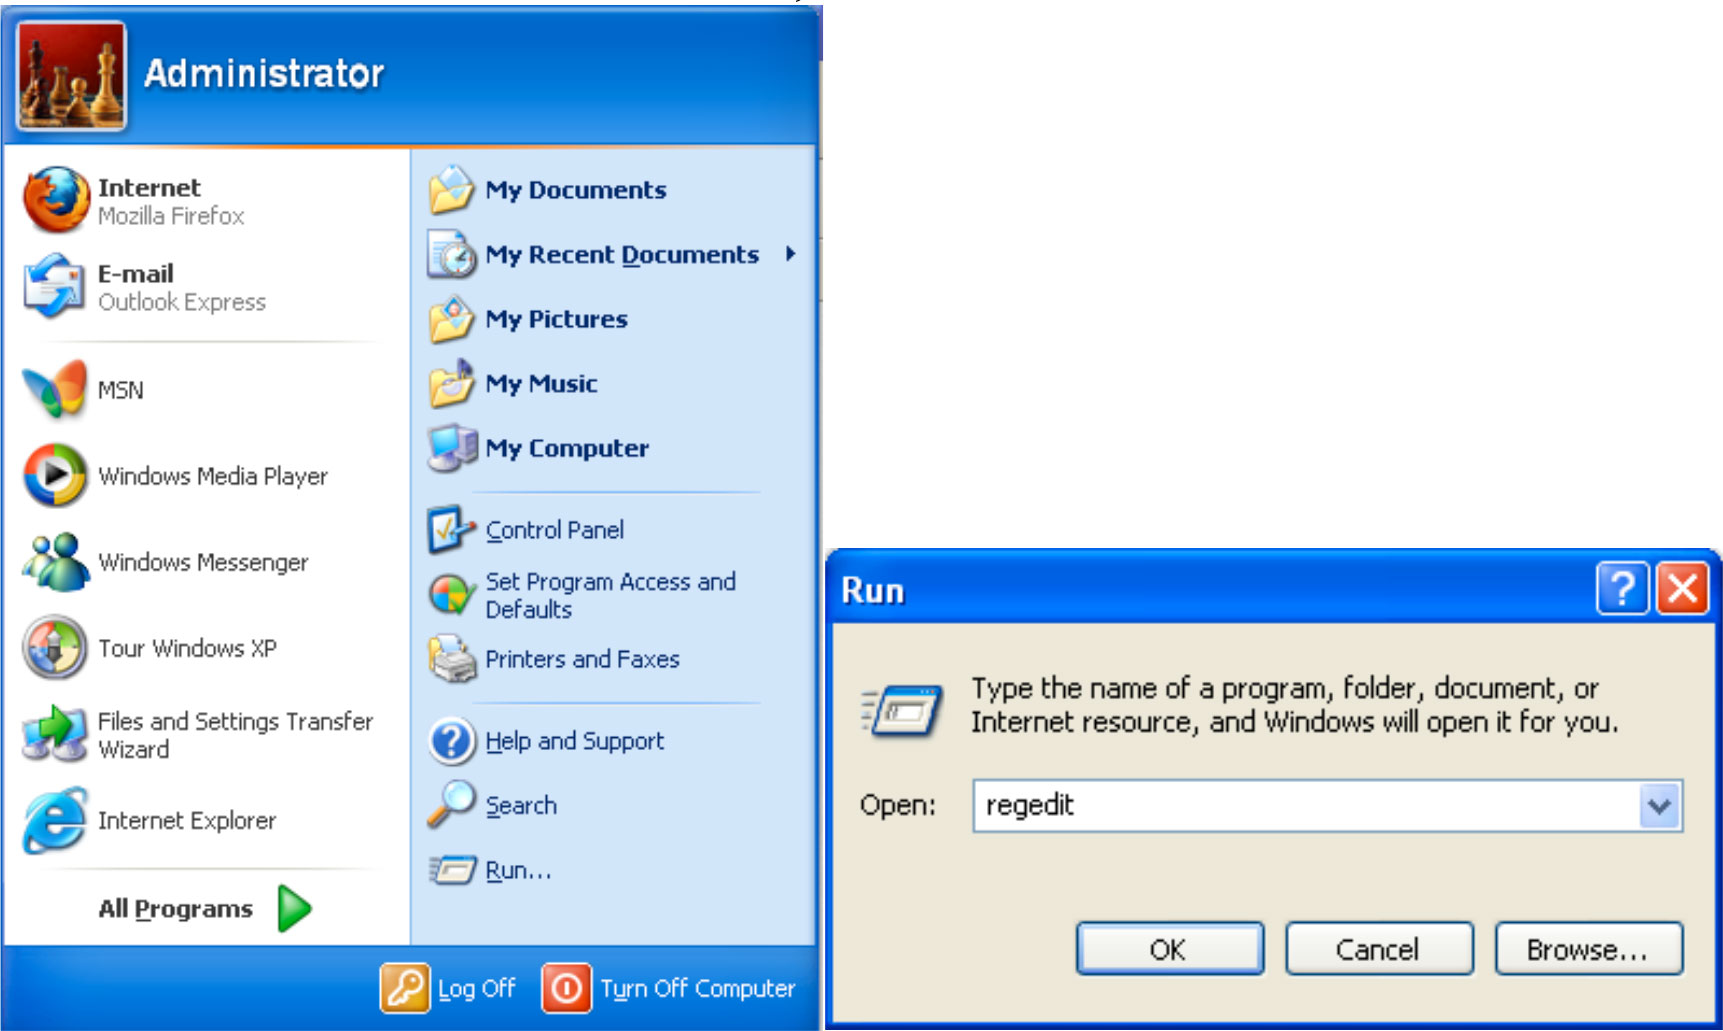
1. Go to: Start and click on ”Run”, in the small window type ”regedit”.
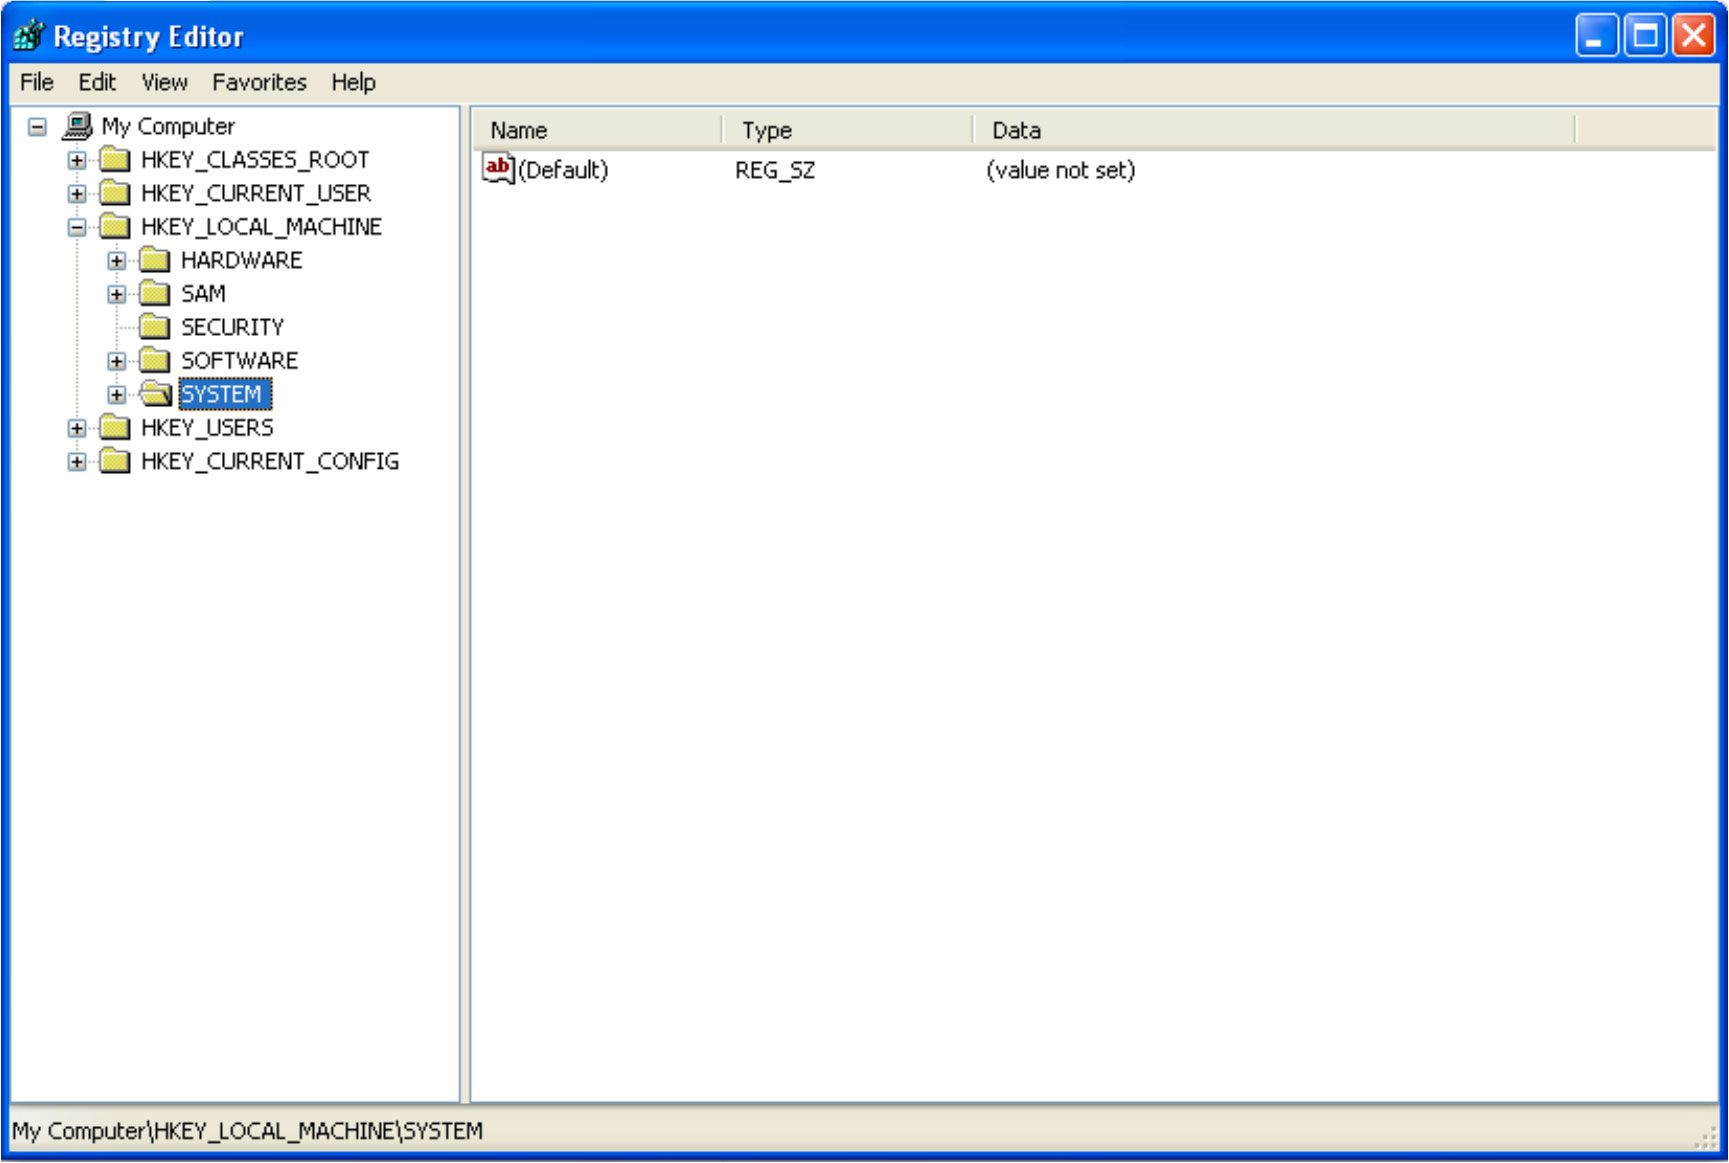
2. A new window will appear that is called ”Registry Editor”. In this window browse to “HKEY_LOCAL_MACHINE” and in the sub menu
click on “SYSTEM” (make sure SYSTEM is highlighted like the picture below).
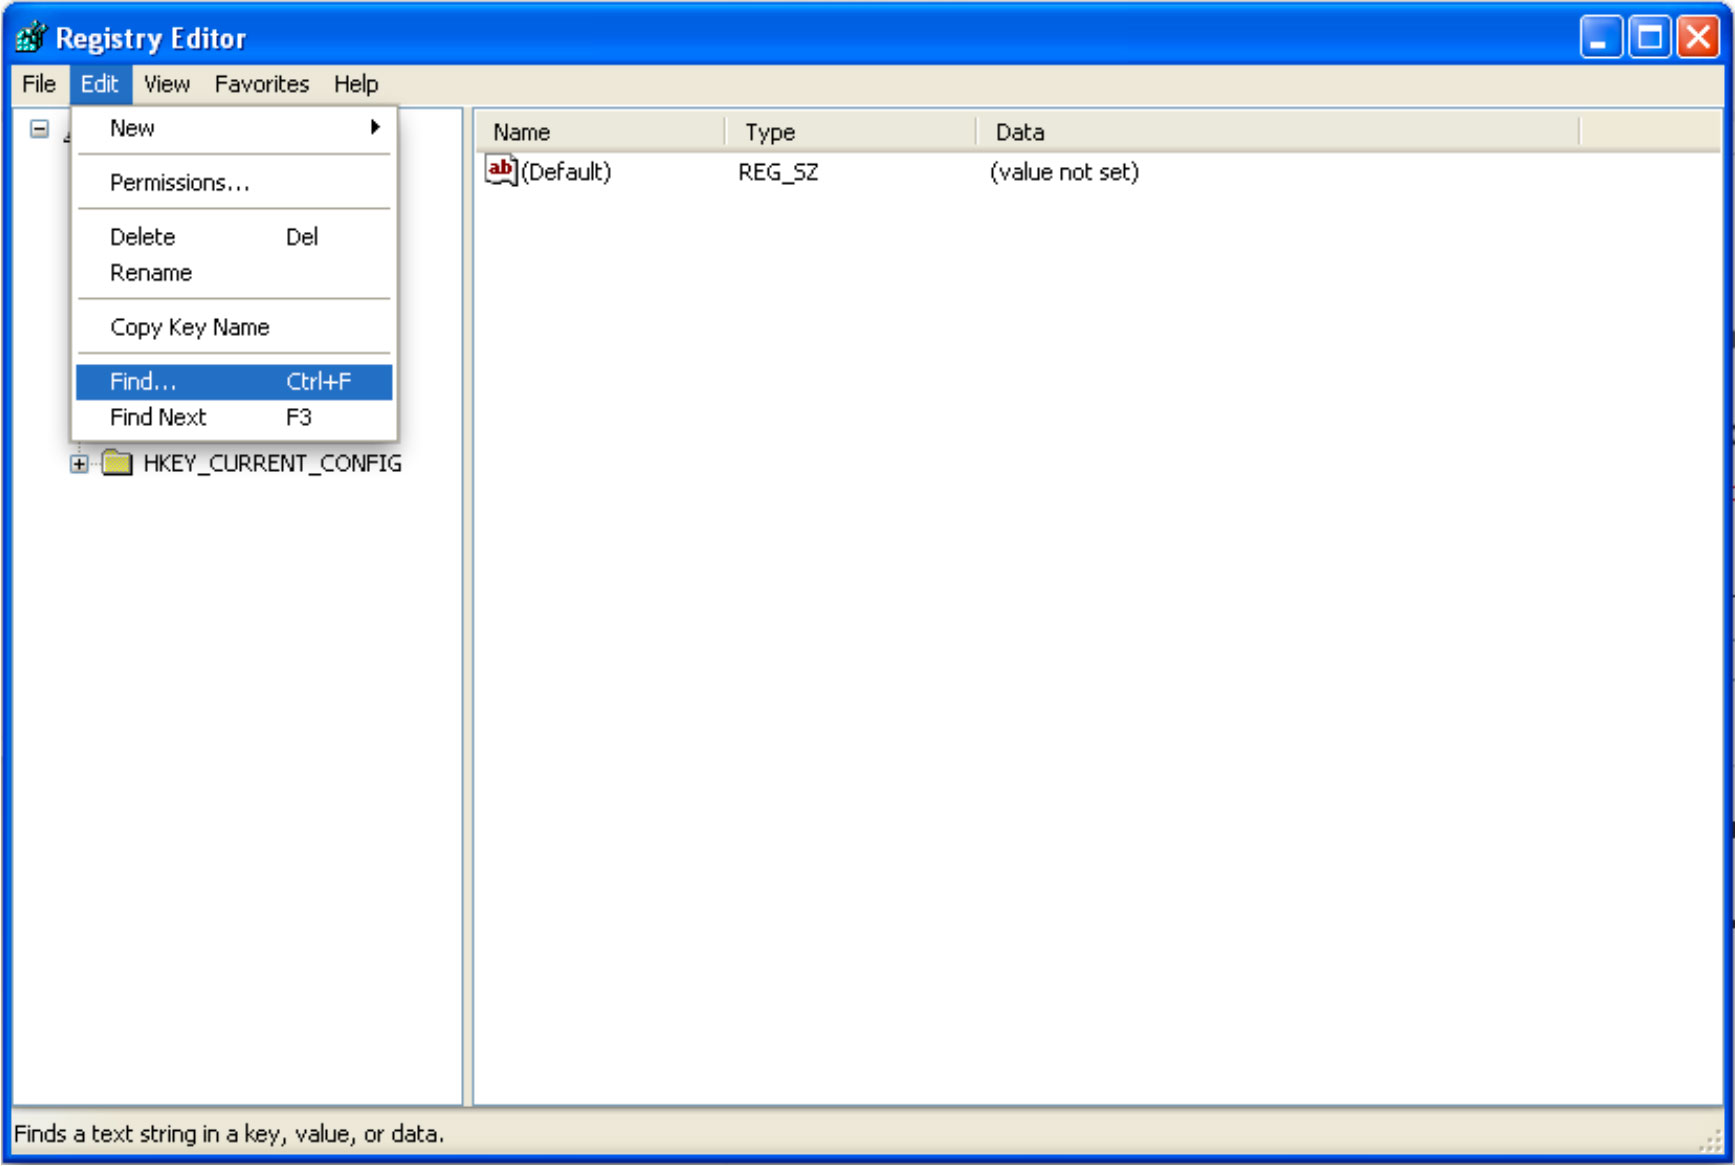
3. Go to Edit -> Find
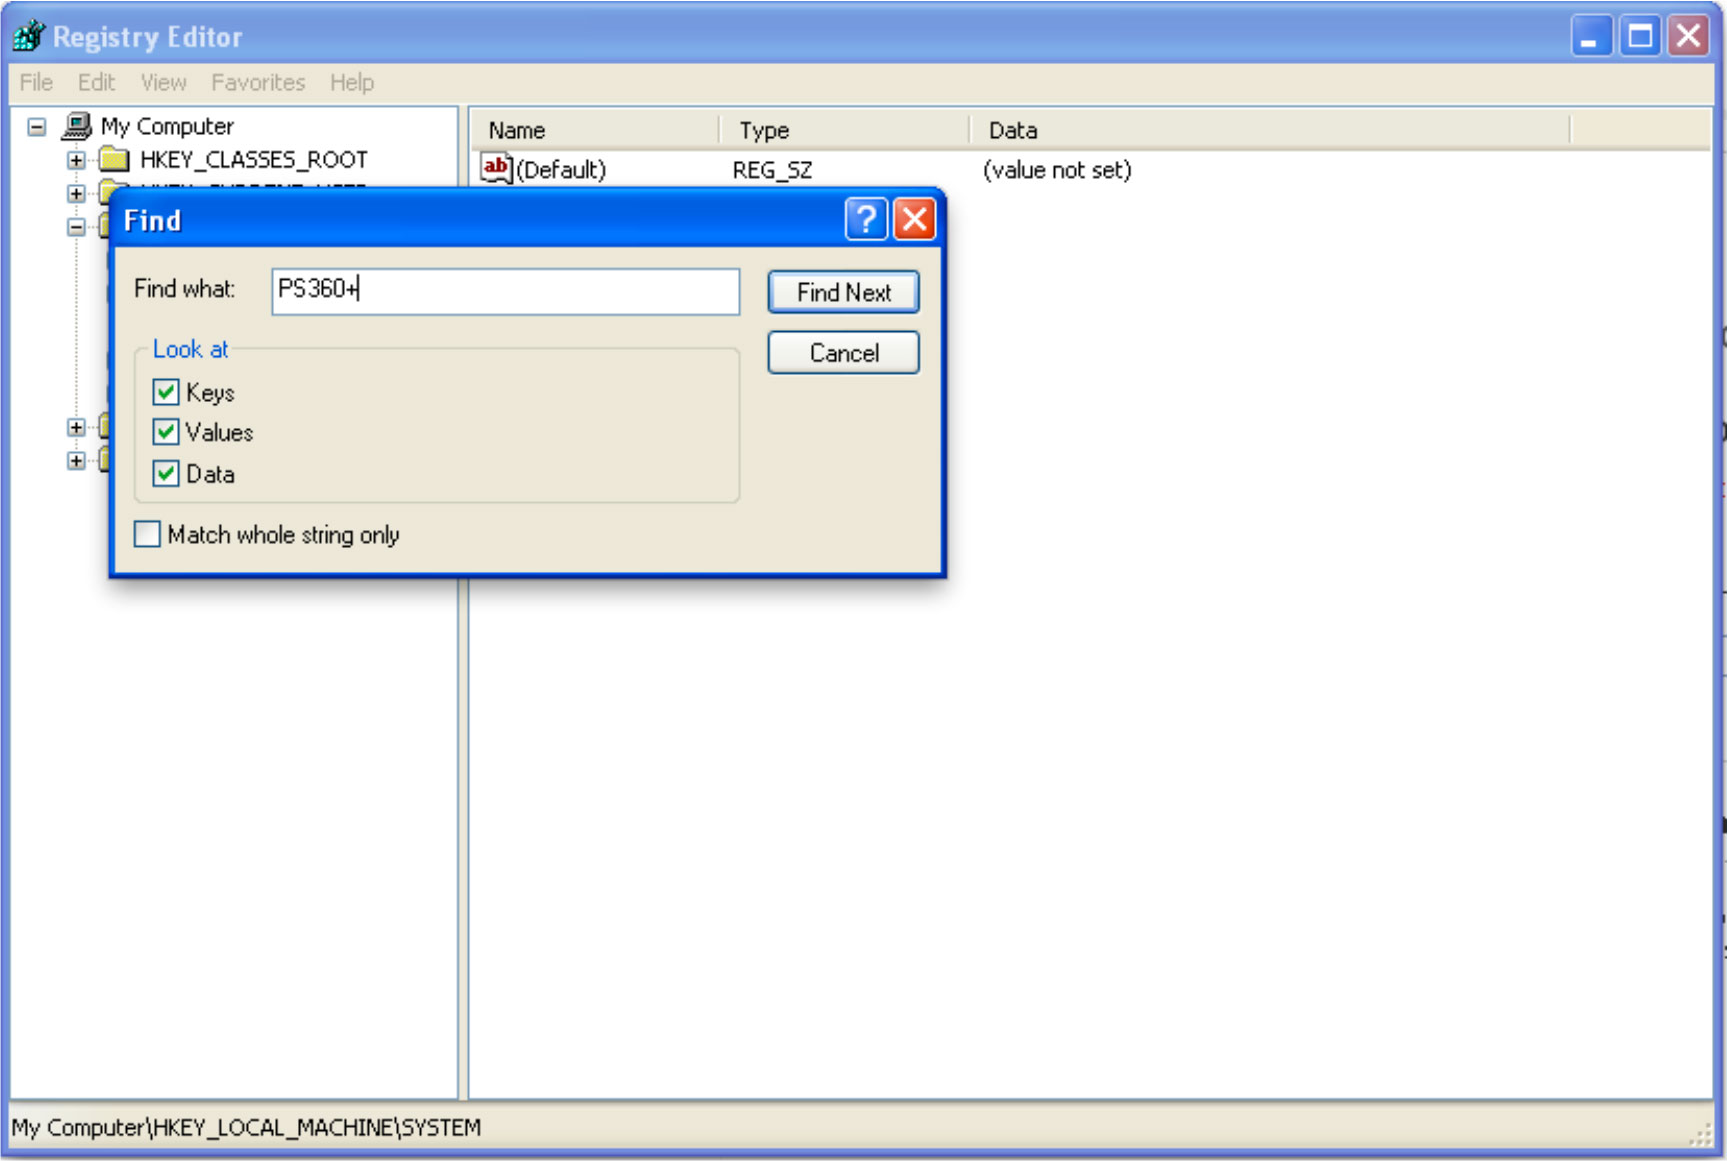
4. Type in the small window "PS360+". Click “Find Next”.
5. You should see “OEMName” in the right side, right click on it and
click “Delete”. After that you can close down all the windows, your are
done!
6. Plug in the PS360+ again to the PC, the descriptor name should be
updated now.
Download Firmware
PS360+ comes with loads of features right out of the box and it becomes even better if you update to the latest firmware. New firmware files does not just give the PS360+ new features like support for different systems, it also fixes potential problems with previous firmware updates as well.
Remember to put the PS360+ in bootloader-mode before you plug it in, you do this by holding down the "Start"-button during plugin.
You will know that you have done it correctly by looking at the LEDs on the PS360+ which will go back and forth like the picture below shows.
Firmware Version: 1.67
Changes
Changes: Added Wii U/Switch (Pokken) Mode. Forced ONLY with P3+K3.
Firmware Version: 1.66
Changes
Changes: Removed autodetection of PS4 for easier compatibility with SG drivers. PS4 8 min. mode forced ONLY with 1P+1K. PS3 BC forced ONLY with 1P+2P. If using on PS4 in 8 minute mode, you only have to force on initial plug in. Soft reset does not affect the mode.
Firmware Version: 1.65
Changes
Notes
Changes: Added forced Xbox 360 mode (2P+2K) for people who have a problem using the PS360+ in Xbox 360 mode on PC/Mac.
Notes: Internal code cleanup.
Firmware Version: 1.6
Changes
Fixes
Notes
Changes: Added NES/SNES support (forced mode only for now = 3K). Added soft reset for PS4: SELECT + 3K (HK). This ONLY works when using it on PS4, it will disconnect and reconnect in ~2 seconds. Just press Home to continue again.
Fixes: Fixed PS4 8 minute timeout issue previously broken by the v2.0 system firmware update.
Notes: Firmware 1.6 variants have the same properties as 1.5, just with 1.6 core updates.
Firmware Version: 1.5
Changes
Fixes
Notes
Changes: Added support for Saturn (forced mode only = 2P + 3P).
Fixes: Upgraded PSx mode to address compatibility and detection issues during some screen switching in games. Patched to allow Jab/1P to be held during startup (for SkullGirls PS4 compatibility). Fixed PS4 8 minute timeout issue previously broken by the v2.0 system firmware update.
Notes:
To make it work with all consoles including Saturn you need to connect a wire from the “Home/Guide” terminal contact to pin 6 on the JST header. Doing this will sacrifice the usage of the Home/Guide button but you can still access the function by pressing Start + Select instead. Because of the design of the PS360+ this is the only way to be able to play on Saturn with full button support. Also you have to physically disconnect the Home/Guide button on your stick to avoid any accidental presses as it's now connected to a USB data line.
Firmware Version: 1.4
Changes
Fixes
Changes: Added PS4 support (limited to 8min).
Fixes: Playstation 3 Backwards Compability (forced mode = 1P + 2P).
Firmware Version: 1.31
Changes
Changes: XBOX support added with smart detection (forced mode = 2K). SOCD and Configuration handling are implemented for it also. Descriptor updated to match.
Firmware Version: 1.23
Fixes
Fixes:
1. S+S=H for Xbox 360 fixed to allow shutting down the system using Start+Select instead of Home button.
2. Descriptor name (the name for the pcb that you see when you connect it to your computer) is now updated so you can see every new release (before it always said the same despite updating the pcb).
Firmware Version: 1.22
Changes
Changes:
Added run-time functions:
LSB = Select + 2P + 3P
RSB = Select + 2K + 3K
LSB + RSB = Select + 2P + 3P + 2K + 3K 4P = Select + 1P + 2P
4K = Select + 1K + 2K
4P + 4K = Select + 1P + 2P + 1K + 2K
Firmware Version: 1.21
Changes
Changes: Added Player LED support for Dreamcast. Still no support for VMU in this release.
Firmware Version: 1.20
Changes
Changes: Added Dreamcast support.
Firmware Version: 1.1VA
Changes
Changes: Configuration and LSB/RSB macros removed. S+S=H remains.
This firmware should be used by those who experience problems with macros during gameplay.
Firmware Version: 1.1
Changes
Changes:
1. Configuration mode is now SELECT+1P+2P+3P, exit with START.
2. LSB/RSB (Left Stick Button, Right Stick Button) support. Activate by pressing:
SELECT+1K+2K = LSB.
SELECT+2K+3K = RSB.
The two button macro for LSB/RSB should avoid accidents when B-Linking in SSF4. LSB/RSB are displayed alone when the macros are used to avoid oddities in training mode, etc.
Firmware Version: 1.0
Fixes
Fixes: Polished the code a little, no direct changes for the user.